Tips for growing a vibrant peace lily at home

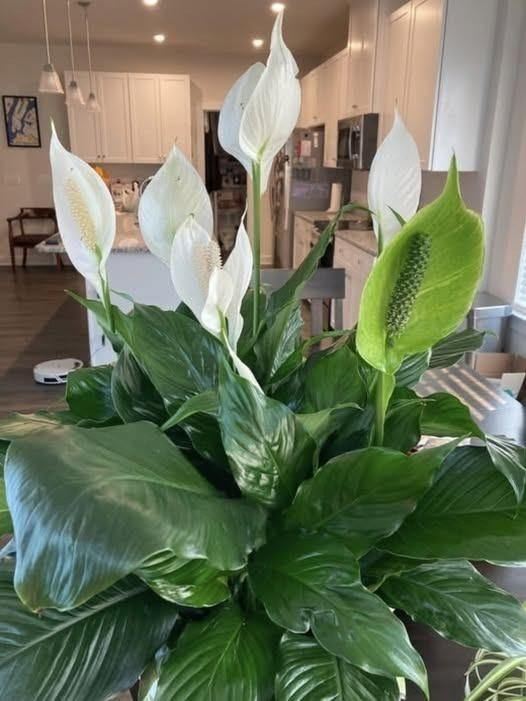
Tips for Growing a Vibrant Peace Lily at Home

The peace lily (Spathiphyllum) is one of the most popular houseplants in the world—and for good reason. With its glossy green leaves and elegant white blooms, it brings a sense of calm and freshness to any indoor space. Beyond its beauty, the peace lily is also known for improving indoor air quality and being relatively low-maintenance. However, to keep it truly vibrant and blooming, it needs the right care. This guide will walk you through essential tips to help your peace lily thrive at home.

1. Understanding the Peace Lily’s Natural Needs

Peace lilies originate from tropical rainforests, where they grow under dense canopies in warm, humid environments. This background explains many of their preferences: indirect light, moist (but not soggy) soil, and moderate temperatures. Mimicking these conditions indoors is the key to success.

2. Choosing the Right Location

One of the most common mistakes is placing a peace lily in direct sunlight. While they tolerate low light better than many plants, direct sun can scorch their leaves, causing brown patches.

Best placement tips:

  • Choose a spot with bright, indirect light.
  • A few feet away from an east- or north-facing window is ideal.
  • Low light is acceptable, but flowering may be reduced.

If your peace lily has lush leaves but no blooms, light levels are often the issue.

3. Watering the Right Way

Peace lilies are famous for “telling” you when they need water—their leaves dramatically droop when thirsty. While this makes them forgiving, consistent watering leads to better growth and appearance.

Watering guidelines:

  • Water when the top inch of soil feels dry.
  • Use room-temperature water.
  • Avoid letting the plant sit in standing water.
  • Ensure the pot has proper drainage holes.

Overwatering is just as harmful as underwatering and can lead to root rot. Yellow leaves often indicate too much water, while drooping leaves usually signal thirst.

4. Soil and Pot Selection Matter

A well-draining, nutrient-rich soil is essential. Peace lilies prefer slightly loose soil that retains moisture without becoming compacted.

Ideal soil mix:

  • Standard indoor potting mix
  • Added perlite or sand for drainage
  • Optional peat moss for moisture retention

Choose a pot that’s only slightly larger than the root ball. Peace lilies actually prefer being a bit root-bound, which can encourage blooming.

5. Maintaining Proper Humidity

Because peace lilies are tropical plants, they appreciate higher humidity levels. Dry indoor air—especially during winter—can cause brown leaf tips.

Ways to boost humidity:

  • Mist the leaves lightly once or twice a week
  • Place a shallow tray of water with pebbles beneath the pot
  • Group plants together to create a humid microclimate
  • Use a room humidifier if available

Bathrooms and kitchens often provide ideal humidity levels, making them excellent locations if lighting is sufficient.

6. Feeding for Healthy Growth and Blooms

Peace lilies don’t require heavy fertilizing, but occasional feeding helps maintain rich foliage and encourages flowers.

Fertilizing tips:

  • Use a balanced liquid houseplant fertilizer
  • Feed once every 6–8 weeks during spring and summer
  • Dilute fertilizer to half strength
  • Avoid fertilizing in winter when growth slows

Too much fertilizer can cause leaf burn and reduce flowering, so less is more.

7. Encouraging Beautiful White Blooms

The iconic white “flowers” of the peace lily are actually modified leaves called spathes. Blooming depends on light, nutrition, and overall plant health.

To encourage blooms:

  • Increase indirect light exposure
  • Maintain consistent watering
  • Avoid frequent repotting
  • Ensure the plant is mature (young plants may not bloom yet)

Once flowers fade, trim them at the base to redirect energy back into leaf growth.

8. Pruning and Cleaning the Leaves

Regular grooming keeps your peace lily looking fresh and vibrant.

Maintenance tips:

  • Remove yellow or damaged leaves with clean scissors
  • Wipe leaves gently with a damp cloth to remove dust
  • Avoid leaf-shine products, which can clog pores

Clean leaves not only look better but also photosynthesize more efficiently.

9. Repotting When Necessary

Peace lilies don’t need frequent repotting, but if roots are growing out of drainage holes or the plant dries out very quickly, it’s time.

Repotting advice:

  • Repot every 1–2 years
  • Choose a pot only 1–2 inches larger
  • Water thoroughly after repotting
  • Expect a short adjustment period

Spring is the best time to repot, when the plant is entering active growth.

10. Common Problems and How to Fix Them

Brown tips: Low humidity or fluoride in tap water
Yellow leaves: Overwatering or poor drainage
Drooping leaves: Underwatering or root stress
No flowers: Insufficient light or excess fertilizer

Using filtered or distilled water can help prevent mineral buildup, especially in areas with hard water.

11. Safety Note

Peace lilies are toxic to pets and children if ingested. Keep them out of reach of cats, dogs, and curious little hands.

Final Thoughts

With the right balance of light, water, humidity, and care, a peace lily can remain lush and vibrant for many years. It’s a forgiving plant that rewards attention with elegant blooms and rich green foliage. Whether you’re a beginner or an experienced plant lover, mastering peace lily care is both easy and deeply satisfying. A healthy peace lily doesn’t just decorate your home—it brings a sense of tranquility and life into your living space.

Philly Cheesesteak Egg Rolls

If you love the bold, savory flavors of a classic Philly cheesesteak and the irresistible crunch of a perfectly fried egg roll, then this recipe is about to become your new favorite appetizer. Philly Cheesesteak Egg Rolls combine tender beef, caramelized onions, melty cheese, and a crispy golden shell into one unforgettable bite. They’re perfect for parties, game nights, family gatherings, or even as a fun dinner option when you want something indulgent and satisfying.

These egg rolls deliver everything you love about a cheesesteak—without the bun—and add a crunchy texture that makes them impossible to resist.

Why Philly Cheesesteak Egg Rolls Are So Popular

Philly cheesesteaks are iconic for a reason: juicy beef, sweet onions, and gooey cheese create a comforting, crave-worthy combination. Wrapping those flavors in an egg roll takes things to another level by:

  • Adding a crispy exterior that contrasts beautifully with the soft filling
  • Making them easy to serve and dip
  • Turning a classic sandwich into a party-friendly finger food
  • Offering endless variations with different cheeses, meats, and cooking methods

Once you try them, you’ll understand why they disappear so fast from the table.

Ingredients You’ll Need

For the Filling:

  • 1 pound thinly sliced beef (ribeye is traditional, but sirloin works well)
  • 1 tablespoon olive oil
  • 1 medium onion, thinly sliced
  • 1 green bell pepper, thinly sliced
  • 2 cloves garlic, minced
  • Salt and black pepper, to taste
  • 1 teaspoon Worcestershire sauce
  • 1 cup shredded provolone cheese (or American cheese)
  • ½ cup cream cheese, softened (optional, for extra creaminess)

For Assembly:

  • 12–15 egg roll wrappers
  • Water or beaten egg (for sealing)

For Frying:

  • Vegetable or canola oil, for deep frying

Step-by-Step Instructions

1. Prepare the Filling

Heat olive oil in a large skillet over medium-high heat. Add the sliced onions and bell peppers and sauté for 4–5 minutes until they soften and begin to caramelize. Add the minced garlic and cook for another 30 seconds until fragrant.

Add the thinly sliced beef to the skillet. Season with salt and black pepper. Cook for 3–4 minutes, stirring frequently, until the beef is just cooked through. Do not overcook, as the meat will continue cooking during frying.

Stir in Worcestershire sauce and remove the skillet from heat.

2. Add the Cheese

While the mixture is still hot, stir in the shredded provolone and cream cheese (if using). Mix until the cheese melts and coats the beef and vegetables evenly. The filling should be creamy, rich, and slightly thick—not watery.

Allow the filling to cool for 5–10 minutes before assembling the egg rolls. This step prevents the wrappers from becoming soggy.

Assembling the Egg Rolls

Lay one egg roll wrapper on a clean surface in a diamond shape, with one corner pointing toward you. Place 2–3 tablespoons of filling near the bottom corner.

Fold the bottom corner over the filling, then fold in the sides tightly. Roll upward into a snug cylinder, sealing the final corner with a dab of water or beaten egg. Repeat with the remaining wrappers and filling.

Keep the assembled egg rolls covered with a damp towel to prevent drying out.

Frying to Crispy Perfection

Heat oil in a deep skillet or fryer to 350°F (175°C). Carefully lower 3–4 egg rolls into the hot oil, making sure not to overcrowd the pan.

Fry for 3–4 minutes, turning occasionally, until golden brown and crispy on all sides. Transfer to a plate lined with paper towels to drain excess oil.

Repeat until all egg rolls are cooked.

Optional Cooking Methods

Air Fryer

  • Preheat air fryer to 375°F (190°C)
  • Lightly spray egg rolls with oil
  • Cook for 8–10 minutes, flipping halfway

Oven-Baked

  • Preheat oven to 400°F (205°C)
  • Brush egg rolls lightly with oil
  • Bake for 15–18 minutes, turning once

While frying gives the crispiest results, these methods offer lighter alternatives.

Best Dipping Sauces

Philly Cheesesteak Egg Rolls are delicious on their own, but dipping sauces take them even further. Try serving them with:

  • Cheese sauce or queso
  • Garlic aioli
  • Spicy sriracha mayo
  • Ranch dressing
  • Ketchup mixed with Worcestershire sauce

Offering a variety of dips makes them even more irresistible for guests.

Variations and Add-Ins

One of the best things about this recipe is how customizable it is:

  • Chicken Cheesesteak Egg Rolls: Substitute beef with thinly sliced chicken breast
  • Mushroom Lovers: Add sautéed mushrooms for extra umami
  • Spicy Kick: Mix in chopped jalapeños or red pepper flakes
  • Extra Cheesy: Use a blend of provolone, mozzarella, and cheddar

You can easily tailor the filling to match your personal taste.

Serving and Storage Tips

Serve Philly Cheesesteak Egg Rolls hot and fresh for the best texture and flavor. They pair wonderfully with salads, fries, or even as a main dish with a dipping sauce on the side.

To store leftovers, refrigerate in an airtight container for up to 3 days. Reheat in an oven or air fryer to restore crispiness—avoid microwaving, as it makes them soggy.

Final Thoughts

Philly Cheesesteak Egg Rolls are the perfect example of comfort food done right. They’re crunchy on the outside, creamy and savory on the inside, and bursting with classic cheesesteak flavor in every bite. Whether you’re hosting guests or simply treating yourself, this recipe delivers restaurant-quality results at home.

Once you make them, don’t be surprised if they become a regular request—these egg rolls are truly unforgettable.