A month before a stroke your body warns you 10 signs not to ignore

A Month Before a Stroke, Your Body Warns You: 10 Signs You Should Never Ignore

A stroke rarely happens without warning. In many cases, the body begins to send subtle — and sometimes not-so-subtle — signals weeks or even a month before a major stroke occurs. Unfortunately, these early warning signs are often ignored, mistaken for stress, fatigue, or minor health issues. Recognizing them early can be life-saving. Understanding what your body is trying to tell you may give you the chance to seek medical care before permanent damage occurs.

Here are 10 important warning signs that may appear up to a month before a stroke — and why you should never ignore them.


1. Sudden, Severe Headaches

A headache that appears suddenly and feels different from your usual headaches can be a red flag. Stroke-related headaches may feel intense, throbbing, or pressure-like and may come with dizziness or nausea. These headaches are often caused by changes in blood flow to the brain and should never be dismissed as “just another headache.”


2. Unexplained Dizziness or Loss of Balance

Frequent dizziness, trouble walking straight, or sudden balance problems can indicate reduced blood supply to the brain. If you notice yourself stumbling, feeling lightheaded, or struggling with coordination — especially without an obvious reason — it may be an early warning sign.


3. Temporary Vision Problems

Blurred vision, double vision, or sudden vision loss in one or both eyes can occur before a stroke. These symptoms may come and go, which is why many people ignore them. However, even brief visual disturbances can signal a transient ischemic attack (TIA), often called a “mini-stroke,” which is a serious warning.


4. Numbness or Tingling on One Side of the Body

Feeling numbness, tingling, or weakness in the face, arm, or leg — especially on one side — is one of the most common stroke warnings. This may happen occasionally at first and then disappear, but recurring episodes should be treated as urgent.


5. Sudden Confusion or Difficulty Speaking

If you or someone around you notices trouble finding words, slurred speech, or confusion during normal conversations, this could indicate impaired brain function. Even short episodes of speech difficulty are significant and should not be ignored.


6. Extreme Fatigue Without Explanation

Unusual, persistent fatigue that doesn’t improve with rest can be an early sign of a stroke, particularly in women. The brain may be working harder due to reduced oxygen supply, leading to overwhelming tiredness weeks before a stroke occurs.


7. Sudden Mood Changes or Personality Shifts

Irritability, anxiety, depression, or sudden emotional changes may appear before a stroke. Reduced blood flow to certain areas of the brain can affect mood regulation and behavior. If these changes come on suddenly and without explanation, they deserve attention.


8. Trouble Understanding Simple Information

Difficulty processing information, following instructions, or understanding what others are saying can signal a neurological issue. These cognitive changes may be subtle at first but are often overlooked until more severe symptoms appear.


9. Chest Discomfort and Shortness of Breath

While more commonly associated with heart problems, chest discomfort and shortness of breath can also precede a stroke. Poor circulation, blood clots, or heart rhythm problems increase the risk of stroke and may show warning signs weeks beforehand.


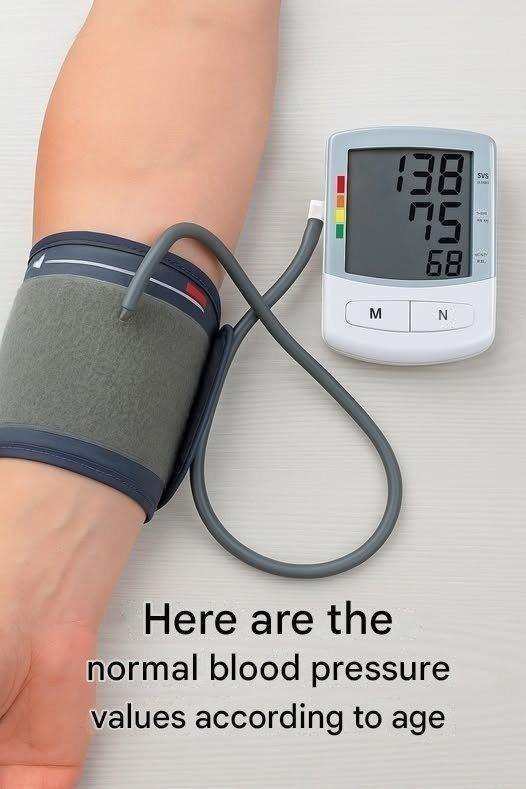
10. Sudden High Blood Pressure

A sharp rise in blood pressure can significantly increase stroke risk. Many people feel no symptoms, but others may experience headaches, nosebleeds, or anxiety. Regular blood pressure monitoring is crucial, especially if readings suddenly spike.


Why These Signs Are Often Ignored

Many pre-stroke symptoms are intermittent and mild, leading people to believe they are harmless. Busy schedules, stress, and fear of “overreacting” cause delays in seeking medical care. However, these early warnings are the body’s way of asking for help.


When to Seek Immediate Medical Attention

If you experience any combination of these symptoms — especially sudden weakness, speech problems, or vision loss — seek emergency care immediately. Early treatment can prevent a full stroke or significantly reduce long-term damage.


Final Thoughts

A stroke can change a life in seconds, but the warning signs often appear long before it happens. Listening to your body, recognizing unusual symptoms, and acting quickly can make the difference between recovery and lifelong disability. Never ignore what feels “off.” When it comes to stroke, time saved is brain saved.

This article is for informational purposes only and does not replace professional medical advice. Always consult a healthcare provider for diagnosis and treatment.

Two Spoons In The Morning And Forget About Bone Pain, Diabetes, Nerves And Depression

Two Spoons in the Morning: Can a Simple Habit Support Bones, Blood Sugar, Nerves, and Mood?

You may have heard the claim: “Two spoons in the morning and forget about bone pain, diabetes, nerves, and depression.” While no single food can magically cure complex health conditions, there is a simple morning habit that science supports for overall metabolic, bone, nerve, and brain health—taking two tablespoons of extra-virgin olive oil (EVOO) as part of a balanced lifestyle.

Let’s separate myth from reality and explore what two spoons in the morning can realistically do, why olive oil stands out, and how to use it safely for long-term benefits.


Why Extra-Virgin Olive Oil?

Extra-virgin olive oil is not just fat—it’s a functional food rich in:

  • Monounsaturated fats (oleic acid)
  • Polyphenols (powerful antioxidants)
  • Vitamin E
  • Anti-inflammatory compounds

These nutrients work together to support multiple systems in the body, which explains why olive oil is a cornerstone of the Mediterranean diet, one of the most studied and healthiest eating patterns in the world.


1. Bone Pain and Joint Health

Bone pain is often linked to inflammation, mineral loss, or aging joints.

Olive oil helps by:

  • Reducing chronic inflammation, a major contributor to joint and bone discomfort
  • Supporting calcium absorption and bone mineral density
  • Protecting bones from age-related weakening (osteoporosis risk)

Studies show that people who regularly consume olive oil have stronger bones and fewer fractures, especially older adults.

👉 While it won’t replace calcium or vitamin D, two tablespoons daily can support bone strength and reduce inflammatory pain over time.

2. Blood Sugar Balance and Diabetes Support

Olive oil does not cure diabetes, but it can significantly improve blood sugar control.

Here’s how:

  • Improves insulin sensitivity
  • Slows digestion of carbohydrates, preventing blood sugar spikes
  • Reduces inflammation linked to insulin resistance

Research shows that adding olive oil to meals lowers post-meal glucose levels, making it especially helpful for people with:

  • Type 2 diabetes
  • Prediabetes
  • Metabolic syndrome

👉 Two tablespoons in the morning—especially before breakfast—may help stabilize blood sugar throughout the day when combined with a healthy diet.


3. Nerve Health and Reduced Nerve Pain

Nerve pain and numbness are often associated with:

  • Inflammation
  • Poor circulation
  • Oxidative stress

Olive oil supports nerve health by:

  • Improving blood flow
  • Protecting nerve cells from oxidative damage
  • Supporting the myelin sheath, which protects nerves

Its vitamin E and polyphenols are especially beneficial for people with diabetic neuropathy or age-related nerve discomfort.

👉 Regular intake may reduce tingling, burning sensations, and nerve irritation over time.


4. Brain Health, Mood, and Depression

The brain is nearly 60% fat, and the quality of fat matters.

Olive oil supports mental health by:

  • Reducing brain inflammation
  • Supporting neurotransmitters like serotonin and dopamine
  • Protecting against cognitive decline

Multiple studies link olive oil consumption with:

  • Lower rates of depression
  • Better memory and focus
  • Reduced risk of Alzheimer’s disease

People following Mediterranean diets rich in olive oil show better emotional balance and mood stability.

👉 While it’s not a replacement for therapy or medication, olive oil can be a powerful nutritional ally for mental well-being.

How to Take Two Spoons in the Morning

For best results:

  • Use extra-virgin olive oil only
  • Take 1–2 tablespoons on an empty stomach
  • Optionally mix with:
    • A few drops of lemon juice
    • Warm water
  • Wait 20–30 minutes before eating

Consistency matters more than quantity.


Important Reality Check

Let’s be clear and responsible:

  • Olive oil is supportive, not a cure
  • It works best with:
    • Balanced nutrition
    • Physical activity
    • Medical treatment when needed

If you have diabetes, chronic pain, nerve disorders, or depression, do not stop prescribed medication without consulting a healthcare professional.


Who Should Be Cautious?

  • People with gallbladder issues
  • Those on very low-fat medical diets
  • Anyone sensitive to oils in large amounts

Start with 1 tablespoon and increase gradually if needed.


Final Thoughts

The idea that two spoons in the morning can change your health isn’t entirely wrong—but it needs context.

Extra-virgin olive oil is a science-backed, natural support for:

  • Bones and joints
  • Blood sugar balance
  • Nerve health
  • Brain function and mood

Used daily and consistently, it can become a simple habit with meaningful long-term benefits—not magic, but real nourishment your body understands.

 the normal blood pressure values ​​according to age

Normal Blood Pressure Values According to Age: What You Should Know

Blood pressure is one of the most important indicators of overall health, yet many people only think about it when a doctor raises concerns. Understanding what “normal” blood pressure looks like at different ages can help you recognize potential problems early and take steps to protect your heart, brain, and kidneys. While the basic definition of normal blood pressure applies to adults of all ages, age-related changes in the body mean that blood pressure patterns and risks can differ as we grow older.


What Is Blood Pressure?

Blood pressure measures the force of blood pushing against the walls of your arteries as your heart pumps. It is recorded using two numbers:

  • Systolic pressure (top number): The pressure when the heart beats and pumps blood.
  • Diastolic pressure (bottom number): The pressure when the heart rests between beats.

Blood pressure is written as systolic over diastolic, for example 120/80 mmHg (millimeters of mercury).


General Blood Pressure Categories (Adults)

Before looking at age-specific considerations, it helps to know the standard adult categories used by most health organizations:

  • Normal: Less than 120/80 mmHg
  • Elevated: 120–129 / less than 80 mmHg
  • High Blood Pressure (Hypertension) – Stage 1: 130–139 / 80–89 mmHg
  • High Blood Pressure (Hypertension) – Stage 2: 140 or higher / 90 or higher
  • Low Blood Pressure (Hypotension): Generally below 90/60 mmHg (especially if symptoms are present)

These categories apply to most adults, regardless of age, but age influences how blood pressure changes and how strictly targets are managed.


Normal Blood Pressure by Age Group

Children and Teenagers (Under 18 Years)

In children and adolescents, normal blood pressure depends on age, sex, and height, not a single fixed number. Doctors use percentile charts rather than one standard value.

  • Normal: Below the 90th percentile for age, sex, and height
  • Elevated: Between the 90th and 95th percentile
  • High Blood Pressure: At or above the 95th percentile

For example, a healthy blood pressure for a young child may be around 90/60 mmHg, while for a teenager it might be closer to 110/70 mmHg. Regular checkups are important, as childhood blood pressure patterns can influence adult health.


Young Adults (18–29 Years)

Young adults typically have strong, flexible blood vessels, so normal readings are often on the lower side.

  • Typical normal range: 90/60 to 120/80 mmHg
  • Many healthy young adults fall around 110/70 mmHg

At this age, high blood pressure often has lifestyle-related causes, such as high salt intake, stress, lack of exercise, smoking, or obesity. Early awareness is key because hypertension can exist for years without symptoms.


Adults (30–39 Years)

As people enter their 30s, work stress, family responsibilities, and lifestyle habits can begin to influence blood pressure.

  • Normal: Below 120/80 mmHg
  • Common healthy readings: 115/75 to 120/80 mmHg

Blood pressure may begin to rise slowly during this decade. Maintaining a healthy weight, exercising regularly, and limiting salt can help keep readings in the normal range.


Middle-Aged Adults (40–59 Years)

This age group sees a higher risk of developing hypertension due to gradual stiffening of arteries and long-term lifestyle factors.

  • Normal: Below 120/80 mmHg
  • Many adults in this group have readings in the 120–130/80–85 mmHg range, which may be considered elevated

Doctors often watch blood pressure closely in this age range, as sustained elevations increase the risk of heart disease, stroke, and kidney problems.


Older Adults (60 Years and Above)

With aging, arteries naturally become less flexible, which can cause systolic pressure to rise.

  • General target: Below 130/80 mmHg for most healthy older adults
  • Some individuals may have slightly higher systolic values (such as 130–139 mmHg) under medical supervision

Very low blood pressure in older adults can cause dizziness and falls, so doctors balance the benefits of lower blood pressure with overall safety and quality of life.


Why Blood Pressure Changes With Age

Several factors contribute to age-related changes in blood pressure:

  • Arterial stiffness: Blood vessels lose elasticity over time
  • Hormonal changes: Affect fluid balance and blood vessel tone
  • Lifestyle accumulation: Diet, stress, physical activity, and habits over many years
  • Chronic conditions: Diabetes, kidney disease, and heart disease become more common with age

When to Be Concerned

You should consult a healthcare professional if:

  • Your readings are consistently above 130/80 mmHg
  • You experience symptoms like headaches, dizziness, chest pain, or shortness of breath
  • Your blood pressure is consistently below 90/60 mmHg with symptoms such as fainting or weakness

Final Thoughts

While “normal” blood pressure is generally defined as below 120/80 mmHg for adults, age plays a significant role in how blood pressure behaves and how it is managed. Regular monitoring, a healthy lifestyle, and routine medical checkups are the best ways to keep your blood pressure within a safe range at any age. Understanding these values empowers you to take control of your health and reduce the risk of serious complications later in life.

Grandma’s Chocolate Pie

Grandma’s Chocolate Pie: A Timeless Dessert That Tastes Like Home

There are desserts that impress, and then there are desserts that comfort. Grandma’s Chocolate Pie belongs firmly in the second category. It’s the kind of pie that doesn’t need fancy toppings or modern twists to shine. One slice instantly transports you to a warm kitchen filled with the smell of cocoa, butter, and love. This classic recipe has been passed down through generations, cherished not because it’s trendy, but because it’s dependable, rich, and deeply satisfying.

The Heart of the Recipe

At its core, Grandma’s Chocolate Pie is wonderfully simple. The filling is a smooth, pudding-like custard made from everyday pantry staples—cocoa powder, sugar, milk, eggs, and butter—poured into a flaky baked pie crust. What makes it special isn’t complexity, but balance. The chocolate flavor is deep without being bitter, sweet without being overwhelming, and creamy without being heavy.

Grandma always said the secret was patience. Rushing the filling or turning the heat too high could ruin the silky texture. This pie rewards a gentle hand and a little extra care.

Ingredients You’ll Need

For the pie crust, you can use a homemade crust if you like, but Grandma would often reach for a trusted basic recipe or even a good-quality store-bought crust when time was short.

For the filling:

  • 1 baked 9-inch pie crust
  • 1 cup granulated sugar
  • ¼ cup unsweetened cocoa powder
  • ¼ cup cornstarch
  • ¼ teaspoon salt
  • 2½ cups whole milk
  • 3 large egg yolks
  • 2 tablespoons unsalted butter
  • 1 teaspoon vanilla extract

Optional topping:

  • Fresh whipped cream or meringue

Step-by-Step Preparation

Start by baking your pie crust according to the recipe or package directions. Set it aside to cool while you prepare the filling.

In a medium saucepan, whisk together the sugar, cocoa powder, cornstarch, and salt. This dry mix ensures the cocoa and cornstarch are evenly distributed, preventing lumps later. Slowly pour in the milk, whisking constantly until the mixture is smooth.

Place the saucepan over medium heat and continue stirring. As the mixture heats, it will begin to thicken. This step requires attention—don’t walk away. After about 8 to 10 minutes, the filling should be thick enough to coat the back of a spoon.

In a separate bowl, lightly whisk the egg yolks. To avoid scrambling them, slowly ladle a small amount of the hot chocolate mixture into the yolks, whisking constantly. This tempers the eggs. Pour the egg mixture back into the saucepan and cook for another 2 minutes, stirring continuously.

Remove the pan from heat and stir in the butter and vanilla extract. The butter adds shine and richness, while the vanilla rounds out the chocolate flavor.

Pour the hot filling into the prepared pie crust. Smooth the top with a spatula.

Topping Options: Simple or Classic

Grandma often served this pie with a generous dollop of whipped cream. Lightly sweetened and fluffy, it perfectly balances the richness of the chocolate. On special occasions, she topped it with a classic meringue, spreading it edge to edge and baking it briefly until golden.

To make whipped cream, simply beat heavy cream with a little sugar and vanilla until soft peaks form. Keep it simple—the pie does the talking.

Cooling and Serving

Let the pie cool at room temperature for about an hour, then refrigerate for at least 3 hours before slicing. This resting time allows the filling to fully set. Cutting too soon will result in a runny pie, something Grandma would gently but firmly warn against.

Serve chilled or slightly cool. Each slice should hold its shape, revealing a smooth, glossy chocolate filling that melts in your mouth.

Why This Pie Endures

Grandma’s Chocolate Pie isn’t flashy, and that’s exactly why it has lasted. It was made for Sunday dinners, potlucks, holidays, and quiet evenings at home. It’s economical, comforting, and universally loved. Children adore its sweetness, while adults appreciate its deep cocoa flavor and nostalgic charm.

More than just a dessert, this pie represents care and tradition. It’s the kind of recipe written on a worn index card, smudged with cocoa fingerprints, pulled out whenever someone needs cheering up.

A Final Thought

In a world full of elaborate desserts, Grandma’s Chocolate Pie reminds us that simplicity can be extraordinary. One bite tells a story of family, warmth, and time well spent in the kitchen. Make it once, and it won’t just become a recipe—it will become a tradition of your own.

Bay leaf is 100000 times stronger than Botox. It erases all wrinkles even at the age of 70

Bay Leaf: Nature’s 100,000x Stronger Alternative to Botox

For decades, people have been on a relentless quest for youthful, radiant skin. From expensive creams to invasive procedures like Botox, the beauty industry has promised wrinkle-free skin and a rejuvenated appearance. Yet, the secret to ageless beauty might have been sitting in your kitchen all along: the humble bay leaf. Recent studies and natural skincare enthusiasts claim that bay leaf extract is up to 100,000 times stronger than Botox, with the astonishing ability to erase wrinkles—even for those in their seventies. Let’s explore how this simple leaf can transform your skin naturally.


What Makes Bay Leaf So Powerful?

Bay leaves, commonly used in cooking, are rich in antioxidants, vitamins, and essential oils that protect and repair the skin. Among their most potent compounds are eugenol, myrcene, and cineole, which have anti-inflammatory and collagen-boosting properties. Collagen is the protein responsible for skin elasticity and firmness, and as we age, its production decreases, leading to wrinkles and sagging.

Bay leaf works on a molecular level to stimulate collagen production, tighten loose skin, and smooth fine lines. Unlike Botox, which merely paralyzes muscles to prevent movement and create a temporary wrinkle-free look, bay leaf addresses the root cause of aging: cellular degeneration and collagen loss. This means results are natural, long-lasting, and completely safe, without needles or chemicals.


How Bay Leaf Works Against Wrinkles

  1. Boosts Collagen and Elastin Production: The antioxidants in bay leaf protect skin cells from oxidative stress, which breaks down collagen and elastin fibers. By stimulating fibroblasts (the cells that produce collagen), bay leaf helps restore firmness and elasticity.
  2. Fights Free Radicals: Aging and wrinkles are often accelerated by free radicals—unstable molecules that damage skin cells. Bay leaf’s antioxidants neutralize these free radicals, preventing premature aging.
  3. Improves Skin Hydration: Dry skin tends to show wrinkles more prominently. Bay leaf oil and extracts enhance the skin’s moisture retention, making it plump, soft, and youthful.
  4. Reduces Inflammation: Chronic inflammation can accelerate skin aging. The anti-inflammatory properties of bay leaf calm redness, puffiness, and irritation, giving the skin a smooth, even appearance.
  5. Enhances Skin Tone and Texture: Regular use of bay leaf extract has been shown to lighten age spots and pigmentation while tightening pores, creating an even, radiant complexion.

Why Bay Leaf Beats Botox

Botox injections have been a go-to for wrinkle reduction for years. While effective, they come with several downsides:

  • Temporary Results: Botox wears off in 3-6 months, requiring repeated injections.
  • Risk of Side Effects: Bruising, swelling, droopy eyelids, or allergic reactions can occur.
  • Muscle Paralysis: Botox works by freezing facial muscles, which can sometimes lead to an unnatural, expressionless look.
  • Costly: Each session can cost hundreds of dollars, adding up over time.

In contrast, bay leaf offers a natural, safe, and affordable solution. It strengthens skin from within, restores elasticity, and rejuvenates the face without injections or side effects. Best of all, it is accessible and simple to incorporate into daily routines.


How to Use Bay Leaf for Wrinkle Reduction

There are multiple ways to use bay leaf for anti-aging benefits, depending on your preference:

  1. Bay Leaf Oil Massage: Mix a few drops of bay leaf essential oil with a carrier oil such as almond or coconut oil. Gently massage onto the face and neck every night before bed. This improves blood circulation, stimulates collagen, and hydrates the skin deeply.
  2. Bay Leaf Facial Steam: Boil 5-6 bay leaves in water and pour into a bowl. Lean over the steam with a towel draped over your head for 5-10 minutes. The steam opens pores, allowing antioxidants to penetrate deeply.
  3. Bay Leaf Face Mask: Grind dried bay leaves into a fine powder and mix with honey or yogurt to create a paste. Apply to the face for 15-20 minutes before rinsing. This mask tightens the skin and smooths fine lines.
  4. Bay Leaf Infused Water: Drink bay leaf tea daily. Its anti-inflammatory and antioxidant properties work from the inside, improving skin elasticity, hydration, and radiance.

Real Results for All Ages

Women and men over 70 have reported remarkable improvements after incorporating bay leaf into their skincare routine. Wrinkles around the eyes, forehead, and mouth diminish, skin feels firmer, and age spots fade. Unlike temporary cosmetic solutions, bay leaf offers a holistic approach to anti-aging by nourishing the skin at a cellular level.


Final Thoughts

While Botox may promise immediate results, the long-term health of your skin depends on natural solutions that rebuild and protect. Bay leaf, with its incredible anti-aging properties, is emerging as a 100,000 times stronger alternative to chemical interventions. It not only reduces wrinkles but also restores skin vitality, tone, and firmness—all while being safe, cost-effective, and easy to use.

For anyone seeking youthful skin without invasive procedures or harsh chemicals, the answer may be as simple as reaching for a bay leaf. Embrace this natural miracle, and let your skin glow with the timeless beauty that nature intended.

4 Benefits of Putting Vick Vaporub on Your Feet Before Bed

4 Benefits of Putting Vicks VapoRub on Your Feet Before Bed

When it comes to home remedies, Vicks VapoRub has long been considered a household staple. Traditionally used to relieve cough, cold, and congestion, this mentholated ointment has also earned a surprising reputation for foot care. Applying Vicks to your feet before bed is a simple ritual that can bring several unexpected benefits. Let’s explore four of the most notable advantages of this practice and why it has become a nightly ritual for many.


1. Promotes Better Sleep

One of the most compelling benefits of applying Vicks VapoRub on your feet is its potential to improve sleep quality. The menthol, camphor, and eucalyptus oil in Vicks have a soothing effect that can calm the nervous system. When massaged into the feet, these ingredients may help relax tense muscles and provide a gentle warming sensation that signals your body it’s time to rest.

Feet are often cold by the evening, and this can interfere with falling asleep. The application of Vicks followed by socks creates a mild heating effect, improving circulation and helping the body transition smoothly into a relaxed state. People who have tried this ritual frequently report feeling calmer and experiencing a deeper, more restorative sleep.

Additionally, Vicks contains subtle aromatic compounds that may function like aromatherapy. The scent of menthol can have a grounding effect, reducing mental clutter before bedtime. While it’s not a replacement for sleep hygiene practices, using Vicks on your feet can complement routines that enhance rest and relaxation.


2. Relieves Cough and Congestion

You might be familiar with rubbing Vicks on your chest and throat to ease cough and congestion, but applying it to your feet can also help. This might sound counterintuitive, yet it is a method used in traditional remedies for decades.

The theory behind this practice is simple: the feet contain many reflex points that correspond to different parts of the body, including the lungs. By applying Vicks to the feet and covering them with socks, the soothing vapors may stimulate these reflex points, indirectly helping reduce coughing and nasal congestion.

Several anecdotal reports suggest that people notice fewer nighttime coughs after using Vicks on their feet. This is particularly helpful for children and adults who struggle with nighttime congestion, allowing them—and their families—a better night’s rest. While scientific evidence is limited, the comfort and mild menthol vapors are often enough to provide relief for mild respiratory discomfort.


3. Softens Rough and Cracked Heels

Dry, cracked heels are a common problem, especially during colder months when feet are exposed to less moisture. Vicks VapoRub can double as a foot moisturizer due to its petroleum jelly base and essential oils. When applied before bed, it creates a protective barrier that locks in moisture, allowing your feet to heal overnight.

For best results, apply a generous layer of Vicks to your heels and cover your feet with cotton socks. By morning, the thick ointment helps soften hardened skin, making your feet noticeably smoother. Over time, this simple nightly ritual can prevent painful cracks and keep feet healthy and hydrated.

Unlike typical lotions that may absorb quickly and require multiple applications, Vicks provides an occlusive effect, meaning it forms a long-lasting layer on the skin. This can be particularly beneficial for people who neglect their foot care routine during the day but want overnight treatment with minimal effort.


4. Fights Fungal Infections

Foot fungus, including athlete’s foot, is a common issue that can cause itching, burning, and discomfort. The active ingredients in Vicks, particularly camphor and eucalyptus oil, have mild antifungal properties. Applying Vicks to the feet before bed can create an environment that discourages fungal growth.

Covering the feet with socks after application enhances this effect by maintaining warmth and allowing the ointment to penetrate the skin. Regular use may reduce irritation, itching, and odor associated with fungal infections. While Vicks should not replace prescribed antifungal treatments for severe infections, it can act as a supplementary home remedy to prevent mild or recurring fungal issues.

The combination of antifungal oils and the occlusive effect of petroleum jelly not only combats fungi but also improves overall foot hygiene. Consistent nighttime use keeps the skin soft, clean, and less prone to infections.


How to Use Vicks on Your Feet Safely

To enjoy these benefits, follow a simple routine:

  1. Wash your feet with warm water and soap, and pat dry.
  2. Apply a thin layer of Vicks VapoRub to the soles and heels.
  3. Massage gently to enhance absorption.
  4. Put on cotton socks to lock in moisture and warmth.
  5. Leave on overnight and wash off in the morning.

It’s important to note that Vicks is intended for external use only. Avoid applying it on broken skin or ingesting it. People with sensitive skin should test a small area first to prevent irritation.

Vinegar is the key to whiter whites and softer towels, but most use it wrong. Here’s the right way to use it

Vinegar Is the Key to Whiter Whites and Softer Towels — But Most People Use It Wrong. Here’s the Right Way to Use It

When it comes to laundry care, vinegar is one of the most underrated household heroes. It’s inexpensive, natural, and already sitting in most kitchens. Yet despite its popularity in “laundry hacks,” many people use vinegar incorrectly — which means they miss out on its real power. Used the right way, vinegar can restore dingy whites, soften towels naturally, remove odors, and even protect your washing machine. Used the wrong way, it does almost nothing or, worse, damages fabrics over time.

Let’s clear up the confusion and show you exactly how to use vinegar properly for brighter whites and luxuriously soft towels.


Why Vinegar Works in Laundry

White distilled vinegar is mildly acidic, and that acidity is what makes it effective. Over time, laundry detergent, fabric softener, hard water minerals, and body oils build up in fabrics. These residues trap dirt, dull whites, and make towels stiff and scratchy.

Vinegar works by:

  • Breaking down detergent and mineral buildup
  • Neutralizing odors instead of masking them
  • Restoring fabric absorbency
  • Softening fibers naturally without coating them

Unlike commercial fabric softeners, vinegar doesn’t leave behind a waxy residue. Instead, it cleans at a deeper level.


The Biggest Mistake People Make

The most common mistake is adding vinegar together with detergent in the main wash cycle.

Why this is wrong:

  • Vinegar neutralizes detergent before it can clean properly
  • Clothes may come out looking the same — or worse
  • You waste both products

Another mistake is using too much vinegar, assuming more is better. Excess vinegar won’t make clothes cleaner and can weaken elastic and delicate fibers over time.

The key is when and where you add it.


The Right Way to Use Vinegar for Whiter Whites

If your white clothes look gray, yellowed, or dull, vinegar can help — but only if used correctly.

Correct Method:

  1. Wash whites with your regular detergent as usual.
  2. During the rinse cycle, add ½ to 1 cup of white distilled vinegar.
    • Use the fabric softener compartment, not the detergent drawer.
  3. Let the cycle finish normally.

This allows the detergent to clean first, then lets vinegar remove leftover residue that causes dullness.

For Extra-Dingy Whites:

  • Soak whites in warm water with 1 cup vinegar for 30–60 minutes before washing.
  • Wash normally afterward.

This is especially effective for socks, undershirts, and pillowcases.


The Right Way to Use Vinegar for Softer Towels

If your towels feel stiff, scratchy, or less absorbent, fabric softener is often the problem. It coats fibers with silicone, reducing absorbency over time.

Correct Method:

  1. Wash towels with detergent only — no fabric softener.
  2. Add ½ cup vinegar to the rinse cycle.
  3. Dry thoroughly (air-dry or tumble dry).

Vinegar strips away buildup and restores the towel’s natural fluffiness and absorbency.

Important Tip:
Do not use vinegar and fabric softener together. Choose one — and vinegar is the better option.


How Often Should You Use Vinegar?

  • Whites: Every 2–3 washes
  • Towels: Every wash or every other wash
  • General laundry: Once a week is enough

Daily use on all clothing isn’t necessary and may shorten fabric lifespan.


Will Clothes Smell Like Vinegar?

No — when used correctly, vinegar smell disappears completely once clothes are dry. If you smell vinegar afterward, you likely used too much or added it at the wrong stage.

For added freshness, you can:

  • Line-dry in sunlight
  • Add a few drops of essential oil to dryer balls (never directly into the washer)

Bonus Benefits Most People Don’t Know

Using vinegar in laundry also:

  • Reduces static cling
  • Helps remove pet hair
  • Prevents color fading
  • Eliminates mildew smells from towels
  • Keeps washing machines cleaner

Once a month, run an empty hot cycle with 2 cups vinegar to remove soap scum and odors from the machine itself.


What Not to Do with Vinegar

Avoid using vinegar on:

  • Silk, wool, or delicate fibers
  • Clothes with rubber prints or heavy elastic
  • Natural stone surfaces in laundry rooms

Also, never mix vinegar with bleach — this creates toxic chlorine gas and is extremely dangerous.


Final Thoughts

Vinegar truly is the secret to whiter whites and softer towels — but only when used the right way. The timing matters more than the amount. By adding vinegar during the rinse cycle instead of the wash, you let it do what it does best: remove buildup, refresh fibers, and restore softness naturally.

Once you switch to this method, you’ll notice brighter whites, fluffier towels, and fewer lingering odors — all without expensive products or harsh chemicals. Sometimes the simplest solutions really are the most effective.

When squeezing lemons, don’t make the mistake of throwing away the seeds they are worth their weight in gold used this way

When squeezing lemons, most of us instinctively toss the seeds straight into the trash. They’re small, hard, and seem completely useless. But this common habit is a mistake. Lemon seeds are far more valuable than they appear, and when used the right way, they can become a surprisingly powerful natural resource for your home, garden, and even your daily wellness routine. Once you know their hidden potential, you’ll never throw them away again.

Why Lemon Seeds Deserve a Second Look

Lemon seeds are packed with natural plant compounds that protect the fruit as it grows. These include essential oils, antioxidants, and bitter substances that have been traditionally valued in natural remedies and household uses. While they are not meant to be eaten raw in large quantities, lemon seeds can be reused in safe and practical ways that extract their benefits without waste.

In a world where people are trying to live more sustainably and reduce household waste, reusing lemon seeds is a simple but powerful step.

1. Grow Your Own Lemon Tree for Free

One of the most rewarding ways to use lemon seeds is to grow your own lemon plant. Instead of buying expensive saplings, you can turn seeds from a single lemon into a beautiful indoor or outdoor tree.

To do this, gently wash the seeds to remove pulp, then soak them in water for a few hours. Plant them in moist soil about half an inch deep. Keep the pot in a warm, sunny place and water lightly. Within a few weeks, you’ll see small green shoots emerging.

Even if the tree doesn’t produce fruit right away, lemon plants are excellent air fresheners and decorative greenery for your home. Their glossy leaves release a subtle citrus scent that naturally freshens indoor air.

2. Natural Pest Repellent for Plants

Lemon seeds contain bitter compounds that many insects dislike. You can make a simple, natural pest repellent by crushing lemon seeds and boiling them in water for 10–15 minutes. Let the mixture cool, strain it, and pour it into a spray bottle.

Spray this solution on plant leaves and soil to help deter ants, aphids, and other small pests. It’s a chemical-free alternative that’s safer for homes with children and pets.

3. Powerful Household Cleaner Booster

Don’t underestimate lemon seeds when it comes to cleaning. When crushed, they release natural oils that enhance the grease-cutting power of lemon juice.

Add crushed lemon seeds to a jar of white vinegar and let the mixture sit for two weeks. Strain it, and you’ll have a potent natural cleaner perfect for kitchen counters, sinks, and bathroom surfaces. It cuts through grime, removes odors, and leaves a fresh citrus scent behind.

4. Traditional Digestive Support Tea

In traditional practices, lemon seeds have been used in very small amounts to support digestion. When boiled and strained, they release mild compounds believed to help with bloating and sluggish digestion.

To prepare, crush two or three seeds, boil them in water for five minutes, then strain completely. Only the liquid is consumed, never the solid seeds. This tea is mild and bitter, often balanced with honey or ginger.

Important note: This is a traditional remedy, not a medical treatment. People with health conditions or those who are pregnant should always consult a healthcare professional before trying new herbal preparations.

5. Natural Deodorizer for Fridge and Shoes

Because lemon seeds contain aromatic oils, they can absorb and neutralize odors. Dry the seeds completely, place them in a small cloth pouch, and use them as a natural deodorizer.

Put one pouch in your refrigerator, another in a shoe cabinet, or even inside gym shoes. They help reduce unpleasant smells without artificial chemicals or sprays.

6. Skin-Polishing Scrub (External Use Only)

Ground lemon seeds can be added to homemade body scrubs for gentle exfoliation. Mix finely ground seeds with sugar, olive oil, and a little lemon juice. Use this scrub on hands or feet to remove dead skin and leave skin feeling smooth.

Avoid using it on sensitive areas or the face, as the texture may be too abrasive.

7. A Step Toward Zero-Waste Living

Perhaps the greatest value of lemon seeds lies in what they represent: a mindset shift. Instead of viewing them as trash, they become a resource. Every time you reuse lemon seeds, you reduce waste, save money, and rely less on chemical products.

This small habit can inspire you to rethink other kitchen scraps too—orange peels, herb stems, and vegetable skins all have hidden uses waiting to be discovered.

Final Thoughts

Lemon seeds may be tiny, but their potential is enormous. From growing new plants to cleaning your home and supporting natural living, these overlooked seeds truly are “worth their weight in gold” when used wisely. The next time you squeeze a lemon, pause before throwing the seeds away. With just a little creativity, you can turn what was once waste into something surprisingly valuable.

Million Dollar Pound Cake

Million Dollar Pound Cake: A Rich, Timeless Classic Worth Every Bite

Few desserts live up to their name quite like the Million Dollar Pound Cake. Rich, buttery, velvety, and perfectly dense, this classic Southern cake has earned its reputation as a truly indulgent treat. It doesn’t rely on fancy fillings or elaborate frostings—its luxury comes from simple ingredients used the right way. One slice is enough to convince you why this cake has been passed down through generations and served at holidays, church gatherings, and special family celebrations.

What makes a Million Dollar Pound Cake special is its texture and flavor balance. It’s dense but tender, moist without being heavy, and subtly sweet with a deep buttery richness that melts in your mouth. The secret lies in patience, quality ingredients, and proper technique. When made correctly, it needs nothing more than a light dusting of powdered sugar or a few fresh berries on the side.

Why It’s Called “Million Dollar” Pound Cake

The name doesn’t come from cost, but from taste. Traditionally, this cake was considered so rich and satisfying that it tasted like a “million dollars.” It uses a generous amount of butter, eggs, and sugar—luxury ingredients in earlier times—making it a symbol of abundance and celebration.

Unlike modern cakes that depend on baking powder or soda, this classic recipe relies on air whipped into butter and sugar for its rise. That old-fashioned method gives it a tight crumb and velvety texture that’s impossible to fake.

Ingredients You’ll Need

To make an authentic Million Dollar Pound Cake, simplicity is key. Each ingredient plays an important role, so quality matters.

1 pound (4 sticks) unsalted butter, softened

3 cups granulated sugar

6 large eggs, room temperature

4 cups all-purpose flour, sifted

¾ cup whole milk

1 teaspoon vanilla extract

1 teaspoon almond extract (optional but traditional)

That’s it—no shortcuts, no substitutes if you want the real thing.

Step-by-Step Instructions

  1. Prepare the pan and oven
    Preheat your oven to 300°F (150°C). Grease a large Bundt or tube pan thoroughly with butter and dust lightly with flour. This cake is rich, so proper pan preparation is essential to prevent sticking.
  2. Cream butter and sugar
    In a large mixing bowl, beat the softened butter until creamy and pale. Gradually add the sugar and continue beating for 5–7 minutes. This step is critical—it incorporates air into the batter and gives the cake its signature texture. Don’t rush it.
  3. Add the eggs slowly
    Add eggs one at a time, beating well after each addition. Make sure each egg is fully incorporated before adding the next. This ensures a smooth, stable batter.
  4. Alternate flour and milk
    Reduce mixer speed to low. Add the flour in portions, alternating with the milk. Begin and end with flour. Mix just until combined—overmixing can make the cake tough.
  5. Add flavoring
    Gently mix in the vanilla and almond extracts. Almond extract gives the cake its classic bakery-style aroma, but you can omit it if you prefer pure vanilla flavor.
  6. Bake low and slow
    Pour the batter evenly into the prepared pan and smooth the top. Bake for 1 hour 40 minutes to 1 hour 50 minutes. The low temperature ensures even baking and prevents drying out.

The cake is done when a toothpick inserted in the center comes out clean or with a few moist crumbs.

  1. Cool properly
    Let the cake cool in the pan for 15–20 minutes, then carefully turn it out onto a wire rack. Allow it to cool completely before slicing.

Tips for Million-Dollar Results

Use room-temperature ingredients for a smooth, uniform batter

Do not rush the creaming process—this is the heart of the recipe

Avoid opening the oven door early, which can cause the cake to sink

Store tightly wrapped to maintain moisture

Serving Suggestions

Million Dollar Pound Cake is incredibly versatile. Serve it plain to appreciate its rich flavor, or elevate it with simple accompaniments:

Fresh strawberries or blueberries

Whipped cream

A light lemon glaze

Vanilla ice cream

It’s perfect for brunch, dessert, or even with afternoon tea.

Storage and Make-Ahead Tips

This cake actually improves with time. Wrapped tightly, it stays moist at room temperature for up to 3 days and in the refrigerator for up to a week. You can also freeze slices for up to 3 months—just thaw at room temperature before serving.

Final Thoughts

The Million Dollar Pound Cake is proof that simple ingredients, treated with care, can create something extraordinary. It’s a cake that doesn’t chase trends—it stands firm in tradition, delivering comfort, nostalgia, and pure indulgence in every slice. Whether you’re baking it for a special occasion or just because, this timeless recipe truly tastes like a million dollars.

Easy Lemon 7up Cake

Easy Lemon 7UP Cake – Moist, Fluffy, and Foolproof

If you love bright lemon flavor and ultra-moist cakes, this Easy Lemon 7UP Cake will quickly become one of your favorites. Made with simple pantry ingredients and the surprising addition of 7UP soda, this cake turns out soft, fluffy, and tender every single time. The carbonation in the soda helps create a light texture, while the lemon adds a refreshing citrus punch that makes each bite irresistible.

This recipe is perfect for beginners because it requires no complicated techniques, and it’s elegant enough to serve at gatherings, holidays, or Sunday tea. Whether you enjoy it plain, dusted with powdered sugar, or topped with a glossy lemon glaze, this cake is pure comfort with a citrus twist.

Why 7UP Works in Cake

You might wonder why soda belongs in a cake batter. The secret lies in carbonation and acidity. The bubbles in 7UP help aerate the batter, giving the cake a lighter crumb, while the citrus flavor enhances the lemon without overpowering it. Since 7UP already contains sweetness and acidity, it balances beautifully with butter and flour, producing a cake that stays moist for days.

Ingredients You’ll Need

For the cake:

  • 1 cup unsalted butter, softened
  • 3 cups granulated sugar
  • 5 large eggs, room temperature
  • 3 cups all-purpose flour
  • ½ teaspoon salt
  • ¾ cup 7UP (or any lemon-lime soda)
  • 2 tablespoons fresh lemon juice
  • 1 tablespoon lemon zest
  • 1 teaspoon vanilla extract

For the lemon glaze (optional but recommended):

  • 1½ cups powdered sugar
  • 2–3 tablespoons fresh lemon juice
  • 1 teaspoon lemon zest

Step-by-Step Instructions

1. Prepare the Pan and Oven

Preheat your oven to 325°F (165°C). Grease a Bundt pan generously with butter and lightly dust it with flour. This step is important because this cake is very moist and can stick if the pan isn’t prepared well.

2. Cream Butter and Sugar

In a large mixing bowl, beat the softened butter until smooth and creamy. Gradually add the sugar and continue beating for 3–5 minutes until the mixture becomes pale and fluffy. This step helps incorporate air into the batter, which contributes to a soft texture.

3. Add Eggs One at a Time

Add the eggs one at a time, mixing well after each addition. Scrape down the sides of the bowl to ensure everything is evenly combined. The batter should look smooth and rich at this stage.

4. Mix Dry Ingredients

In a separate bowl, whisk together the flour and salt. This ensures even distribution and prevents lumps in the batter.

5. Combine Wet and Dry Ingredients

Gradually add the flour mixture to the batter, alternating with the 7UP. Begin and end with the flour. Mix gently on low speed—do not overmix. Overmixing can make the cake dense.

6. Add Lemon Flavor

Stir in the lemon juice, lemon zest, and vanilla extract. The aroma at this point will already be fresh and citrusy.

7. Bake the Cake

Pour the batter evenly into the prepared Bundt pan and smooth the top. Bake for 60–70 minutes, or until a toothpick inserted into the center comes out clean. If the top browns too quickly, loosely cover with foil during the last 10–15 minutes.

8. Cool Properly

Allow the cake to cool in the pan for about 10–15 minutes, then carefully invert it onto a wire rack to cool completely. Cooling helps the cake set and prevents breakage.

How to Make the Lemon Glaze

In a small bowl, whisk powdered sugar, lemon juice, and lemon zest until smooth and pourable. Once the cake is completely cool, drizzle the glaze generously over the top, letting it drip down the sides. The glaze adds a sweet-tart finish that perfectly complements the buttery cake.

Tips for Best Results

  • Use room-temperature eggs and butter for a smoother batter.
  • Fresh lemon juice and zest give the best flavor—avoid bottled juice if possible.
  • Do not substitute diet soda; regular 7UP works best.
  • This cake tastes even better the next day as the flavors deepen.

Serving and Storage

Serve this Lemon 7UP Cake with tea, coffee, or a scoop of vanilla ice cream. It’s wonderful as a dessert or a light afternoon treat. Store the cake in an airtight container at room temperature for up to 3 days, or refrigerate for up to 5 days.

Final Thoughts

This Easy Lemon 7UP Cake proves that simple ingredients can create something truly special. With its moist crumb, refreshing lemon flavor, and effortless preparation, it’s a recipe you’ll return to again and again. Whether you’re baking for family, guests, or just yourself, this cake delivers guaranteed smiles with every slice 🍋🍰.