Three Types of People You Should Avoid If You Want to Age Gracefully

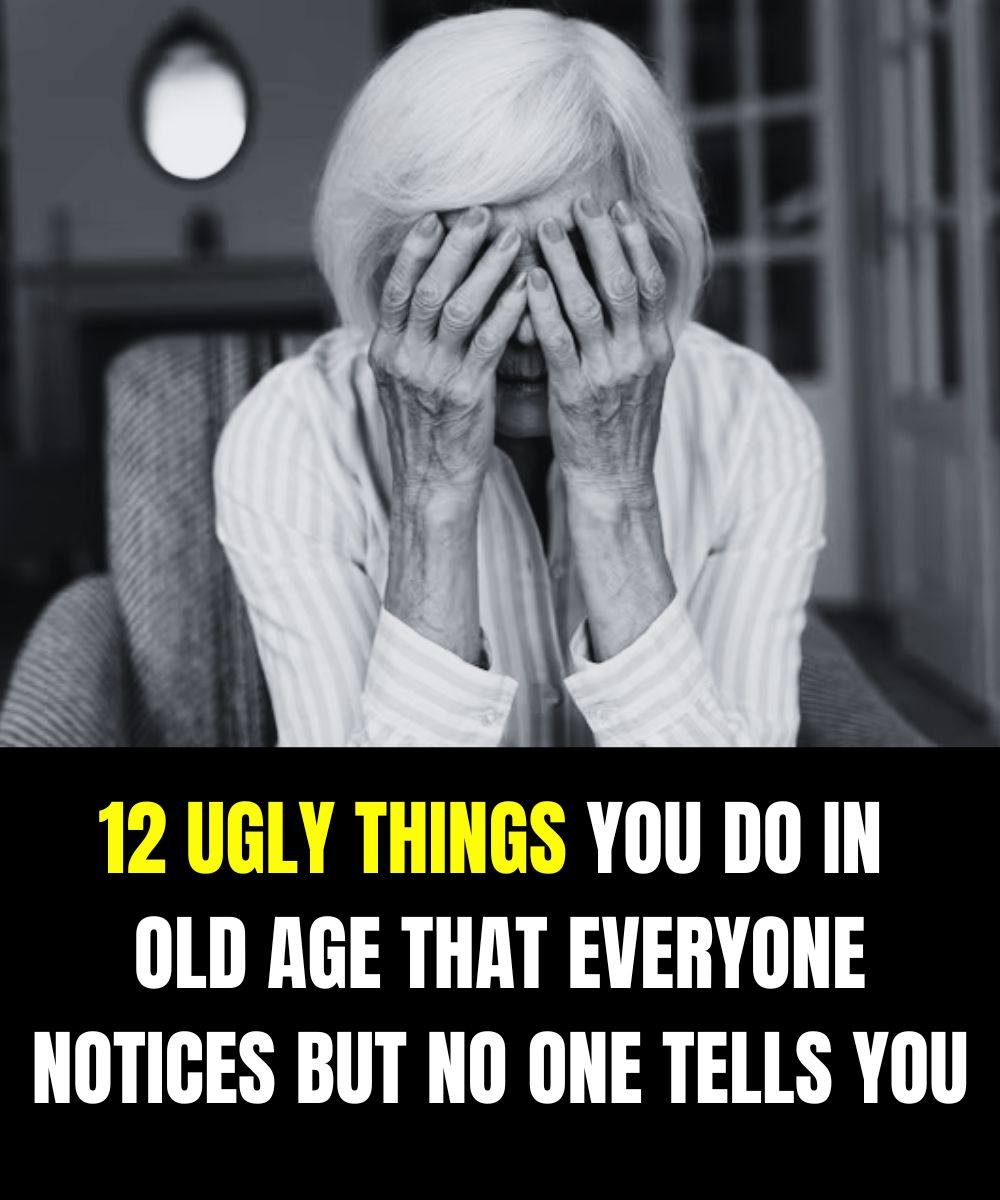
Aging gracefully isn’t just about skincare, diet, or exercise. It’s also about protecting your peace, managing your energy, and choosing wisely who you allow into your inner circle. As we grow older, our time becomes more valuable and our emotional resilience more precious. The people around us can either nourish our spirit or slowly drain it.

If you want to age with dignity, vitality, and joy, here are three types of people you should avoid.

1. The Constant Complainer

We all face challenges. Illness, financial stress, family problems — life doesn’t stop being complicated as we age. But there is a difference between sharing struggles and living in a permanent state of negativity.

The constant complainer sees problems in everything. The weather is never right. The food is never good enough. Their health is always worse than anyone else’s. Conversations with them feel heavy, repetitive, and exhausting. Over time, this constant negativity can subtly affect your own mindset.

Studies in psychology suggest that emotions are contagious. Spend enough time with someone who focuses only on what’s wrong, and you may start seeing the world through the same gray lens. Chronic stress and negativity are linked to higher blood pressure, weaker immunity, and faster aging at the cellular level.

As you grow older, your goal should be emotional balance. Surround yourself with people who acknowledge life’s difficulties but still search for solutions, gratitude, and small joys. Aging gracefully means protecting your mental environment just as much as your physical one.

2. The Energy Drainer

This person may not complain constantly, but they leave you feeling tired every time you interact. Energy drainers come in many forms:

  • The friend who only calls when they need something

  • The relative who brings drama to every gathering

  • The acquaintance who competes instead of supports

They often dominate conversations, dismiss your experiences, or subtly make everything about themselves. You may find yourself giving advice, emotional support, time, and effort — without receiving much in return.

As we age, our energy reserves change. Recovery takes longer. Sleep becomes more important. Stress impacts the body more deeply. Constant emotional labor can contribute to fatigue, anxiety, and even physical symptoms like headaches or digestive problems.

Healthy relationships should feel reciprocal. You don’t need constant praise or attention, but there should be balance. Mutual respect. Shared listening. Shared laughter.

Protecting your energy isn’t selfish — it’s wise. Aging gracefully requires conserving your strength for the things that truly matter: your health, your passions, your loved ones, and your peace of mind.

3. The Fear Spreader

Some people thrive on spreading fear. They constantly predict disasters — economic collapse, health catastrophes, family breakdowns. Every conversation circles back to worst-case scenarios.

While staying informed is important, living in chronic fear is harmful. Fear triggers stress hormones like cortisol, which, over time, can impact heart health, memory, sleep, and immune function.

The fear spreader often disguises their behavior as “just being realistic.” But there’s a difference between being informed and being consumed by anxiety. If every discussion leaves you more worried than before, that relationship may be quietly harming your well-being.

As you age, your focus should shift toward stability and inner calm. You deserve relationships that encourage preparedness without panic, awareness without alarm, and caution without obsession.

Why This Matters More With Age

In youth, we often tolerate toxic dynamics because we have more energy, more distractions, and more time to “recover” emotionally. But with age comes clarity — and a stronger awareness that time is finite.

Aging gracefully means:

  • Choosing calm over chaos

  • Choosing encouragement over criticism

  • Choosing balance over drama

Your nervous system becomes more sensitive to chronic stress as you grow older. Persistent tension can accelerate visible aging, disrupt sleep, increase inflammation, and weaken resilience.

The people in your life either contribute to your healing or to your stress. There is rarely a neutral effect over the long term.

What to Do Instead

Avoiding certain personality types doesn’t mean cutting everyone off harshly. It means creating healthy boundaries.

You can:

  • Limit time spent with negative individuals

  • Redirect conversations away from constant complaints

  • Politely decline invitations that feel draining

  • Invest more energy in supportive friendships

Seek out people who:

  • Laugh easily

  • Take responsibility for their own emotions

  • Encourage healthy habits

  • Respect your boundaries

  • Bring calm into your life

These relationships act like emotional vitamins. They support longevity, mental clarity, and even physical health.

The Quiet Secret to Graceful Aging

Graceful aging is less about looking younger and more about feeling lighter. It’s about reducing unnecessary burdens — physical, emotional, and social.

You cannot control how quickly time passes. But you can control the environment you create around yourself.

As you move through the later chapters of life, remember: peace is priceless. Energy is limited. Joy is intentional.

Protect your mind from chronic negativity. Guard your energy from constant takers. Shield your heart from those who live in fear.

The people you choose today shape the quality of your tomorrow.

Choose wisely — and age gracefully.

Ranch Potatoes

If you’re looking for a no-fuss, crowd-pleasing side dish, these Slow Cooker Ranch Potatoes are about to become a regular in your kitchen. They’re creamy, savory, and packed with that unmistakable ranch flavor everyone secretly loves. Best of all? The slow cooker does almost all the work while you focus on the main dish—or just relax.

This recipe is perfect for family dinners, potlucks, holidays, or Sunday meals. It pairs beautifully with chicken, beef, pork, or even a simple salad. The potatoes turn tender, the sauce gets luxuriously creamy, and the ranch seasoning ties everything together in the most comforting way possible.

Why You’ll Love This Recipe

  • Uses simple pantry ingredients

  • No boiling or pre-cooking required

  • Creamy without being overly heavy

  • Easy to customize with cheese, bacon, or herbs

  • Perfect make-ahead slow cooker side dish

  • Ingredients (Serves 6–8)

    • 2½ to 3 pounds potatoes (Yukon Gold or red potatoes work best)

    • 1 packet ranch seasoning mix (about 1 oz)

    • 1 cup sour cream

    • 1 can (10.5 oz) cream of chicken soup (or cream of mushroom)

    • ½ cup milk or heavy cream

    • 2 tablespoons melted butter

    • 1 teaspoon garlic powder

    • ½ teaspoon onion powder

    • ½ teaspoon black pepper

    • ¼ teaspoon paprika (optional, for warmth)

    • 1½ cups shredded cheddar cheese (optional but highly recommended)

    • 2 tablespoons chopped fresh parsley or green onions (for garnish)

    Step-by-Step Instructions

    1. Prepare the Potatoes

    Wash the potatoes well and cut them into bite-sized chunks. You don’t need to peel them—keeping the skins on adds texture and flavor. Try to keep the pieces roughly the same size so they cook evenly.

    Lightly grease the inside of your slow cooker with butter or nonstick spray.

    2. Make the Creamy Ranch Sauce

    In a medium bowl, whisk together:

    • Ranch seasoning mix

    • Sour cream

    • Cream of chicken soup

    • Milk or cream

    • Melted butter

    • Garlic powder

    • Onion powder

    • Black pepper

    • Paprika (if using)

    Mix until smooth and creamy. The sauce should be thick but pourable.

    3. Combine Everything

    Add the chopped potatoes directly into the slow cooker. Pour the ranch sauce over the top and gently stir until all the potatoes are well coated.

    If you’re adding cheddar cheese, stir in about 1 cup now and reserve the rest for later.

    4. Slow Cook to Perfection

    Cover and cook:

    • Low: 5–6 hours

    • High: 3–4 hours

    The potatoes are done when they’re fork-tender and the sauce has thickened beautifully.

    About 30 minutes before serving, sprinkle the remaining cheese over the top, cover again, and let it melt into a gooey, irresistible layer.

    5. Garnish and Serve

    Once done, gently stir (or leave the cheesy top intact for presentation). Sprinkle with chopped parsley or green onions for a fresh finish.

    Serve hot and watch it disappear fast.

    Tips for the Best Ranch Potatoes

    • Don’t over-stir during cooking—potatoes can break apart.

    • Yukon Gold potatoes give the creamiest texture.

    • If the sauce seems thick at the end, stir in a splash of warm milk.

    • Keep the lid on as much as possible—slow cookers lose heat quickly.

    Easy Variations

    Cheesy Bacon Ranch Potatoes

    Add ¾ cup cooked, crumbled bacon during the last hour of cooking for a smoky, savory twist.

    Garlic Parmesan Ranch

    Replace half the cheddar with grated Parmesan and add 1 teaspoon minced garlic for bold flavor.

    Lighter Version

    Use light sour cream and reduced-fat soup, and skip the cheese—or use less.

    Spicy Ranch Potatoes

    Add a pinch of cayenne pepper or chopped jalapeños for a subtle kick.

    What to Serve With Ranch Potatoes

    These creamy potatoes pair perfectly with:

    • Roast chicken or baked chicken thighs

    • Meatloaf or grilled steak

    • BBQ ribs or pulled pork

    • Green beans, broccoli, or a crisp salad to balance the richness

    They’re especially popular at holiday dinners and buffets because they stay warm and creamy for hours in the slow cooker.

    Make-Ahead & Storage

    • Make ahead: Assemble everything the night before, refrigerate the slow cooker insert, then cook the next day.

    • Refrigerate leftovers: Store in an airtight container for up to 3 days.

    • Reheat: Warm gently on the stove or microwave with a splash of milk to loosen the sauce.

Kentucky Crockpot Potatoes

There’s something deeply comforting about Kentucky-style cooking. It’s humble, hearty, and made to feed a crowd without fuss. Kentucky Crockpot Potatoes are exactly that kind of dish—the sort that simmers away gently while you go about your day, filling the house with a warm, buttery aroma that promises comfort before you even lift the lid.

This recipe is rich, creamy, and satisfying, often served as a side dish at church suppers, family reunions, and Sunday dinners across the South. The magic is in the slow cooker: simple ingredients, low heat, and time doing most of the work for you.

Why You’ll Love This Recipe

  • Hands-off cooking: Let the crockpot do the heavy lifting

  • Budget-friendly: Uses everyday pantry ingredients

  • Crowd-pleaser: Creamy, cheesy, and comforting

  • Versatile: Perfect with chicken, beef, or as a stand-alone dish

Ingredients (Serves 6–8)

  • 2½ to 3 pounds potatoes (Yukon Gold or russet potatoes work best)

  • 1 small onion, finely chopped

  • 2 cups shredded cheddar cheese (sharp cheddar preferred)

  • 1 can (10.5 oz) cream of chicken soup

  • ½ cup sour cream

  • ¼ cup melted butter

  • ½ cup milk

  • 1 teaspoon salt

  • ½ teaspoon black pepper

  • ½ teaspoon garlic powder

  • ½ teaspoon paprika

  • Optional: chopped fresh parsley or green onions for garnish

Step-by-Step Instructions

1. Prepare the Potatoes

Wash and peel the potatoes (peeling is optional if you prefer a rustic texture). Slice them into thin, even rounds—about ⅛ to ¼ inch thick. Uniform slices ensure even cooking and that perfect tender bite.

Place the sliced potatoes in a bowl of cold water while you prepare the rest of the ingredients. This prevents browning and removes excess starch. Drain and pat dry before layering.

2. Make the Creamy Sauce

In a medium mixing bowl, combine the cream of chicken soup, sour cream, milk, melted butter, salt, black pepper, garlic powder, and paprika. Whisk until smooth and creamy. This sauce is the heart of the dish—rich, savory, and classic Southern comfort.

3. Layer the Crockpot

Lightly grease the inside of your crockpot with butter or nonstick spray.

Start with a layer of sliced potatoes, followed by a sprinkle of chopped onion and a handful of shredded cheese. Spoon some of the creamy sauce over the top.

Repeat the layers until all ingredients are used, finishing with sauce and a generous layer of cheese on top.

4. Slow Cook to Perfection

Cover the crockpot with the lid and cook:

  • On LOW: 6–7 hours

  • On HIGH: 3–4 hours

The potatoes are done when they’re fork-tender and the sauce is bubbling gently around the edges. Avoid lifting the lid too often—slow cookers like consistency.

5. Rest and Garnish

Once cooked, turn off the heat and let the potatoes rest for 10–15 minutes. This allows the sauce to thicken and settle.

Garnish with chopped parsley or green onions if desired, adding a touch of freshness and color.

Tips for the Best Kentucky Crockpot Potatoes

  • Use Yukon Gold potatoes for a naturally buttery flavor

  • Shred your own cheese for better melting (pre-shredded cheese contains anti-caking agents)

  • Don’t overslice the potatoes—too thin and they’ll turn mushy

  • Season each layer lightly for balanced flavor throughout

Tasty Variations

  • Bacon Lover’s Version: Add cooked, crumbled bacon between layers

  • Extra Cheesy: Mix mozzarella or Monterey Jack with cheddar

  • Herb Boost: Add dried thyme or rosemary to the sauce

  • Meaty Main Dish: Stir in diced cooked ham or shredded chicken

How to Serve

Kentucky Crockpot Potatoes pair beautifully with:

  • Fried or baked chicken

  • Meatloaf or pot roast

  • Barbecue ribs

  • Roasted vegetables or green beans

They’re also hearty enough to stand on their own as a cozy vegetarian main dish.

Storage & Reheating

  • Refrigerator: Store leftovers in an airtight container for up to 3 days

  • Reheating: Warm gently in the microwave or oven with a splash of milk to restore creaminess

Final Thoughts

Kentucky Crockpot Potatoes are more than just a side dish—they’re a taste of Southern hospitality. Creamy, comforting, and incredibly easy to make, this recipe is perfect for busy days, family gatherings, or anytime you need a little food-made-with-love feeling on your table.

12 nasty things you do in old age that everyone notices, but no one dares to tell you

Aging is a privilege. It means you’ve lived, survived, learned, and collected stories that younger people haven’t even imagined yet. But let’s be honest—getting older can also come with habits that quietly rub others the wrong way. The tricky part? Most people would rather bite their tongue than risk hurting your feelings.

That silence doesn’t mean they don’t notice. They do. Here are 12 common behaviors that tend to creep in with age—often without bad intentions—and why being aware of them can actually make life (and relationships) smoother.

1. Complaining… All the Time

Yes, joints ache. Yes, things were cheaper “back then.” But when every conversation turns into a complaint about pain, prices, or politics, people start emotionally checking out. Occasional venting is human. Constant negativity, however, drains the room faster than you realize.

2. Repeating the Same Stories

That story about your first job or how tough school was? It was charming the first five times. Repeating stories isn’t about ego—it’s often memory-related—but listeners still notice. When you see eyes glazing over, it might be time to wrap it up.

3. Giving Unsolicited Advice

Experience is valuable, but advice that wasn’t asked for can feel patronizing. Younger people often want understanding, not instruction. Saying “When I was your age…” rarely lands the way you think it does.

4. Refusing to Adapt to Change

Technology, language, social norms—things evolve. Digging your heels in and insisting that “everything new is stupid” sends a message that you’re unwilling to learn. You don’t need to love change, but rejecting it entirely creates distance.

5. Talking Over Others

Many older adults unintentionally dominate conversations, interrupting or redirecting discussions back to themselves. It’s not rudeness—it’s habit. Still, people notice when they’re not given space to speak.

6. Being Blunt Under the Guise of “Honesty”

“I’m just telling it like it is” can sometimes be code for being unnecessarily harsh. Honesty doesn’t require cruelty. Words hit harder as people age, not softer.

7. Ignoring Personal Hygiene Changes

Sense of smell and awareness can decline with age, which is why issues like body odor, bad breath, or unwashed clothes sometimes slip by unnoticed—to you, but not to others. Loved ones often feel too awkward to say anything.

8. Acting Entitled to Respect Without Giving It

Respect isn’t automatic—it’s mutual. Expecting deference simply because of age, while dismissing younger generations, creates resentment instead of admiration.

9. Oversharing Personal or Medical Details

There’s a fine line between openness and oversharing. Graphic health updates, bathroom issues, or deeply personal details can make people uncomfortable, especially in casual settings.

10. Being Stuck in the Past

Nostalgia is beautiful, but living entirely in yesterday can make it seem like you’ve checked out of today. People notice when you show no interest in current events, ideas, or even their lives.

11. Assuming You’re Always Right

Years of experience don’t make anyone infallible. Refusing to admit mistakes—or dismissing new information outright—signals rigidity. Growth doesn’t have an expiration date.

12. Expecting Others to “Just Know” What You Need

Instead of asking clearly for help, attention, or company, some older adults hint, sigh, or act hurt when others don’t read their minds. This creates confusion and quiet frustration on both sides.

Why No One Tells You

Most people stay silent out of respect—or fear. They don’t want to hurt you, argue, or seem ageist. So they smile, nod, and slowly pull away. The truth is, awareness of these habits isn’t about shame. It’s about connection.

The Good News

Noticing even a few of these patterns puts you ahead of the curve. Small adjustments—listening more, complaining less, staying curious—can dramatically improve how people feel around you.

17 Foods That Increase Magnesium and Help Prevent High Blood Pressure, Blood Clots, and Muscle Fatigue

Magnesium is one of the most underrated minerals in the human body, yet it plays a role in more than 300 biochemical reactions. It helps regulate blood pressure, supports healthy blood flow, prevents muscle cramps, and keeps your heart rhythm steady. Unfortunately, many people don’t get enough magnesium from their daily diet, which may contribute to high blood pressure, circulation problems, blood clots, and persistent muscle fatigue.

The good news? You can significantly boost your magnesium levels by choosing the right foods. Below are 17 magnesium-rich foods that support heart health, reduce clotting risk, and help muscles relax and recover naturally.


1. Spinach

Spinach is a magnesium powerhouse. One cooked cup provides nearly 40% of your daily magnesium needs. Magnesium helps relax blood vessels, allowing blood to flow more easily and lowering blood pressure naturally.

2. Pumpkin Seeds

These small seeds pack a serious mineral punch. Just one ounce contains about 150 mg of magnesium. Pumpkin seeds also support healthy circulation and may reduce platelet aggregation, lowering clot risk.

3. Almonds

Almonds are rich in magnesium, healthy fats, and antioxidants. Eating a small handful daily may help regulate blood pressure while preventing muscle fatigue and nighttime leg cramps.

4. Avocados

Avocados contain magnesium along with potassium—an ideal combination for heart health. Together, these minerals help balance fluids, relax blood vessels, and protect against hypertension.

5. Black Beans

Black beans provide magnesium, fiber, and plant protein. Fiber helps control cholesterol, while magnesium supports proper muscle contraction and prevents spasms.

6. Dark Chocolate (70% or Higher)

Dark chocolate is surprisingly rich in magnesium. It also improves blood vessel function and reduces inflammation, which may help prevent abnormal clot formation when eaten in moderation.

7. Bananas

While known for potassium, bananas also provide magnesium. This combination helps prevent muscle cramps, supports nerve signaling, and aids recovery after physical activity.

8. Chia Seeds

Chia seeds are loaded with magnesium, omega-3 fatty acids, and fiber. These nutrients help reduce blood pressure, improve circulation, and support heart rhythm stability.

9. Oats

Whole oats are an excellent breakfast choice for magnesium intake. They help regulate blood sugar levels while supporting relaxed muscles and steady blood flow throughout the day.

10. Cashews

Cashews are rich in magnesium and healthy fats. Regular consumption may help reduce muscle fatigue and improve vascular relaxation, especially in people with magnesium deficiency.

11. Swiss Chard

This leafy green contains magnesium, potassium, and calcium—three minerals essential for healthy blood pressure and muscle function. Swiss chard also supports circulation by improving arterial flexibility.

12. Yogurt

Yogurt provides magnesium along with calcium and probiotics. These nutrients work together to support heart health, muscle recovery, and proper nerve function.

13. Lentils

Lentils are a plant-based magnesium source that also supports blood sugar balance and reduces inflammation—both important factors in preventing blood clots.

14. Salmon

Salmon contains magnesium and omega-3 fatty acids, which help thin the blood naturally, reduce clot risk, and support relaxed blood vessels.

15. Figs

Fresh or dried figs provide magnesium and antioxidants. They support muscle relaxation and may help regulate blood pressure when eaten regularly.

16. Brown Rice

Unlike refined grains, brown rice retains its magnesium content. It supports energy production in muscles and helps prevent fatigue caused by mineral imbalance.

17. Tofu

Tofu is rich in magnesium and protein, making it ideal for muscle repair and recovery. It also supports vascular health by helping blood vessels remain flexible.


Why Magnesium Is Essential for Blood Pressure and Circulation

Magnesium helps regulate calcium movement in blood vessel walls. When magnesium levels are low, blood vessels may tighten, increasing blood pressure and the risk of clot formation. Adequate magnesium intake encourages vessel relaxation, smooth blood flow, and balanced muscle contraction.


Signs You May Be Low in Magnesium

  • Muscle cramps or twitching

  • Fatigue and weakness

  • Irregular heartbeat

  • High blood pressure

  • Poor sleep quality

If these symptoms are frequent, increasing magnesium-rich foods may help.


Simple Tips to Increase Magnesium Naturally

  • Eat leafy greens daily

  • Snack on nuts and seeds instead of processed foods

  • Choose whole grains over refined ones

  • Limit excessive caffeine and sugar, which deplete magnesium


Final Thoughts

Magnesium is a silent protector of your heart, muscles, and circulation. By including these 17 magnesium-rich foods in your diet, you can naturally support healthy blood pressure, reduce the risk of blood clots, and keep muscle fatigue at bay—without relying solely on supplements.

he secret hidden in guava leaves

6 trigger foods that cause agonizing pain if you have neuropathy

Living with neuropathy can feel like walking on live wires. Burning, stabbing, tingling, or electric-shock sensations can appear without warning and make even simple daily activities exhausting. While neuropathy is often linked to conditions like diabetes, vitamin deficiencies, autoimmune disorders, or nerve injuries, many people don’t realize that food choices can dramatically influence nerve pain.

Certain foods may worsen inflammation, disrupt blood sugar, or irritate already-damaged nerves—turning manageable symptoms into agonizing pain. If you live with neuropathy, avoiding these common trigger foods could make a noticeable difference.

1. Refined Sugar and Sweets

Sugar is one of the biggest enemies of nerve health, especially for people with diabetic or prediabetic neuropathy. Consuming sweets, sugary drinks, pastries, and desserts causes rapid spikes in blood sugar. These spikes damage small blood vessels that nourish nerves, leading to increased pain, numbness, and burning sensations.

High sugar intake also fuels inflammation throughout the body. Inflamed nerves become hypersensitive, making pain feel sharper and more persistent. Over time, excess sugar can even accelerate nerve degeneration.

Common sources to watch out for:
Candy, soda, fruit juices, cakes, cookies, sweetened yogurt, and breakfast cereals.

2. Refined Carbohydrates

White bread, white rice, pasta, and baked goods made with refined flour break down quickly into glucose. Even if they don’t taste sweet, they act like sugar in the body—causing blood sugar surges that can worsen neuropathic pain.

For many people, these foods increase tingling, numbness, and that uncomfortable “pins and needles” sensation. Refined carbs also lack fiber and essential nutrients needed for nerve repair.

Better alternatives:
Whole grains, oats, brown rice, quinoa, and high-fiber vegetables help stabilize blood sugar and reduce inflammation.

3. Alcohol

Alcohol is a well-known nerve toxin. In fact, alcoholic neuropathy is a recognized medical condition. Even moderate drinking can irritate nerves and intensify pain for those who already have neuropathy.

Alcohol interferes with the absorption of B vitamins—especially B1, B6, and B12—which are crucial for nerve function. It also increases oxidative stress, damaging nerve endings further.

Many people with neuropathy report worse burning and stabbing pain at night after drinking alcohol, along with increased numbness in the feet and hands.

If you have neuropathy:
Limiting or completely avoiding alcohol may significantly reduce flare-ups.

4. Fried and Processed Foods

Fried foods and heavily processed snacks are loaded with unhealthy fats, additives, and advanced glycation end products (AGEs). These compounds trigger inflammation and oxidative stress, both of which are known to worsen nerve pain.

Fast food, packaged snacks, frozen meals, and processed meats can increase swelling around nerves, making pain signals stronger and more frequent.

Examples to avoid:
French fries, fried chicken, chips, sausages, hot dogs, and packaged pastries.

5. Foods High in Saturated and Trans Fats

Diets high in saturated and trans fats impair blood circulation, reducing oxygen and nutrients reaching the nerves. Poor circulation is a major contributor to neuropathy pain, particularly in the feet and legs.

These fats also increase systemic inflammation, making nerve endings more sensitive to pain signals. Over time, they may worsen nerve damage and slow healing.

Common sources:
Fatty cuts of red meat, butter, margarine, full-fat dairy, baked goods, and commercially prepared snacks.

Healthier fats:
Olive oil, avocados, nuts, seeds, and fatty fish like salmon support nerve health.

6. Artificial Sweeteners and Additives

Many people turn to artificial sweeteners thinking they are safer than sugar—but for neuropathy sufferers, they can be problematic. Some artificial sweeteners and food additives may overstimulate nerves or trigger inflammation in sensitive individuals.

Monosodium glutamate (MSG), aspartame, and artificial flavor enhancers have been linked by some people to increased nerve pain, headaches, and tingling sensations.

While reactions vary, it’s worth paying attention to how your body responds after consuming diet sodas, sugar-free candies, and highly processed foods.

Final Thoughts

Neuropathy pain isn’t caused by food alone, but diet can either calm or aggravate damaged nerves. By reducing sugar, refined carbs, alcohol, fried foods, unhealthy fats, and artificial additives, many people experience fewer flare-ups and improved comfort.

A nerve-friendly diet focuses on whole foods, stable blood sugar, anti-inflammatory nutrients, and proper vitamin intake—especially B vitamins. Small changes, made consistently, can lead to meaningful relief.

If neuropathy pain feels overwhelming, your plate may be one of the most powerful tools you have to take back control.

Creamy Crab and Shrimp Seafood Bisque

Few dishes feel as comforting and luxurious as a warm bowl of seafood bisque. Silky, rich, and deeply flavorful, this Creamy Crab and Shrimp Seafood Bisque is the kind of recipe you make when you want to slow down, impress guests, or simply treat yourself to something special. Inspired by classic coastal cooking, this bisque balances the sweetness of crab and shrimp with aromatic vegetables, gentle spices, and a velvety cream base. The best part? It’s surprisingly achievable at home.

This recipe serves 4–6 and is perfect as a starter for a dinner party or as a cozy main course with crusty bread.

Ingredients

Seafood

  • 200 g (7 oz) fresh crab meat (lump or claw, picked over for shells)

  • 250 g (9 oz) raw shrimp, peeled and deveined

  • Shrimp shells (optional, for extra flavor)

Vegetables & Aromatics

  • 2 tablespoons butter

  • 1 tablespoon olive oil

  • 1 medium onion, finely chopped

  • 2 celery stalks, finely chopped

  • 1 medium carrot, finely chopped

  • 3 cloves garlic, minced

Liquids & Base

  • 3 tablespoons all-purpose flour

  • 2 cups seafood stock (or fish stock)

  • 1 cup milk

  • 1 cup heavy cream

Seasonings

  • 1 teaspoon tomato paste

  • ½ teaspoon paprika (smoked paprika works beautifully)

  • ¼ teaspoon cayenne pepper (optional, for gentle heat)

  • ½ teaspoon dried thyme or 1 teaspoon fresh thyme

  • 1 bay leaf

  • Salt and black pepper, to taste

Finishing Touches

  • 1 tablespoon fresh lemon juice

  • 1–2 tablespoons chopped fresh parsley or chives

  • Step-by-Step Instructions

    1. Build the Flavor Base

    In a large heavy-bottomed pot or Dutch oven, heat the butter and olive oil over medium heat. Once the butter melts and starts to foam, add the chopped onion, celery, and carrot. Cook gently for 6–8 minutes, stirring often, until the vegetables soften and become fragrant. You’re not looking for browning here—just a sweet, tender base.

    Add the minced garlic and cook for another 30 seconds, just until aromatic.

    2. Create the Roux

    Sprinkle the flour evenly over the vegetables. Stir continuously for about 2 minutes to cook out the raw flour taste. The mixture should look slightly thick and paste-like. Stir in the tomato paste, paprika, cayenne (if using), thyme, and bay leaf.

    This step is crucial—it forms the backbone of the bisque’s creamy texture.

    3. Add the Stock

    Slowly pour in the seafood stock, stirring constantly to avoid lumps. Bring the mixture to a gentle simmer and let it cook for 10–12 minutes. The bisque will thicken slightly as the flavors meld together.

    If you have shrimp shells, you can simmer them in the stock beforehand and strain for even deeper seafood flavor.

    4. Blend for Smoothness

    Remove the bay leaf. Using an immersion blender, carefully blend the soup until smooth and velvety. If you don’t have an immersion blender, allow the soup to cool slightly and blend in batches in a regular blender, then return it to the pot.

    This step transforms the soup from chunky to luxurious.

    5. Add Milk, Cream, and Seafood

    Reduce the heat to low. Stir in the milk and heavy cream. Add the shrimp and cook gently for 3–4 minutes, just until the shrimp turn pink and are cooked through.

    Fold in the crab meat carefully so it stays in nice pieces. Let the bisque warm for another 2–3 minutes—do not boil.

    6. Finish and Balance

    Stir in the lemon juice, then season with salt and black pepper to taste. The lemon brightens the richness and brings everything into balance.

  • https://mojo.generalmills.com/api/public/content/uAOzt_I85ka4XGBzMl-jSg_webp_base.webp?t=191ddcab8d1c415fa10fa00a14351227&v=7d9c9f73
  • Serving Suggestions

    Ladle the bisque into warm bowls and garnish with fresh parsley or chives. Serve with:

    • Crusty baguette or sourdough bread

    • Garlic toast

    • A light green salad with lemon vinaigrette

    For an extra-special touch, drizzle a little cream on top or add a few whole shrimp as garnish.

  • Tips for the Best Bisque

    • Use fresh seafood: Fresh crab and shrimp make a noticeable difference in sweetness and texture.

    • Don’t rush the base: Slowly cooking the vegetables builds depth of flavor.

    • Low heat after cream: High heat can cause the cream to separate—gentle warming is key.

    • Make it your own: A splash of white wine added before the stock or a pinch of Old Bay seasoning can add a personal twist.

    • Final Thoughts

      This Creamy Crab and Shrimp Seafood Bisque is rich without being heavy, elegant yet comforting. It’s the kind of dish that feels restaurant-worthy but is made with simple, honest ingredients at home. Whether you’re serving it for a holiday meal, a romantic dinner, or a quiet night in, this bisque delivers warmth, flavor, and a little bit of coastal magic in every spoonful. 🦐🦀

    • https://www.thespruceeats.com/thmb/GDpOappTiYuWUXeOk2YuESj8dpc%3D/1500x0/filters%3Ano_upscale%28%29%3Amax_bytes%28150000%29%3Astrip_icc%28%29/crab-and-shrimp-seafood-bisque-3060729-hero-01-131207f18aec46378c3ed233b823d2d8.jpg

Colon Cleansing Soup

Colon Cleansing Soup: A Gentle, Nourishing Way to Support Digestive Health

Your colon works quietly behind the scenes every day, processing waste, absorbing water, and helping your body eliminate toxins. When digestion slows down—thanks to stress, low fiber intake, dehydration, or processed foods—you may notice bloating, constipation, heaviness, or low energy. That’s where a colon cleansing soup can help. This warm, fiber-rich, and hydrating soup supports natural elimination without harsh laxatives or extreme cleanses. Think of it as comfort food with benefits.

This soup isn’t about “forcing” your body to detox. Your liver and colon already do that job well. Instead, the goal is to support them with ingredients that are easy to digest, anti-inflammatory, and rich in soluble and insoluble fiber.

Why Soup Works So Well for Colon Health

Warm soups are especially friendly to the digestive system. Cooking vegetables breaks down tough fibers, making nutrients easier to absorb and gentler on the gut. Liquids also help soften stool and keep waste moving smoothly through the intestines.

A good colon cleansing soup focuses on:

Fiber to feed beneficial gut bacteria

Water-rich vegetables to prevent dryness and constipation

Anti-inflammatory herbs and spices to calm the digestive tract

Natural minerals to support gut muscle movement

Key Ingredients and Their Benefits

Each ingredient in this soup is chosen for a reason:

Onion & Garlic – Support healthy gut bacteria and stimulate digestion

Carrots – Rich in soluble fiber that helps bind waste

Celery – Hydrating and mildly diuretic, great for flushing

Zucchini – Gentle on the stomach and easy to digest

Cabbage – Traditionally used to support intestinal health

Spinach or Kale – Adds magnesium, which supports bowel movement

Ginger – Reduces bloating and stimulates digestion

Turmeric – Anti-inflammatory and soothing to the gut lining

Colon Cleansing Soup Recipe
Ingredients:

1 tablespoon olive oil

1 medium onion, chopped

3 cloves garlic, minced

2 carrots, sliced

2 celery stalks, chopped

1 zucchini, diced

1 cup chopped cabbage

1 handful spinach or kale

1 teaspoon grated fresh ginger

½ teaspoon turmeric powder

6 cups water or low-sodium vegetable broth

Salt and black pepper to taste

Optional: fresh parsley or coriander for garnish

How to Prepare

Sauté the base
Heat olive oil in a large pot over medium heat. Add onion and cook until soft and translucent. Stir in garlic and ginger and cook for 30 seconds until fragrant.

Add vegetables
Add carrots, celery, zucchini, and cabbage. Stir well and cook for 3–4 minutes to lightly soften them.

Pour in liquid
Add water or vegetable broth. Bring to a gentle boil.

Season and simmer
Add turmeric, salt, and black pepper. Reduce heat and let the soup simmer for 20–25 minutes until vegetables are tender.

Finish with greens
Add spinach or kale in the last 3 minutes of cooking. Stir until wilted.

Serve warm
Garnish with fresh herbs if desired.

How to Use This Soup for Gentle Cleansing

For best results, enjoy this soup:

Once daily, preferably in the evening

For 3–5 consecutive days

Alongside plenty of water

You can eat it as a light dinner or replace one heavy meal with it. Avoid processed foods, excess sugar, and fried items during this time to let your digestive system reset.

What You May Notice

Many people report:

Less bloating within 1–2 days

More regular bowel movements

A lighter feeling in the abdomen

Improved energy and comfort after meals

Results vary, but the key is consistency and simplicity.

Important Tips

Do not overdo cleanses—your colon does not need constant flushing

If you have chronic digestive issues, consult a healthcare professional

Always listen to your body

Final Thoughts

This colon cleansing soup is not a miracle cure, but it is a kind, nourishing way to support your digestive system. Warm, simple, and deeply hydrating, it works with your body instead of against it. Sometimes, the best reset doesn’t come from extremes—it comes from a bowl of homemade soup, eaten slowly and mindfully 🥣

Stuffed Cabbages Rolls

Stuffed cabbage rolls are one of those timeless dishes that instantly feel like home. Whether you know them as cabbage rolls, golabki, sarma, or malfouf, this recipe has crossed borders, generations, and family kitchens. Tender cabbage leaves wrapped around a savory filling, slowly simmered in a rich sauce—simple ingredients, big comfort. This version is classic, cozy, and perfect for a hearty family meal.


Why Stuffed Cabbage Rolls Are So Beloved

Cabbage rolls are loved because they’re humble yet deeply satisfying. Cabbage becomes silky and mild when cooked, perfectly balancing the richness of the filling inside. They’re economical, nourishing, and even better the next day, which makes them ideal for batch cooking and gatherings.

They also adapt beautifully to different tastes. You can make them meaty, vegetarian, spicy, or mild. No matter the variation, the idea remains the same: wrapped goodness slowly cooked to perfection.


Ingredients You’ll Need

For the cabbage rolls

  • 1 large green cabbage

  • 500 g (1 lb) ground meat (beef, lamb, or a mix)

  • 1 cup cooked rice (white or brown)

  • 1 medium onion, finely chopped

  • 2 cloves garlic, minced

  • 1 egg

  • 1 teaspoon salt

  • ½ teaspoon black pepper

  • 1 teaspoon paprika

  • ½ teaspoon dried thyme or dill

  • 2 tablespoons fresh parsley, chopped

For the sauce

  • 2 cups tomato sauce or crushed tomatoes

  • 2 tablespoons tomato paste

  • 1 cup water or broth

  • 1 tablespoon olive oil

  • Salt and pepper to taste

  • Optional: a pinch of sugar to balance acidity


Step 1: Prepare the Cabbage

Bring a large pot of water to a gentle boil. Carefully remove the core from the cabbage using a sharp knife. Place the whole cabbage into the boiling water. As the outer leaves soften, gently peel them off using tongs. Set the leaves aside to cool.

You’ll need about 12–15 large leaves. Trim the thick center vein from each leaf to make rolling easier, being careful not to cut all the way through.


Step 2: Make the Filling

In a large bowl, combine the ground meat, cooked rice, chopped onion, garlic, egg, salt, pepper, paprika, herbs, and parsley. Mix gently with your hands or a spoon until everything is evenly combined. Don’t overmix—this keeps the rolls tender instead of dense.


Step 3: Roll Them Up

Lay a cabbage leaf flat on a clean surface. Place about 2–3 tablespoons of filling near the base of the leaf. Fold the sides inward, then roll it up tightly from bottom to top, like a small burrito. Repeat until all the filling is used.

If some leaves are small or torn, don’t worry—they can be layered at the bottom of the pot to prevent sticking.


Step 4: Prepare the Sauce and Assemble

In a bowl, mix the tomato sauce, tomato paste, water or broth, olive oil, salt, and pepper. Taste and adjust seasoning.

Spread a thin layer of sauce on the bottom of a large pot or deep baking dish. Arrange the cabbage rolls seam-side down, packing them snugly so they don’t unravel. Pour the remaining sauce over the rolls, making sure they’re mostly covered.


Step 5: Slow Cook to Perfection

Stovetop method:
Cover the pot and simmer on low heat for about 60–75 minutes.

Oven method:
Cover the dish tightly with foil and bake at 180°C (350°F) for about 90 minutes.

The cabbage should be tender, and the filling fully cooked and juicy.


Serving Suggestions

Stuffed cabbage rolls are best served hot, spooned with extra sauce. They pair beautifully with:

  • Mashed potatoes

  • Crusty bread

  • Yogurt or sour cream

  • A simple cucumber or green salad

They’re filling enough to stand alone but shine even more as part of a comforting spread.


Tips for the Best Cabbage Rolls

  • Make ahead: They taste even better the next day as the flavors deepen.

  • Freeze-friendly: Uncooked or cooked rolls freeze well for up to 3 months.

  • Lighter version: Use lean meat or replace half the meat with lentils.

  • Extra flavor: Add a splash of lemon juice or a pinch of chili flakes to the sauce.


Final Thoughts

Stuffed cabbage rolls are more than just a recipe—they’re a tradition passed down through hands that cooked with love. They teach patience, reward simplicity, and bring people together around the table. Once you make them from scratch, you’ll understand why this dish has survived centuries and still feels just as comforting today.