German potato pancakes

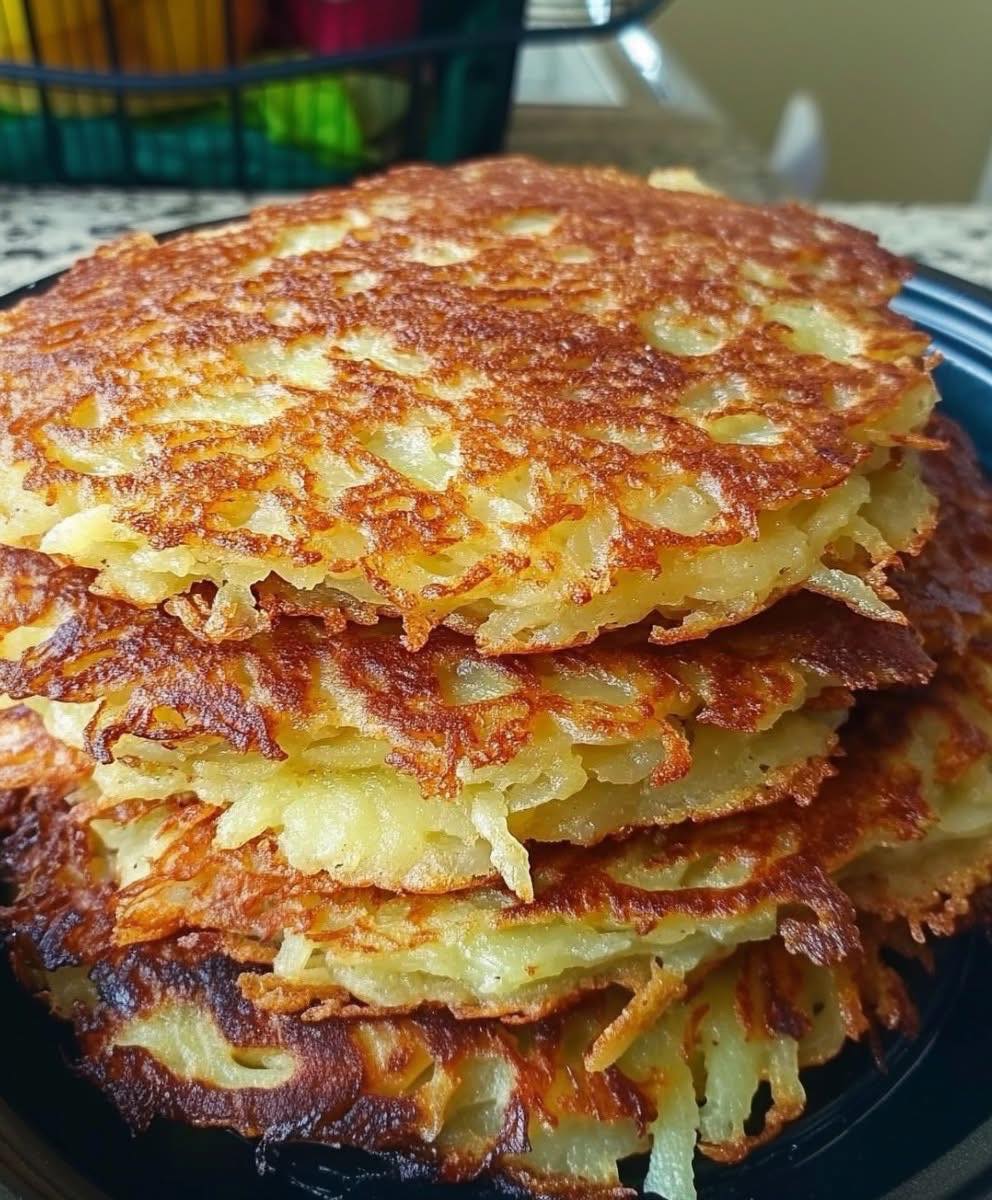
German Potato Pancakes (Kartoffelpuffer): A Crispy Comfort Food Classic

German potato pancakes, known as Kartoffelpuffer, Reibekuchen, or Kartoffelpfannkuchen depending on the region, are one of Germany’s most beloved comfort foods. Crispy on the outside, tender on the inside, and deeply satisfying, these golden pancakes are a staple at Christmas markets, family kitchens, and traditional festivals. Simple ingredients, honest flavors, and centuries of tradition make them a timeless dish that continues to win hearts around the world.

A Brief History of Kartoffelpuffer

Potatoes arrived in Europe in the 16th century and quickly became a cornerstone of German cuisine due to their affordability and versatility. Over time, cooks discovered that grating raw potatoes and frying them into pancakes created a delicious way to transform humble ingredients into a filling meal. Kartoffelpuffer became especially popular among working families because they were inexpensive, easy to prepare, and could be served sweet or savory depending on what was available.

Today, potato pancakes are enjoyed across Germany, from street vendors selling them fresh off the griddle to home kitchens passing down family recipes from one generation to the next.

What Makes German Potato Pancakes Special?

Unlike hash browns or latkes, German potato pancakes are typically made with raw grated potatoes, not cooked ones. This gives them their signature crisp texture and rich potato flavor. Onion is almost always included, adding depth and a subtle sweetness, while eggs and a small amount of flour bind everything together.

Another defining feature is how they are served. In Germany, Kartoffelpuffer are commonly paired with applesauce (Apfelmus), creating a perfect contrast between salty, crispy pancakes and sweet, fruity sauce. In savory versions, they may be served with sour cream, quark, smoked salmon, or even alongside sausages.

Ingredients You’ll Need

To make authentic German potato pancakes, you only need a handful of pantry staples:

  • Potatoes (starchy varieties work best)
  • Onion
  • Eggs
  • All-purpose flour
  • Salt
  • Optional: black pepper or nutmeg
  • Oil for frying (sunflower or neutral vegetable oil)

The simplicity of these ingredients is exactly what makes the dish shine.

Step-by-Step Preparation

1. Prepare the Potatoes
Peel the potatoes and grate them finely using a box grater or food processor. Finely grated potatoes create a smoother batter and crispier pancakes.

2. Remove Excess Moisture
Place the grated potatoes in a clean kitchen towel or cheesecloth and squeeze out as much liquid as possible. This step is crucial—too much moisture will prevent the pancakes from becoming crispy.

3. Add Onion and Binding Ingredients
Grate the onion directly into the potatoes. This not only adds flavor but also helps prevent discoloration. Mix in the eggs, flour, and salt. If you like, add a pinch of black pepper or nutmeg for extra warmth.

4. Heat the Oil
Heat a generous amount of oil in a heavy skillet over medium-high heat. The oil should be hot enough that the batter sizzles immediately when added.

5. Fry Until Golden
Spoon small portions of the mixture into the pan and gently flatten them into thin pancakes. Fry for about 3–4 minutes per side until deeply golden and crispy. Avoid overcrowding the pan.

6. Drain and Serve
Transfer the pancakes to a plate lined with paper towels to drain excess oil. Serve immediately while hot and crisp.

Serving Suggestions

Traditional German potato pancakes are incredibly versatile:

  • Classic Sweet Style: Serve hot with applesauce or apple compote.
  • Savory Style: Pair with sour cream, crème fraîche, or herbed quark.
  • Hearty Meal: Serve alongside bratwurst, sauerkraut, or a green salad.
  • Modern Twist: Top with smoked salmon and dill for an elegant appetizer.

Whether sweet or savory, Kartoffelpuffer are best enjoyed fresh from the pan.

Tips for Perfect Kartoffelpuffer

  • Use starchy potatoes for the crispiest result.
  • Always squeeze out excess liquid from the potatoes.
  • Keep the pancakes thin; thick pancakes won’t crisp properly.
  • Fry in batches and avoid lowering the oil temperature.
  • Serve immediately—potato pancakes lose their crispness as they cool.

A Dish That Brings People Together

German potato pancakes are more than just food—they are a memory, a tradition, and a shared experience. The aroma of frying potatoes instantly evokes cozy winter evenings, bustling market stalls, and family gatherings around the stove. With just a few ingredients and a little care, you can recreate this beloved German classic in your own kitchen.

Whether you enjoy them with applesauce like generations before you or add your own modern touch, Kartoffelpuffer remain a perfect example of how simple food can be truly extraordinary.

Cream Puffs with Custard Filling A Classic French Dessert You Can Make at Home

Cream puffs, known in France as choux à la crème, are one of the most beloved pastries in the world. With their light, airy shells and rich, silky custard filling, they look elegant enough for a French patisserie window—yet they’re surprisingly achievable in a home kitchen. If you’ve ever admired cream puffs but felt intimidated to make them yourself, this guide will show you that with a little patience and the right technique, you can create this classic dessert from scratch.


What Are Cream Puffs?

Cream puffs are made from pâte à choux, a unique pastry dough cooked on the stovetop and then baked in the oven. Unlike most doughs, choux pastry doesn’t rely on yeast or baking powder. Instead, steam created during baking causes the dough to puff up, forming a hollow center—perfect for filling with custard, whipped cream, or even ice cream.

The custard filling, also known as crème pâtissière, is a thick, creamy vanilla-flavored custard made from milk, eggs, sugar, and cornstarch. When paired with the crisp shell, it creates a perfect balance of textures and flavors.


Ingredients You’ll Need

For the Choux Pastry (Cream Puff Shells):

  • 1 cup water
  • ½ cup unsalted butter
  • 1 cup all-purpose flour
  • 4 large eggs
  • ¼ teaspoon salt

For the Custard Filling:

  • 2 cups whole milk
  • ½ cup granulated sugar
  • 4 egg yolks
  • ¼ cup cornstarch
  • 2 tablespoons unsalted butter
  • 1½ teaspoons vanilla extract

Step 1: Making the Choux Pastry

Begin by preheating your oven to 400°F (200°C) and lining a baking sheet with parchment paper.

In a medium saucepan, combine the water, butter, and salt. Heat over medium heat until the butter is completely melted and the mixture comes to a rolling boil. Reduce the heat to low and add the flour all at once. Stir vigorously with a wooden spoon until the mixture pulls away from the sides of the pan and forms a smooth ball. This step is crucial—it cooks out excess moisture and helps the dough puff properly.

Remove the pan from the heat and let the dough cool for about 5 minutes. This prevents the eggs from scrambling when added. Add the eggs one at a time, mixing thoroughly after each addition. The dough will look lumpy at first, but keep mixing until it becomes smooth, glossy, and thick enough to hold its shape.

Spoon or pipe small mounds of dough onto the prepared baking sheet, spacing them a few inches apart. Bake for 25–30 minutes, or until the cream puffs are golden brown and firm. Do not open the oven during baking, as this can cause them to collapse.

Once baked, remove them from the oven and poke a small hole in the side of each puff to release steam. Let them cool completely before filling.


Step 2: Preparing the Custard Filling

While the cream puff shells cool, prepare the custard. In a saucepan, heat the milk over medium heat until it’s hot but not boiling.

In a separate bowl, whisk together the sugar, egg yolks, and cornstarch until smooth and pale. Slowly pour the hot milk into the egg mixture while whisking constantly to prevent curdling. Return the mixture to the saucepan and cook over medium heat, stirring continuously, until it thickens into a smooth custard.

Once thickened, remove from heat and stir in the butter and vanilla extract. Transfer the custard to a bowl, cover with plastic wrap pressed directly onto the surface to prevent a skin from forming, and refrigerate until fully chilled.


Step 3: Filling the Cream Puffs

When both the shells and custard are cool, it’s time to assemble. Transfer the custard to a piping bag fitted with a small round tip. Insert the tip into the hole made earlier and gently pipe custard into each puff until it feels full and heavy.

Alternatively, you can slice the cream puffs in half horizontally and spoon the custard inside, sandwich-style.


Serving and Variations

Cream puffs are delicious as-is, but you can elevate them even further:

  • Dust with powdered sugar for a classic finish
  • Drizzle with melted chocolate or chocolate ganache
  • Fill with flavored custard, such as coffee, chocolate, or lemon
  • Add fresh berries for a light, fruity contrast

They’re best enjoyed the same day they’re filled, when the shells are crisp and the custard is fresh.


Final Thoughts

Cream puffs with custard filling are proof that classic French desserts don’t have to be complicated. With simple ingredients and a bit of technique, you can create a bakery-quality treat right at home. Whether you serve them at a dinner party, a holiday gathering, or simply as a weekend indulgence, these delicate pastries are sure to impress—and once you master them, you’ll find yourself making them again and again.

Air fryer breakfast toast recipe with egg

Air Fryer Breakfast Toast with Egg: A Crispy, Comforting Morning Favorite

If you’re looking for a quick, satisfying, and comforting breakfast that doesn’t require standing over a stove, air fryer breakfast toast with egg is the perfect solution. This recipe combines crispy toast, a perfectly cooked egg, and endless topping possibilities—all made in minutes using your air fryer. Whether you’re rushing out the door or enjoying a slow morning at home, this breakfast toast feels special while remaining incredibly simple.

The air fryer has completely changed how we prepare breakfast. It delivers crisp results with less oil, minimal cleanup, and consistent cooking. This toast-with-egg recipe is a favorite because it’s versatile, budget-friendly, and suitable for beginners.


Why Make Breakfast Toast in the Air Fryer?

Using an air fryer for breakfast toast has several advantages:

  • Perfect texture: Crispy edges with a soft center
  • Hands-off cooking: No flipping or pan-watching
  • Quick cooking time: Ready in under 10 minutes
  • Less oil needed: Healthier than pan-frying
  • Easy cleanup: No greasy pans

The air fryer’s circulating heat cooks the egg evenly while toasting the bread just right.


Ingredients (Serves 1–2)

Basic ingredients:

  • 1–2 slices of bread (white, whole wheat, sourdough, or multigrain)
  • 1–2 large eggs
  • 1 tablespoon butter or olive oil
  • Salt, to taste
  • Black pepper, to taste

Optional toppings:

  • Shredded cheese (cheddar, mozzarella, or parmesan)
  • Cherry tomatoes, sliced
  • Avocado slices
  • Fresh herbs (parsley, chives, basil)
  • Chili flakes or paprika
  • Cooked turkey bacon or beef sausage
  • Spinach or mushrooms (pre-sautéed)

Step-by-Step Instructions

Step 1: Preheat the Air Fryer

Preheat your air fryer to 180°C (350°F) for about 2–3 minutes. Preheating ensures even cooking and crispier toast.

Step 2: Prepare the Bread

Take a slice of bread and gently press down the center using the back of a spoon or your fingers, creating a shallow well. This helps keep the egg from sliding off.

Lightly butter or brush olive oil over the bread, especially around the edges for extra crispiness.

Step 3: Add the Egg

Carefully crack one egg into the center of the bread. Don’t worry if some egg white spreads slightly—this is normal.

Sprinkle with salt and black pepper. If you like spice, add chili flakes or paprika at this stage.

Step 4: Air Fry

Place the prepared toast carefully into the air fryer basket.

Air fry at 180°C (350°F) for:

  • 6–7 minutes for a runny yolk
  • 8–9 minutes for a soft-set yolk
  • 10–11 minutes for a fully cooked yolk

Cooking time may vary slightly depending on your air fryer model and bread thickness.

Step 5: Add Cheese (Optional)

If using cheese, add it during the last 2 minutes of cooking so it melts without burning.

Step 6: Serve Immediately

Remove the toast carefully using tongs or a spatula. Garnish with fresh herbs, avocado slices, or tomatoes. Serve hot for the best texture and flavor.


Flavor Variations to Try

1. Cheesy Breakfast Toast

Add shredded cheddar or mozzarella before cooking. Finish with black pepper and herbs.

2. Mediterranean Style

Top with cherry tomatoes, olives, feta cheese, and oregano after cooking.

3. Protein-Packed Version

Add cooked turkey bacon, chicken sausage, or leftover grilled chicken.

4. Veggie Lover’s Toast

Add sautéed mushrooms, spinach, or bell peppers before cracking the egg.

5. Avocado Egg Toast

Top with smashed avocado, lemon juice, and chili flakes after cooking.


Tips for Perfect Results

  • Use thick bread to prevent sogginess.
  • Always preheat your air fryer.
  • If the bread browns too quickly, loosely cover with foil.
  • Crack the egg into a small bowl first, then pour it onto the toast for better control.
  • Don’t overcrowd the air fryer basket.

Nutrition Benefits

This breakfast toast provides:

  • Protein from eggs
  • Energy from bread
  • Healthy fats if using olive oil or avocado
  • Customizable nutrients with vegetables and herbs

It’s a balanced breakfast that keeps you full without feeling heavy.


Final Thoughts

Air fryer breakfast toast with egg is one of those recipes you’ll come back to again and again. It’s fast, comforting, customizable, and perfect for busy mornings or relaxed weekends. With minimal ingredients and almost no cleanup, it proves that great breakfasts don’t need to be complicated.

Once you try this recipe, you’ll likely start experimenting with toppings and flavors, making it your own signature morning dish. Simple, satisfying, and delicious—this air fryer breakfast toast truly checks all the boxes. 🍳🍞

Never Use Ginger If You Have Any of These Conditions It Can Cause Serious Health Problems

Never Use Ginger If You Have Any of These Conditions – It Can Cause Serious Health Problems

Ginger is widely praised as a natural remedy. It’s used to soothe nausea, reduce inflammation, ease digestion, and even support immunity. Because it’s natural, many people assume ginger is completely safe for everyone. Unfortunately, that’s not true. Like many powerful herbs, ginger can cause serious health problems if used by the wrong person or in the wrong amount.

If you regularly consume ginger tea, raw ginger, supplements, or concentrated extracts, it’s important to know when ginger may do more harm than good. Below are key conditions where ginger should be avoided or used only under medical supervision.

  1. Bleeding Disorders

Ginger naturally thins the blood by slowing clot formation. While this can be helpful for circulation, it can be dangerous for people with bleeding disorders such as hemophilia or low platelet counts.

If you already struggle with excessive bleeding, nosebleeds, or easy bruising, ginger can worsen these symptoms. Even moderate daily intake may increase the risk of internal bleeding or prolonged bleeding after minor injuries.

  1. If You Take Blood-Thinning Medications

People taking medications such as warfarin, aspirin, clopidogrel, or other anticoagulants should be extremely cautious with ginger. Combining ginger with blood thinners can amplify their effects, raising the risk of dangerous bleeding events.

This includes bleeding in the stomach, intestines, brain, or after surgery. Ginger supplements are especially risky because they deliver much higher doses than food-based ginger.

  1. Before or After Surgery

Doctors commonly advise stopping ginger at least 1–2 weeks before surgery. Because ginger interferes with blood clotting, it can cause excessive bleeding during or after surgical procedures, including dental surgery.

Using ginger too soon after surgery may delay healing or cause complications that require medical intervention.

  1. Gallstones or Gallbladder Problems

Ginger stimulates bile production, which helps digestion in healthy people. However, if you have gallstones or gallbladder disease, this increased bile flow can trigger pain, inflammation, or gallbladder attacks.

People with a history of gallstones should avoid medicinal doses of ginger unless approved by a healthcare professional.

  1. Severe Acid Reflux or Stomach Ulcers

Although ginger can help mild digestive discomfort, it can worsen symptoms in people with severe acid reflux (GERD), gastritis, or stomach ulcers.

Large amounts of ginger may irritate the stomach lining, increase acid production, and cause:

Burning pain

Nausea

Bloating

Worsening heartburn

If ginger causes stomach pain or burning, it’s a clear sign to stop using it.

  1. Low Blood Sugar or Diabetes on Medication

Ginger can lower blood sugar levels. While this may sound beneficial, it can be dangerous for people with diabetes who are already taking insulin or blood sugar–lowering drugs.

Combining ginger with diabetes medication may cause:

Hypoglycemia (dangerously low blood sugar)

Dizziness

Confusion

Fainting

If you have diabetes, ginger should only be used in small food amounts unless your doctor approves it.

  1. High Blood Pressure on Medication

Ginger may lower blood pressure by improving circulation and relaxing blood vessels. However, when combined with blood pressure medications, it can cause blood pressure to drop too low.

This can lead to:

Weakness

Lightheadedness

Blurred vision

Increased risk of falls

People taking antihypertensive drugs should not use ginger supplements without medical guidance.

  1. Heart Rhythm Disorders

High doses of ginger may stimulate the heart and affect electrical activity. For people with arrhythmias or irregular heartbeat, this can worsen symptoms such as palpitations or rapid heart rate.

While small culinary amounts are usually safe, concentrated ginger products should be avoided if you have a known heart rhythm condition.

  1. Pregnancy (In High Doses)

Ginger is sometimes recommended for pregnancy-related nausea, but excessive intake can be risky. Large amounts of ginger may increase the risk of bleeding or uterine contractions, especially in late pregnancy.

Pregnant women should:

Avoid ginger supplements

Limit ginger to small food or tea amounts

Always consult a healthcare provider before regular use

  1. Ginger Allergy or Sensitivity

Some people are allergic or sensitive to ginger, even if they don’t realize it at first. Symptoms may include:

Skin rashes

Mouth or throat irritation

Stomach pain

Breathing difficulty (rare but serious)

Any allergic reaction is a strong reason to stop using ginger immediately.

Final Thoughts

Ginger is not a harmless cure-all. It is a powerful natural substance that interacts with medications, affects blood clotting, and alters blood sugar and pressure. For healthy individuals, small culinary amounts are generally safe. But for people with certain medical conditions, ginger can trigger serious health problems.

If you have a chronic illness, take daily medication, or use ginger regularly for “medicinal” purposes, always speak with a healthcare professional first. Natural does not always mean safe—and when it comes to ginger, knowing when not to use it can protect your health.

Clear Your Lungs and Stop Coughing in Just Three Days

Clear Your Lungs and Stop Coughing in Just Three Days

A persistent cough, chest tightness, or heavy-feeling lungs can make even simple daily tasks exhausting. Whether it’s caused by pollution, smoking history, seasonal allergies, a recent cold, or excess mucus buildup, your lungs sometimes need focused care to recover. While no remedy can magically cure all lung problems overnight, the good news is that with the right natural strategies, many people notice significant relief within just three days.

This guide shares safe, practical steps to help clear your lungs, calm coughing, and support easier breathing—naturally.

Day 1: Loosen Mucus and Reduce Irritation

  1. Hydration Is Non-Negotiable
    Your lungs rely on fluids to keep mucus thin and easy to expel. Thick mucus traps irritants and triggers coughing.

Drink warm water frequently

Add herbal teas like ginger, thyme, or chamomile

Avoid ice-cold drinks that can tighten airways

Aim for at least 8–10 glasses of fluids throughout the day.

  1. Steam Inhalation for Immediate Relief
    Warm steam helps open airways and loosen trapped mucus.

How to do it:

Boil water and pour it into a bowl

Lean over the bowl, cover your head with a towel

Breathe deeply for 10–15 minutes

Optional additions:

A few drops of eucalyptus or peppermint oil

A pinch of salt

Many people feel relief after just one session.

  1. Avoid Lung Irritants
    On day one, reduce anything that inflames your lungs:

Cigarette smoke

Strong perfumes or cleaning chemicals

Dust and polluted air

If needed, wear a mask outdoors or keep windows closed during heavy pollution.

Day 2: Calm Inflammation and Strengthen Breathing

  1. Honey and Warm Liquids for Cough Control
    Honey coats the throat and helps suppress coughing naturally.

Try this:

1 tablespoon raw honey

Mixed into warm water or herbal tea

Drink 2–3 times a day

Honey is especially helpful for nighttime coughing.

  1. Anti-Inflammatory Foods
    What you eat directly affects lung health.

Focus on:

Garlic and onions (natural lung cleansers)

Turmeric (powerful anti-inflammatory)

Citrus fruits (vitamin C boosts immune response)

Leafy greens

Avoid:

Fried foods

Excess dairy (can thicken mucus in some people)

Sugary snacks

  1. Controlled Deep Breathing Exercises
    Deep breathing improves oxygen flow and helps clear stagnant air from the lungs.

Simple exercise:

Sit upright

Inhale slowly through the nose for 4 seconds

Hold for 2 seconds

Exhale through the mouth for 6 seconds

Repeat for 5–10 minutes, twice a day.

Day 3: Expel Toxins and Support Recovery

  1. Light Physical Activity
    Gentle movement encourages lung expansion and mucus clearance.

Good options:

Brisk walking

Gentle stretching

Light yoga

Avoid intense workouts if coughing is still strong.

  1. Postural Drainage (Natural Lung Clearing)
    This technique uses gravity to help drain mucus.

How to try it:

Lie on your side with your chest slightly lower than your hips

Stay for 5–10 minutes

Switch sides

Follow with gentle coughing to expel loosened mucus.

  1. Improve Sleep Position
    Sleeping flat can worsen coughing. Slight elevation helps keep airways open.

Use an extra pillow

Sleep on your side rather than your back

Quality sleep accelerates lung healing.

Helpful Natural Add-Ons

Ginger tea: Soothes airways and reduces inflammation

Thyme tea: Traditionally used for cough relief

Warm saltwater gargle: Reduces throat irritation

Humidifier: Keeps airways moist, especially in dry climates

When to Be Cautious

These methods support natural lung cleansing, but they are not a replacement for medical care. Seek professional help if you experience:

Shortness of breath

Chest pain

High fever

Cough lasting more than three weeks

Coughing up blood

People with asthma, COPD, or chronic lung disease should consult a healthcare provider before trying new remedies.

What Results to Expect in Three Days

Many people report:

Less frequent coughing

Easier breathing

Reduced chest tightness

Better sleep

Consistency is key. Even after three days, continuing these habits can further improve lung health.

Final Thoughts

Your lungs work tirelessly every second of your life. Giving them focused care—even for just three days—can make a noticeable difference. By staying hydrated, using steam therapy, eating anti-inflammatory foods, and practicing deep breathing, you help your body do what it’s designed to do: heal itself.

Treat your lungs kindly, and they will reward you with clearer breathing, calmer coughing, and renewed energy.

Here’s how to clean dirty bed pillows to leave them white and smelling sweet

Here’s how to clean dirty bed pillows so they turn bright white, fresh, and sweet-smelling again—without ruining their shape or softness. Many people wash their sheets regularly but forget about pillows, even though they absorb sweat, oils, saliva, dust mites, and odors every night. Over time, this buildup causes yellow stains, flatness, and unpleasant smells. The good news is that with the right method, most pillows can look and feel almost new again.


Why Pillows Turn Yellow and Smelly

Pillow discoloration usually comes from sweat, natural body oils, wet hair, skincare products, and humidity. Even when you use pillowcases, moisture slowly seeps through. Dust mites and bacteria also thrive in warm, damp fabric, contributing to musty odors. Washing pillows the wrong way—or not washing them at all—makes the problem worse.

Experts recommend washing pillows every 3–6 months to keep them hygienic and fresh.


Step 1: Check the Care Label First

Before cleaning, always read the care label. Most pillows fall into one of these categories:

  • Synthetic or polyester pillows – Machine washable
  • Down or feather pillows – Machine washable with care
  • Memory foam or latex pillows – NOT machine washable

This method works best for synthetic and down pillows.


Step 2: Pre-Treat Yellow Stains

For heavily stained pillows, pre-treatment is essential.

You’ll need:

  • Baking soda
  • White vinegar
  • Hydrogen peroxide (3%)
  • Liquid laundry detergent

How to do it:

  1. Mix ½ cup baking soda with enough hydrogen peroxide to form a paste.
  2. Gently rub the paste onto yellow stains using a soft brush or cloth.
  3. Let it sit for 30–60 minutes.
  4. Lightly mist with white vinegar to help break down odors.

This combination lifts stains and neutralizes smells naturally.


Step 3: Wash Pillows the Right Way

Place two pillows in the washing machine to keep it balanced.

Use hot water (if allowed by the care label) to kill bacteria and dust mites.

Add to the washer:

  • 1–2 tablespoons of liquid detergent
  • ½ cup baking soda (for whitening and odor removal)
  • 1 cup white vinegar in the fabric softener compartment

Avoid using bleach—it can break down pillow fibers and cause yellowing over time.


Step 4: Extra Rinse for Freshness

Always run an extra rinse cycle. Pillows trap soap easily, and leftover detergent can make them stiff and smelly. The extra rinse ensures all residues are fully removed, leaving the pillows soft and clean.


Step 5: Dry Thoroughly (This Is Crucial)

Improper drying is the main reason pillows develop mildew smells.

Drying tips:

  • Use low to medium heat
  • Add 2–3 clean tennis balls or dryer balls to fluff the filling
  • Pause the dryer halfway to reshape the pillows

Drying may take longer than clothes—sometimes two full cycles. Make sure pillows are completely dry inside, not just on the surface.


Step 6: Sun-Dry for Natural Whitening

If possible, place pillows in direct sunlight for a few hours after drying. Sunlight naturally whitens fabric and kills lingering bacteria. It also leaves pillows smelling fresh and clean without artificial fragrances.


How to Clean Memory Foam Pillows

Memory foam pillows should never go in the washer.

Instead:

  1. Fill a tub with lukewarm water and a small amount of mild detergent.
  2. Gently squeeze the pillow (do not twist).
  3. Rinse thoroughly with clean water.
  4. Press out excess water using towels.
  5. Air-dry flat in a well-ventilated area.

How to Keep Pillows White Longer

  • Use zippered pillow protectors under pillowcases
  • Wash pillowcases weekly
  • Shower before bed to reduce oil transfer
  • Keep hair completely dry at bedtime
  • Replace pillows every 1.5–2 years

The Sweet-Smelling Final Touch

For a naturally pleasant scent, add a few drops of lavender or lemon essential oil to a damp cloth and toss it into the dryer during the final 10 minutes. This leaves pillows lightly scented without overpowering chemicals.


Final Thoughts

Clean pillows don’t just look better—they improve sleep quality, reduce allergens, and make your entire bed feel fresher. With this simple method, even old, yellowed pillows can be revived and made soft, white, and sweet-smelling again. Once you try it, you’ll never ignore pillow washing again.

 gluten free biscuits

Gluten-Free Biscuits: Crispy, Comforting, and Perfect for Everyone

Gluten-free biscuits are no longer a compromise—they’re a delicious choice enjoyed by people with celiac disease, gluten sensitivity, or anyone simply looking to diversify their baking. Light, crumbly, and full of flavor, gluten-free biscuits can be just as satisfying as traditional ones when made with the right ingredients and techniques. Whether you enjoy them with tea, serve them as a snack, or pair them with savory dishes, these biscuits deserve a place in your kitchen.

What Makes a Biscuit Gluten-Free?

Traditional biscuits rely on wheat flour, which contains gluten—a protein that provides elasticity and structure. In gluten-free baking, this structure must be recreated using alternative flours and binding agents. The key is balance. A good gluten-free biscuit should be tender, slightly crisp on the outside, and soft inside, without being gritty or dry.

Common gluten-free flours include:

  • Rice flour (light and neutral)
  • Almond flour (rich and moist)
  • Oat flour (mild and slightly sweet, ensure certified gluten-free)
  • Corn flour or cornstarch (adds tenderness)
  • Tapioca or potato starch (improves texture and chew)

Most successful recipes use a blend rather than a single flour.

Why People Love Gluten-Free Biscuits

Gluten-free biscuits aren’t just for those avoiding gluten. Many people enjoy them because they are:

  • Easier to digest for sensitive stomachs
  • Naturally lighter in texture
  • Customizable for dairy-free, sugar-free, or vegan diets
  • A great base for both sweet and savory flavors

From breakfast spreads to afternoon snacks, they adapt effortlessly to any occasion.

Basic Gluten-Free Biscuit Recipe

This simple recipe produces tender, flaky biscuits with minimal effort.

Ingredients:

  • 2 cups gluten-free all-purpose flour (with xanthan gum)
  • 1 tablespoon baking powder
  • ½ teaspoon salt
  • 1 tablespoon sugar (optional)
  • 6 tablespoons cold butter or dairy-free margarine
  • ¾ cup cold milk or plant-based milk

Instructions:

  1. Preheat the oven to 200°C (400°F). Line a baking tray with parchment paper.
  2. In a bowl, mix flour, baking powder, salt, and sugar.
  3. Cut cold butter into small cubes and rub into the flour until the mixture resembles coarse crumbs.
  4. Gradually add milk, mixing gently until a soft dough forms.
  5. Roll the dough between two sheets of parchment paper to about 1.5 cm thickness.
  6. Cut into rounds using a biscuit cutter or glass.
  7. Bake for 12–15 minutes, until lightly golden on top.
  8. Cool slightly before serving.

Tips for Perfect Gluten-Free Biscuits

  • Keep ingredients cold: Cold butter helps create a flaky texture.
  • Don’t overmix: Overworking the dough can make biscuits dense.
  • Let the dough rest: Resting for 10 minutes allows flours to absorb moisture.
  • Use parchment paper: Gluten-free dough is softer and easier to handle this way.

Sweet Variations

Gluten-free biscuits can easily be transformed into delightful sweet treats:

  • Add vanilla and extra sugar for tea biscuits
  • Mix in chocolate chips or raisins
  • Sprinkle cinnamon sugar on top before baking
  • Drizzle with honey or glaze once cooled

These versions pair perfectly with tea, coffee, or warm milk.

Savory Variations

Savory gluten-free biscuits are equally popular and incredibly versatile:

  • Add grated cheese and herbs
  • Mix in garlic powder or black pepper
  • Serve with soups, stews, or breakfast eggs
  • Use as a base for mini sandwiches

They make excellent dinner rolls or side dishes without anyone noticing they’re gluten-free.

Storage and Shelf Life

Gluten-free biscuits are best eaten fresh but store well when handled properly:

  • Keep in an airtight container at room temperature for 2 days
  • Refrigerate for up to 5 days
  • Freeze baked biscuits for up to 2 months

To reheat, warm in the oven for a few minutes to restore freshness.

Are Gluten-Free Biscuits Healthier?

Gluten-free does not automatically mean healthier, but it can be beneficial for those with intolerance. Using whole-grain gluten-free flours like almond or oat flour adds fiber, protein, and healthy fats. Reducing refined sugar and pairing biscuits with nutrient-rich foods can make them part of a balanced diet.

Final Thoughts

Gluten-free biscuits prove that dietary restrictions don’t have to limit enjoyment. With the right flour blend, gentle handling, and a bit of creativity, you can make biscuits that are just as comforting, flavorful, and satisfying as traditional ones. Whether you prefer them sweet or savory, homemade gluten-free biscuits bring warmth to the table and confidence to the baker.

Once you master the basics, you’ll find endless ways to customize them—and you may never miss gluten at all.

17 signs of kidney trouble you can see don’t ignore

Your kidneys work quietly behind the scenes, filtering waste, balancing fluids, and keeping your body in harmony. Because they’re so efficient, kidney problems often develop slowly—and many people miss the early warning signs. The good news? Your body often gives visible clues. If you know what to look for, you can catch problems early and protect your health. Here are 17 visible signs of kidney trouble you should never ignore.


1. Swelling in the Feet, Ankles, or Hands

When kidneys can’t remove excess sodium and fluids, swelling (edema) appears—most commonly in the feet, ankles, hands, and sometimes the face.

2. Puffy Eyes, Especially in the Morning

Persistent puffiness around the eyes can signal protein leaking into the urine, a common early sign of kidney damage.

3. Changes in Urine Color or Appearance ⚠️

This is a big one. Foamy urine, dark brown urine, cloudy urine, or urine with a pink or reddish tint can indicate protein loss, dehydration, infection, or even blood in the urine. Don’t ignore sudden or ongoing changes.

4. Frequent Urination (Especially at Night)

If you’re waking up multiple times to urinate, your kidneys may be struggling to concentrate urine properly.

5. Burning or Pain During Urination

This can indicate a urinary tract infection (UTI). If untreated, UTIs can spread to the kidneys and cause serious damage.

6. Persistent Fatigue and Weakness

Failing kidneys produce less erythropoietin, a hormone needed to make red blood cells. This can lead to anemia, making you feel constantly tired and weak.

7. Dry, Itchy Skin

Kidneys help maintain the right balance of minerals. When they fail, mineral imbalances can cause dry, itchy, irritated skin.

8. Muscle Cramps

Low calcium or imbalanced electrolytes—often linked to kidney dysfunction—can cause painful muscle cramps, especially at night.

9. Bad Breath or Metallic Taste

A buildup of waste in the blood (uremia) can cause breath that smells like ammonia and a persistent metallic taste in the mouth.

10. Nausea and Vomiting

As toxins accumulate in the body due to poor kidney filtration, nausea and vomiting may become frequent.

11. Loss of Appetite

Kidney trouble can reduce appetite, leading to unexplained weight loss and nutritional deficiencies.

12. Back or Side Pain

Pain just below the rib cage or in the lower back—especially on one side—may be linked to kidney infections, stones, or inflammation.

13. Difficulty Concentrating

Toxin buildup and anemia can reduce oxygen flow to the brain, making it hard to focus or think clearly.

14. Pale or Yellowish Skin Tone

Anemia related to kidney disease can make your skin look unusually pale or slightly yellow.

15. Cold Sensitivity

Feeling cold even in warm environments may be another sign of anemia caused by kidney dysfunction.

16. High Blood Pressure

Kidneys play a key role in regulating blood pressure. Kidney damage can cause hypertension—or uncontrolled blood pressure can further damage the kidneys.

17. Shortness of Breath

Fluid buildup in the lungs or severe anemia caused by kidney failure can make breathing difficult, even during light activity.


Why Early Detection Matters

Kidney disease often progresses silently. By the time severe symptoms appear, significant damage may already be done. Recognizing visible signs early can help slow or even prevent further deterioration with proper treatment and lifestyle changes.

What You Should Do

If you notice one or more of these signs, especially changes in urine (#3), swelling, or ongoing fatigue, consult a healthcare professional promptly. Simple tests—like urine analysis and blood work—can reveal kidney problems early.

Protect Your Kidneys Daily

  • Stay well hydrated
  • Control blood pressure and blood sugar
  • Limit salt and processed foods
  • Avoid excessive painkiller use
  • Get regular checkups, especially if you have diabetes or hypertension

TAKE TWO TABLESPOONS IN THE MORNING AND SAY GOODBYE TO BONE PAIN, NERVE PROBLEMS, CARTILAGE WEAR, ANXIETY, DEPRESSION, AND INSOMNIA

Take Two Tablespoons in the Morning: How a Simple Daily Habit May Support Bones, Nerves, Joints, Mood, and Sleep

Headlines often promise miracle cures, but lasting health rarely comes from magic—it comes from consistent, evidence-based habits. One such habit that has attracted attention for centuries is taking two tablespoons of extra-virgin olive oil (EVOO) in the morning. While it is not a cure-all and should never replace medical treatment, research and traditional use suggest that this simple routine can support bone health, nerve function, joint comfort, emotional balance, and sleep quality when combined with a healthy lifestyle.

Let’s look at what actually happens in the body and why olive oil earns its reputation.


1. Supporting Bone Health and Reducing Bone Pain

Bone pain is often linked to inflammation, mineral loss, or poor nutrient absorption. Extra-virgin olive oil is rich in polyphenols—powerful antioxidants that help reduce chronic inflammation, a key contributor to bone discomfort.

Studies associated with the Mediterranean diet (which relies heavily on olive oil) show better bone density and lower fracture risk, especially in older adults. Olive oil may help the body use calcium and vitamin D more efficiently, both essential for maintaining strong bones. While it won’t rebuild bone overnight, consistent use may help slow age-related bone loss and ease inflammation-related aches.


2. Nourishing Nerves and Supporting Nerve Function

Nerve problems often stem from inflammation, oxidative stress, and poor blood circulation. Olive oil contains healthy monounsaturated fats and antioxidants like oleuropein, which help protect nerve cells from damage.

Healthy fats are crucial for maintaining the myelin sheath, the protective coating around nerves that allows signals to travel properly. Including olive oil regularly may support nerve signaling and overall nervous system health—especially when paired with B-vitamin-rich foods, exercise, and good blood sugar control.


3. Protecting Cartilage and Joint Comfort

Cartilage wear is a major factor in joint stiffness and discomfort as we age. Chronic inflammation accelerates this process. Olive oil’s anti-inflammatory compounds work in a way similar (though much milder) to some anti-inflammatory medications—without the same risks when used in normal food amounts.

Polyphenols in olive oil may help slow cartilage breakdown, support joint lubrication, and reduce morning stiffness. This is why populations that consume olive oil daily often report better mobility and fewer joint complaints later in life.


4. Supporting Emotional Balance: Anxiety and Low Mood

The brain is nearly 60% fat, and the quality of fats we eat directly affects how it functions. Olive oil supports brain health by improving cell membrane flexibility, reducing oxidative stress, and supporting neurotransmitter balance.

Research links olive-oil-rich diets to lower rates of depression and anxiety, likely due to reduced inflammation and better blood flow to the brain. Stable blood sugar levels—another benefit of healthy fats—also play a role in emotional regulation and stress response.

While olive oil is not a treatment for anxiety or depression, using it regularly as part of a balanced diet may support emotional resilience and mental clarity.


5. Promoting Better Sleep and Relaxation

Insomnia is often tied to inflammation, stress hormones, and unstable blood sugar. Taking olive oil in the morning helps regulate metabolism throughout the day, which can lead to more stable energy levels and improved nighttime sleep.

Healthy fats support the production of hormones involved in sleep regulation, including melatonin precursors. By reducing systemic inflammation and supporting nervous system balance, olive oil may indirectly help the body relax more easily at night.


How to Use It Correctly

  • Take 1–2 tablespoons of extra-virgin olive oil in the morning
  • You can take it plain or mix it with:
    • A little lemon juice
    • Warm water
    • Whole-grain toast or yogurt

Choose high-quality extra-virgin olive oil, cold-pressed and stored in a dark bottle. Heat and light destroy beneficial compounds.


Important Reality Check

Olive oil is supportive, not curative. It will not instantly erase chronic pain, nerve damage, depression, or insomnia. Results—if they occur—are gradual and depend on consistency, overall diet, movement, sleep habits, and existing medical conditions.

If you have gallbladder disease, digestive disorders, or are on medication, consult your healthcare provider before increasing fat intake.


The Bottom Line

Taking two tablespoons of extra-virgin olive oil in the morning is a simple, affordable, and time-tested habit that may support:

  • Bone strength
  • Nerve health
  • Joint and cartilage comfort
  • Emotional balance
  • Healthier sleep patterns

It’s not a miracle—but when paired with balanced nutrition, physical activity, and medical care when needed, it can be a powerful ally in long-term wellness.

Sometimes, small daily choices make the biggest difference.

What Happens to the Body After Gallbladder Removal 3 Diseases That May Follow Avoid Surgery If Possible

What Happens to the Body After Gallbladder Removal?
3 Diseases That May Follow – Avoid Surgery If Possible

Gallbladder removal, medically known as cholecystectomy, is one of the most common surgeries worldwide. Doctors often recommend it for gallstones, inflammation, or gallbladder dysfunction. While the operation is generally considered safe and lifesaving in certain cases, many people are unaware that living without a gallbladder can lead to long-term changes in digestion and metabolism. For some individuals, these changes may increase the risk of certain health problems.

Understanding what happens to the body after gallbladder removal can help you make informed decisions and explore alternatives when surgery is not absolutely necessary.


What Is the Gallbladder’s Role?

The gallbladder is a small, pear-shaped organ located beneath the liver. Its main job is to store and concentrate bile, a digestive fluid produced by the liver. Bile helps break down fats and absorb fat-soluble vitamins such as A, D, E, and K.

When you eat a fatty meal, the gallbladder releases bile into the small intestine in a controlled way. This timing and concentration are important for efficient digestion.

After gallbladder removal, bile no longer has a storage reservoir. Instead, it flows continuously and less concentrated from the liver directly into the intestine. While the body can adapt, this change may create digestive and metabolic challenges over time.


What Changes After Gallbladder Removal?

In the short term, many people experience:

  • Diarrhea or loose stools
  • Bloating and gas
  • Fat intolerance
  • Abdominal discomfort after meals

For some, these symptoms fade within weeks or months. For others, they persist and may evolve into chronic conditions.


1. Bile Acid Diarrhea (Chronic Digestive Disorder)

One of the most common long-term issues after gallbladder removal is bile acid malabsorption, often called bile acid diarrhea.

Why it happens:

Without the gallbladder regulating bile release, excess bile can spill into the colon. Bile acids are irritating to the intestinal lining and can pull water into the bowel, leading to frequent, urgent diarrhea.

Common symptoms:

  • Chronic watery diarrhea
  • Urgency after meals
  • Abdominal cramping
  • Burning sensation in the rectum

This condition is often misdiagnosed as irritable bowel syndrome (IBS), leaving patients untreated for years.


2. Fatty Liver Disease (Non-Alcoholic Fatty Liver Disease – NAFLD)

After gallbladder removal, the liver must work harder to continuously produce bile. Over time, this constant demand can disrupt fat metabolism and insulin sensitivity.

How it may develop:

  • Continuous bile flow alters fat digestion
  • Increased fat accumulation in the liver
  • Higher risk of insulin resistance

This can contribute to non-alcoholic fatty liver disease, a condition where excess fat builds up in liver cells.

Warning signs:

  • Fatigue
  • Right-sided abdominal discomfort
  • Elevated liver enzymes
  • Often no symptoms in early stages

If left unmanaged, fatty liver disease can progress to inflammation, fibrosis, and even cirrhosis.


3. Increased Risk of Metabolic Disorders

Research suggests that gallbladder removal may be associated with a higher risk of metabolic syndrome, which includes:

  • Type 2 diabetes
  • High cholesterol
  • Obesity
  • Cardiovascular disease

Why the risk increases:

The gallbladder plays a role in bile signaling, which affects glucose metabolism and gut hormones. Removing it may disrupt these signals, contributing to blood sugar instability and weight gain in some individuals.

People who already have insulin resistance, obesity, or poor dietary habits may be more vulnerable to these effects.


Nutrient Deficiencies After Gallbladder Removal

Because bile is less concentrated, fat digestion may be less efficient. Over time, this can lead to deficiencies in:

  • Vitamin A (vision and immunity)
  • Vitamin D (bone health and immunity)
  • Vitamin E (antioxidant protection)
  • Vitamin K (blood clotting)

Symptoms may include weak bones, poor immunity, dry skin, and fatigue.


Can Gallbladder Surgery Be Avoided?

In some cases, yes—especially when gallstones are small, symptoms are mild, or inflammation is not severe.

Non-surgical approaches may include:

  • Dietary changes (low-fat, whole foods diet)
  • Weight management
  • Adequate hydration
  • Managing insulin resistance
  • Certain medications to dissolve cholesterol gallstones (in select cases)

However, surgery is necessary and lifesaving in situations such as:

  • Severe or recurrent gallbladder attacks
  • Acute cholecystitis
  • Gallbladder infection
  • Pancreatitis caused by gallstones
  • Suspicion of gallbladder cancer

Avoiding surgery should never mean ignoring serious symptoms.


Living Well Without a Gallbladder

If gallbladder removal is unavoidable, many people live healthy lives with proper care:

  • Eat smaller, more frequent meals
  • Reduce greasy and fried foods
  • Increase soluble fiber intake
  • Monitor liver health regularly
  • Supplement fat-soluble vitamins if needed (under medical guidance)

Final Thoughts

Gallbladder removal can be essential, but it is not a “minor” change for the body. The gallbladder plays a subtle yet important role in digestion and metabolism. For some people, its removal may increase the risk of chronic digestive problems, fatty liver disease, and metabolic disorders.

If surgery is suggested, it’s wise to discuss all options, understand potential long-term effects, and make lifestyle changes that support digestive and liver health. When possible and medically safe, prevention and conservative treatment may help you avoid surgery—and its lifelong consequences.