Everyone should know that clove steam has the power to

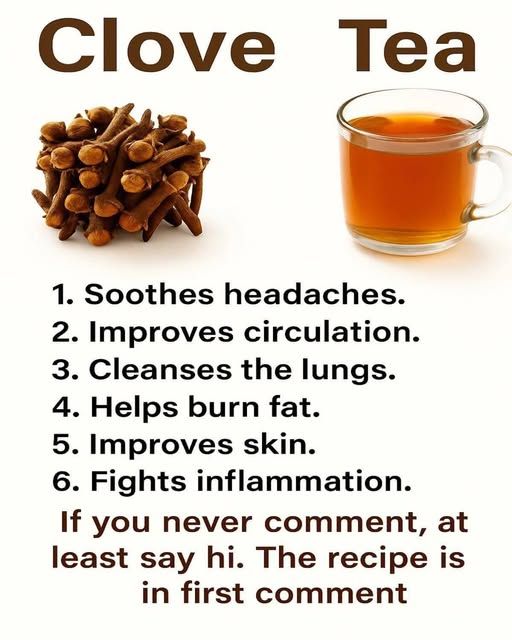
For centuries, cloves have been treasured in traditional medicine systems across Asia, the Middle East, and Africa. While most people recognize cloves as a warming kitchen spice, far fewer know about one of their most underrated uses: clove steam. This simple home remedy—made by inhaling steam infused with cloves—has long been used to support respiratory comfort, oral health, skin clarity, and overall well-being. Though it is not a cure or replacement for medical treatment, clove steam offers several gentle, natural benefits that many people can safely enjoy.

What Is Clove Steam?

Clove steam is created by adding whole cloves or clove powder to hot water and inhaling the rising steam. The steam carries clove’s natural aromatic compounds—especially eugenol, the main active component—into the nasal passages and airways. This method allows the beneficial properties of cloves to act quickly and locally, which is why steaming has been used traditionally for congestion, sinus discomfort, and relaxation.

The Natural Compounds Behind Clove Steam

Cloves are rich in:

  • Eugenol – known for its soothing, antimicrobial, and anti-inflammatory properties

  • Antioxidants – help combat oxidative stress

  • Volatile oils – responsible for the warming aroma and therapeutic steam effects

When heated, these compounds are released into the steam, making inhalation particularly effective for short-term relief and comfort.

1. Supports Clear Breathing and Sinus Comfort

One of the most common traditional uses of clove steam is for nasal congestion and sinus pressure. The warm steam helps loosen mucus, while clove’s natural compounds may reduce irritation in the nasal passages. Many people find clove steam helpful during seasonal colds, dry weather, or allergy-related stuffiness.

The warming sensation can make breathing feel easier and more comfortable, especially when combined with slow, deep inhalation.

2. May Help Soothe Cough and Throat Irritation

Clove has been traditionally used to calm throat discomfort. When inhaled as steam, it may help:

  • Moisturize dry airways

  • Reduce throat irritation caused by dryness or mild coughing

  • Provide a warming, soothing effect

This makes clove steam a popular nighttime remedy in traditional households, especially during colder months.

3. Promotes Oral and Dental Freshness

Cloves have a long history in oral care, particularly for bad breath and gum comfort. Inhaling clove steam through the nose and mouth may help reduce odor-causing bacteria and provide a fresh, clean feeling. Some people also use clove steam after dental hygiene routines for added freshness.

However, it’s important to note that clove steam does not replace brushing, flossing, or professional dental care.

4. Encourages Relaxation and Mental Calm

The warm, spicy aroma of clove has a naturally grounding effect. Many people report that clove steam helps them:

  • Feel more relaxed

  • Reduce tension after a long day

  • Clear mental fog

A few minutes of mindful breathing with clove-infused steam can feel similar to a gentle aromatherapy session, helping the body unwind.

5. May Support Skin Clarity Through Steam Therapy

Facial steaming is a common skincare practice, and adding cloves may enhance the experience. The steam opens pores while clove’s antimicrobial properties may help cleanse the skin surface. Some people use clove steam occasionally to:

  • Remove impurities

  • Support clearer-looking skin

  • Refresh dull or tired skin

This should be done cautiously and not too frequently, especially for sensitive skin.

How to Use Clove Steam Safely

You will need:

  • 4–6 whole cloves

  • 1 bowl of hot (not boiling) water

  • A towel

Steps:

  1. Add cloves to hot water

  2. Lean over the bowl at a safe distance

  3. Cover your head with a towel

  4. Inhale the steam for 5–10 minutes

Important Safety Tips

  • Avoid clove steam if you have asthma unless approved by a healthcare provider

  • Do not use boiling water to prevent burns

  • Keep eyes closed during steaming

  • Stop immediately if irritation occurs

Final Thoughts

Clove steam may be simple, but its gentle benefits have stood the test of time. From supporting easier breathing and relaxation to promoting freshness and comfort, this traditional practice remains a valuable part of natural self-care routines. While it is not a medical treatment or cure, clove steam can be a comforting, affordable, and natural way to support daily wellness when used responsibly.

Sometimes, the most powerful remedies are the simplest ones—passed down quietly, one steaming bowl at a time.

Top 7 Foods That Kill Worms in the Intestine

Top 7 Foods That Kill Worms in the Intestine (With Powerful Natural Recipes)

Intestinal worms are a common health concern worldwide, especially in areas with warm climates, poor sanitation, or contaminated food and water. These parasites can cause symptoms such as stomach pain, bloating, diarrhea, fatigue, unexplained weight loss, and nutrient deficiencies. While medical treatment is essential in severe cases, nature provides powerful foods that help eliminate intestinal worms naturally and restore gut health.

Below are the top 7 foods that kill worms in the intestine, along with simple recipes you can prepare at home to support your digestive system.

1. Garlic – The Natural Parasite Killer

Garlic contains allicin, a sulfur compound with strong antibacterial, antiviral, and antiparasitic properties. It helps paralyze and eliminate worms while strengthening the immune system.

Garlic Detox Recipe

Ingredients:

  • 3 cloves raw garlic

  • 1 cup warm water

  • 1 teaspoon honey

Method:
Crush the garlic and mix with warm water. Add honey and drink on an empty stomach in the morning for 7 days.

Benefits:
Kills parasites, cleanses the gut, boosts immunity.

2. Pumpkin Seeds – Proven Anti-Worm Remedy

Pumpkin seeds contain cucurbitacin, a compound known to paralyze intestinal worms so the body can flush them out naturally.

Pumpkin Seed Paste Recipe

Ingredients:

  • 2 tablespoons raw pumpkin seeds

  • 1 teaspoon honey

Method:
Grind seeds into a paste, mix with honey, and eat before breakfast. Drink warm water afterward.

Benefits:
Especially effective against tapeworms and roundworms.

3. Papaya – Digestive Enzyme Powerhouse

Papaya contains papain, an enzyme that breaks down parasites and improves digestion. Papaya seeds are even more powerful.

Papaya Seed Cleanse

Ingredients:

  • 1 tablespoon papaya seeds

  • 1 cup fresh papaya chunks

  • ½ cup water

Method:
Blend and drink once daily for 5 days.

Benefits:
Destroys parasites and heals the digestive tract.

4. Coconut – Natural Worm Expeller

Coconut has antimicrobial fatty acids that help remove parasites and soothe the gut lining.

Coconut Cleanse Bowl

Ingredients:

  • 1 cup fresh grated coconut

  • 1 teaspoon coconut oil

  • 1 tablespoon yogurt

Method:
Eat in the morning on an empty stomach. Drink warm water after 30 minutes.

Benefits:
Flushes worms and supports healthy digestion.

5. Turmeric – Powerful Anti-Parasitic Spice

Turmeric contains curcumin, known for killing parasites and reducing inflammation in the gut.

Turmeric Gut Cleanse Drink

Ingredients:

  • ½ teaspoon turmeric powder

  • 1 cup warm milk or water

  • 1 teaspoon honey

Method:
Drink at bedtime for 7 days.

Benefits:
Kills worms and heals intestinal lining.

6. Ginger – Stimulates Parasite Removal

Ginger increases stomach acid and digestive enzymes, creating an environment parasites cannot survive in.

Ginger Tea Recipe

Ingredients:

  • 1 teaspoon grated ginger

  • 1 cup boiling water

  • Lemon juice (optional)

Method:
Steep for 10 minutes and drink twice daily.

Benefits:
Expels worms and relieves bloating.

7. Carrots – Natural Intestinal Cleanser

Carrots are rich in fiber and beta-carotene, helping sweep parasites out of the digestive system.

Carrot Detox Salad

Ingredients:

  • 1 cup grated carrots

  • 1 teaspoon olive oil

  • Pinch of salt

  • Lemon juice

Method:
Eat daily before meals.

Benefits:
Cleans intestines and supports gut health.

Best Anti-Worm Recipe Combo (Power Cleanse Smoothie)

This smoothie combines multiple parasite-killing ingredients for maximum effect.

Ingredients:

  • ½ cup papaya

  • 1 tablespoon pumpkin seeds

  • 1 teaspoon grated ginger

  • ½ teaspoon turmeric

  • 1 teaspoon honey

  • 1 cup coconut water

Method:
Blend and drink on an empty stomach for 5–7 days.

Results:
Kills parasites, detoxifies gut, boosts digestion.

Tips to Prevent Intestinal Worms

  • Wash hands thoroughly before eating

  • Drink clean, boiled water

  • Wash fruits and vegetables properly

  • Cook meat thoroughly

  • Avoid walking barefoot in contaminated soil

  • Maintain good hygiene

When to See a Doctor

While natural remedies help, consult a healthcare provider if you experience:

  • Persistent abdominal pain

  • Severe diarrhea

  • Blood in stool

  • Weight loss

  • Fatigue

  • Worms visible in stool

Prescription medication may be necessary for complete treatment.

Final Thoughts

Nature provides powerful solutions to fight intestinal parasites safely. Garlic, pumpkin seeds, papaya, coconut, turmeric, ginger, and carrots work together to cleanse the gut and restore digestive health. Including these foods in your daily diet not only helps eliminate worms but also improves immunity and overall wellness.

18 Powerful Ways to Use Clove Tea to Boost Health and Heal Naturally

Clove tea may look simple, but don’t let its modest appearance fool you. Made from dried clove buds, this ancient herbal drink has been used for centuries in traditional medicine for its warming, healing, and protective properties. Packed with antioxidants, anti-inflammatory compounds, and natural oils like eugenol, clove tea offers a wide range of health benefits when consumed regularly and responsibly.

Below are 18 powerful ways clove tea can support your health naturally and why this spicy brew deserves a place in your daily routine.

1. Strengthens the Immune System

Clove tea is rich in antioxidants that help the body fight free radicals. These antioxidants strengthen immune defenses, helping you ward off common infections like colds and flu.

2. Supports Digestive Health

Struggling with bloating or indigestion? Clove tea stimulates digestive enzymes, improves gut movement, and reduces gas, making it an excellent drink after meals.

3. Relieves Toothache and Oral Pain

Thanks to eugenol’s natural numbing effect, clove tea can help ease mild tooth pain, gum inflammation, and mouth infections when used as a warm rinse or consumed.

4. Reduces Inflammation

Chronic inflammation is linked to many health issues. Clove tea’s anti-inflammatory compounds help soothe joints, muscles, and internal tissues.

5. Helps Control Blood Sugar Levels

Studies suggest cloves may improve insulin sensitivity. Drinking clove tea in moderation may help support healthy blood sugar management, especially when combined with a balanced diet.

6. Improves Liver Function

Clove antioxidants help protect liver cells from oxidative stress and may assist the liver in detoxifying harmful substances more efficiently.

7. Eases Cough and Cold Symptoms

Warm clove tea helps loosen mucus, soothe sore throats, and reduce coughing. Adding honey can enhance its calming effect.

8. Boosts Metabolism

Clove tea gently stimulates metabolism, helping the body burn calories more efficiently. This makes it a supportive drink for weight-management routines.

9. Promotes Better Sleep

Clove tea has mild calming properties that help relax the nervous system, making it a soothing bedtime drink for those struggling with restlessness.

10. Fights Bacterial Infections

Cloves possess natural antibacterial properties that help the body fight harmful bacteria, especially in the digestive and respiratory systems.

11. Relieves Menstrual Discomfort

Women often use clove tea to help reduce cramps and abdominal discomfort during menstruation due to its warming and antispasmodic effects.

12. Improves Circulation

Clove tea helps stimulate blood flow, which can improve oxygen delivery throughout the body and support heart health.

13. Freshens Breath Naturally

Regularly drinking clove tea or using it as a mouth rinse can help neutralize odor-causing bacteria and keep breath fresh.

14. Supports Respiratory Health

Clove tea can help open airways, reduce congestion, and support lung health, making it useful for people with seasonal breathing issues.

15. Protects Against Oxidative Stress

High levels of antioxidants in clove tea help reduce cellular damage, which may slow signs of aging and support long-term wellness.

16. Reduces Nausea

A warm cup of clove tea can help calm the stomach, reduce nausea, and ease mild vomiting or motion sickness.

17. Supports Skin Health

By reducing inflammation and fighting bacteria from within, clove tea may help improve acne-prone skin and promote a clearer complexion.

18. Enhances Overall Vitality

Regular, moderate consumption of clove tea supports energy levels, mental clarity, and overall balance in the body.

How to Prepare Clove Tea

  • Boil 1–2 cups of water

  • Add 3–5 whole cloves

  • Simmer for 5–10 minutes

  • Strain and drink warm

Optional additions include cinnamon, ginger, or honey for extra flavor and benefits.

Precautions

Clove tea is powerful. Drinking too much may cause stomach irritation or interact with certain medications. Stick to 1–2 cups per day, and consult a healthcare professional if you are pregnant or managing a medical condition.

Final Thoughts

Clove tea is a small habit with big benefits. From digestion and immunity to oral health and relaxation, this ancient remedy offers a natural, affordable way to support your well-being. When enjoyed mindfully, clove tea can become a comforting daily ritual that nourishes both body and soul.

Pfizer finally publishes the list of side effects of its vaccines

🧪 Pfizer and the “Side Effects List”: What’s Real — and What’s Misinformation?

In recent months, social media posts have surged claiming that Pfizer “finally” released a list of side effects for its COVID-19 vaccine — and that the list contains a laundry list of serious, even fatal conditions allegedly linked to the shots. But here’s the important truth: Pfizer has not published a new, definitive list of vaccine side effects in 2025, and the viral lists circulating online are either misinterpretations or misleading compilations of unrelated data.

🔍 The Claim: A “New” List of Side Effects

In early 2025, posts went viral on platforms like X (formerly Twitter) and Facebook suggesting that Pfizer had released an official list of side effects associated with its COVID-19 vaccine, including conditions like heart failure, stillbirth, and neurological diseases. These posts presented lists of dozens or even hundreds of conditions and implied they are confirmed vaccine side effects.

But independent news fact-checks and investigations found no evidence that Pfizer issued such a list in 2025. The posts either:

Recycled an older document Pfizer submitted to the U.S. Food and Drug Administration (FDA) in 2021, or

Confused adverse event reports with scientifically confirmed side effects.

🧬 Adverse Events vs. Side Effects — Critical Distinction

This is where nuance matters. In pharmaceutical and regulatory language:

Adverse events are any health problems that occur after vaccination — regardless of cause. These are reported to systems like VAERS (Vaccine Adverse Event Reporting System), where anyone can submit a report.

Side effects are health issues that clinical evidence shows were caused by the vaccine.

The 2021 document often cited online lists adverse events reported early in the rollout — not a list of conditions scientifically proven to be caused by the vaccine. Regulatory agencies explicitly say that an event being reported after vaccination does not prove it was caused by the vaccine.

So, lumping everything from common things like “fever” to rare conditions like seizures into a single “side effects” list is misleading and inaccurate.

📄 What the Official Side Effect Information Says

The most accurate, up-to-date side effect information comes not from social media posts but from Pfizer’s own patient information and regulatory fact sheets. These lists are routinely published and updated in countries around the world.

According to Pfizer’s own medical information for the Comirnaty® COVID-19 vaccine:

Reported side effects can include:

👍 Common and Mild Reactions

Pain, redness, or swelling at the injection site

Tiredness or fatigue

Headache

Muscle or joint pain

Fever or chills

Nausea, diarrhea

Swollen lymph nodes

Feeling generally unwell

These responses are typical of many vaccines and usually resolve within a few days as the immune system responds.

⚠️ Less Common or Rarely Reported Events

Allergic reactions — mild to severe (including anaphylaxis)

Myocarditis and pericarditis — inflammation of heart tissue, typically very rare and more often reported in adolescent males and young adults

Fainting immediately after injection

Febrile seizures in young children (rare)

Regulatory agencies also caution that other serious side effects — while extremely rare — may occur, and healthcare providers encourage reporting any unusual post-vaccination symptoms.

📊 What the Science and Regulators Say

Major regulatory and health authorities, including the U.S. FDA, the European Medicines Agency (EMA), and the World Health Organization (WHO), continue to monitor vaccine safety closely. Across billions of doses administered globally:

Most side effects remain mild and transient, such as soreness and tiredness.

Serious side effects are very rare and carefully investigated.

The overall benefits of vaccination (preventing severe disease, hospitalization, and death) consistently outweigh the risks.

In fact, global data estimate that COVID-19 vaccines have prevented millions of deaths worldwide.

🧠 Why This Matters

The spread of unverified “side effect lists” does real harm:

It fuels fear and hesitancy, even among people with legitimate questions.

It blurs the line between raw reports and established medical evidence.

It undermines public trust in health systems working to keep people safe.

But the scientific process is transparent: regulated vaccines undergo rigorous testing before approval, and ongoing safety monitoring is part of how public health agencies ensure those vaccines remain safe. Updates to side effect profiles are published as new data become available — not leaked as sensational social media posts.

🧾 Bottom Line

📌 Pfizer has not released a newly published list of COVID vaccine side effects in 2025.
📌 Long lists circulating online are based on misinterpreted older documents or adverse event reports, not proven causal side effects.
📌 Actual side effect information is publicly accessible on Pfizer’s official documents and regulatory fact sheets.

Vaccines like Pfizer-BioNTech’s COVID-19 shot are continuously monitored for safety, and serious side effects are extremely rare. If you have concerns about vaccine risks or how side effects are tracked, trusted sources like official health agencies and qualified medical professionals are the best places to start.

Eat garlic and honey on an empty stomach for 7 days

Eat Garlic and Honey on an Empty Stomach for 7 Days: Here’s What Happens to Your Body

The combination of garlic and honey has been used for centuries in traditional medicine across many cultures. Individually, both ingredients are nutritional powerhouses. When consumed together—especially on an empty stomach for seven consecutive days—they may offer a range of health-supporting benefits that many people swear by.

But what actually happens to your body when you try this simple morning ritual? Let’s break it down in a balanced, science-aware way.

Why Garlic and Honey?

Garlic contains sulfur compounds like allicin, which are responsible for its strong smell and many of its health properties.
Raw honey is rich in antioxidants, enzymes, and natural sugars that provide quick energy and soothing effects.

When combined, honey helps soften garlic’s harsh taste while improving absorption and making it easier on the stomach.

Day 1–2: Supporting Digestion and Gut Health

Eating garlic and honey first thing in the morning may stimulate your digestive system.

  • Garlic encourages the production of digestive enzymes

  • Honey soothes the stomach lining

  • Together, they may help reduce bloating and sluggish digestion

Some people notice better bowel regularity within the first couple of days. This is especially helpful for those who experience constipation or indigestion in the morning.

Tip: If raw garlic feels too strong, crush it and let it sit for 5–10 minutes before mixing with honey. This activates beneficial compounds.

Day 3–4: Immune System Boost

Garlic is well known for its antibacterial, antiviral, and antifungal properties, while honey contains antioxidants that help protect cells from oxidative stress.

By the third or fourth day, your immune system may benefit from:

  • Reduced inflammation

  • Better defense against common infections

  • Improved response to seasonal colds

This doesn’t mean it replaces medicine, but it may support your body’s natural defenses when used consistently.

Day 5: Heart and Circulation Support

Garlic has been widely studied for its role in heart health.

Possible benefits include:

  • Supporting healthy blood pressure levels

  • Helping manage cholesterol when combined with a balanced diet

  • Improving circulation

Honey complements this by reducing oxidative stress in blood vessels. After several days, some people report feeling lighter, more energetic, and less fatigued.

Day 6: Skin and Detox Support

Your skin often reflects what’s happening inside your body.

By day six:

  • Garlic may help fight acne-causing bacteria

  • Honey supports liver function and gentle detox processes

  • Antioxidants help combat dull skin and breakouts

Many people notice clearer skin, reduced inflammation, and a healthier glow—but results vary depending on diet and lifestyle.

Day 7: Energy and Mental Clarity

After a full week, some people experience:

  • Improved morning energy

  • Reduced brain fog

  • Better focus and mood

This may be due to stabilized blood sugar levels from honey and improved circulation from garlic.

While it’s not a miracle cure, this combination can help set a healthier tone for the day when paired with proper sleep and nutrition.

How to Take Garlic and Honey Correctly

Simple Morning Recipe:

  • 1 clove of raw garlic (crushed or finely chopped)

  • 1 teaspoon of raw honey

Instructions:

  1. Crush the garlic and let it rest for a few minutes

  2. Mix with honey

  3. Consume on an empty stomach

  4. Wait 20–30 minutes before eating breakfast

Drink a glass of warm water afterward if desired.

Who Should Be Careful?

This remedy is generally safe for most people, but caution is advised if you:

  • Have stomach ulcers or acid reflux

  • Take blood-thinning medication

  • Are allergic to honey or garlic

  • Are pregnant or breastfeeding

Always consult a healthcare professional if you have underlying conditions.

Final Thoughts

Eating garlic and honey on an empty stomach for seven days won’t magically cure diseases—but it can support digestion, immunity, heart health, and overall wellness when used responsibly.

Think of it as a natural habit, not a medical treatment. Combined with a healthy diet, hydration, and movement, this simple ritual may help your body function a little better—one morning at a time 🌿

Keep these tips in mind to avoid visiting the dentist How to naturally repair a cavity

Keep These Tips in Mind to Avoid Visiting the Dentist: How to Naturally Repair a Cavity

Let’s be honest—most people only think about their teeth when pain shows up. By then, a simple issue may have turned into a full-blown cavity that requires a drill, a filling, or worse. The good news? Very early tooth decay can sometimes be stopped—or even reversed—naturally if you act early and adopt the right habits.

While advanced cavities always need professional dental treatment, early enamel damage (also called demineralization) can often be repaired through natural methods that strengthen and remineralize the tooth. Here’s how to protect your smile and reduce unnecessary trips to the dentist.

First, What Is a Cavity?

A cavity forms when acids produced by bacteria in your mouth slowly wear down tooth enamel. This happens when sugars and starches feed harmful bacteria, creating acid that erodes the protective outer layer of your teeth.

Cavities develop in stages:

  1. Enamel demineralization (early and reversible)

  2. Enamel decay

  3. Dentin damage

  4. Pulp infection (painful and serious)

The key is catching the problem at stage one, when natural repair is still possible.

1. Improve Your Oral Hygiene (This Matters More Than You Think)

No natural remedy will work if plaque is left sitting on your teeth.

Do this daily:

  • Brush twice a day for at least 2 minutes

  • Use a soft-bristled toothbrush

  • Clean gently along the gum line

  • Floss once daily to remove trapped food and bacteria

Plaque left behind continues to produce acid—even if you eat healthy foods.

2. Use Fluoride—or Natural Remineralizing Alternatives

Fluoride helps rebuild weakened enamel and is one of the most proven cavity-fighting minerals. If you prefer natural options, there are alternatives that may help remineralize enamel:

Natural remineralizing aids:

  • Calcium (strengthens enamel)

  • Phosphorus (supports tooth structure)

  • Magnesium (helps absorb calcium)

  • Hydroxyapatite toothpaste (a fluoride-free option)

These minerals help replace what acid removes from your teeth.

3. Cut Sugar and Refined Carbs (This Is Non-Negotiable)

Sugar is the main fuel for cavity-causing bacteria. Even “healthy” sugars like honey or fruit juice can still harm enamel when consumed frequently.

Reduce or avoid:

  • Sugary drinks (including soda and sweet tea)

  • Candy and sweets

  • White bread and pastries

  • Frequent snacking between meals

The fewer acid attacks your teeth face each day, the more time enamel has to repair itself.

4. Eat Tooth-Friendly Foods

Your diet plays a powerful role in tooth repair.

Foods that help remineralize teeth:

  • Leafy greens (spinach, kale)

  • Cheese and yogurt (rich in calcium)

  • Nuts and seeds

  • Eggs (contain vitamin D)

  • Fatty fish (supports mineral absorption)

These foods help neutralize acid and supply the building blocks enamel needs to stay strong.

5. Oil Pulling: An Ancient Practice for Oral Health

Oil pulling involves swishing oil (usually coconut oil) in your mouth for 10–15 minutes, then spitting it out.

Potential benefits:

  • Reduces harmful bacteria

  • Lowers plaque buildup

  • Improves gum health

  • Helps maintain a balanced oral environment

While oil pulling won’t fix deep cavities, it may help prevent early decay from worsening.

6. Avoid Constant Snacking

Every time you eat, your mouth becomes acidic for about 20–30 minutes. If you snack all day, your teeth are constantly under attack.

Better habits:

  • Eat full meals instead of frequent snacks

  • Drink water between meals

  • Chew sugar-free gum to stimulate saliva

Saliva is your body’s natural defense—it neutralizes acids and delivers minerals to teeth.

7. Drink More Water (Especially After Meals)

Water washes away food particles and bacteria while helping maintain a healthy saliva flow.

If possible:

  • Drink water after every meal

  • Choose fluoridated water if available

  • Avoid sipping sugary drinks throughout the day

Hydration plays a surprisingly large role in cavity prevention.

8. Strengthen Your Gums to Protect Your Teeth

Healthy gums protect tooth roots from exposure and decay.

Natural gum-supporting habits:

  • Massage gums gently while brushing

  • Use saltwater rinses

  • Avoid smoking

  • Manage stress (stress weakens immunity)

Strong gums reduce the risk of bacteria reaching deeper parts of the tooth.

When Natural Methods Are NOT Enough

It’s important to be realistic. Once a cavity has formed a hole in the tooth, it cannot be repaired naturally. At that point, delaying treatment may lead to pain, infection, or tooth loss.

See a dentist if you notice:

  • Tooth pain or sensitivity

  • Visible holes or dark spots

  • Swelling or bleeding gums

  • Bad breath that doesn’t go away

Natural care works best as prevention and early intervention, not a replacement for professional treatment.

Final Thoughts

You may not be able to “regrow” a tooth, but you can help your body repair early enamel damage and stop cavities before they get worse. By improving oral hygiene, eating the right foods, cutting sugar, and supporting natural remineralization, you can protect your teeth and avoid unnecessary dental visits.

Your smile is worth the effort—and prevention is always easier, cheaper, and less painful than treatment. 😁

Never Step on This Weed It’s Considered a Gold Mine in the Garden

Most gardeners wage a daily war against weeds—pulling, spraying, and stomping anything that dares pop up between their prized plants. But what if one of those so-called “weeds” was actually a hidden treasure? A plant so nutritious, resilient, and beneficial that experts call it a gold mine for your garden and your health. Meet purslane—the humble ground-hugging plant you should think twice about stepping on.

What Is This “Gold Mine” Weed?

Purslane (Portulaca oleracea) is a fast-growing, succulent weed with smooth reddish stems and thick, oval green leaves. It thrives in cracks, garden beds, sidewalks, and even dry, neglected soil. Because it spreads quickly, many people rip it out without a second thought. That’s a mistake.

Purslane has been used for thousands of years in traditional medicine and cuisine across the Mediterranean, Asia, and the Middle East. Today, scientists and nutritionists recognize it as one of the most nutrient-dense plants on Earth.

Why Gardeners Call It a “Gold Mine”

Purslane earns its golden reputation for several powerful reasons:

1. One of the Best Plant Sources of Omega-3

Unlike most leafy greens, purslane is packed with omega-3 fatty acids, the same heart-healthy fats found in fish. These fats support brain function, reduce inflammation, and promote cardiovascular health. For people who eat little or no seafood, purslane is a rare and valuable plant-based alternative.

2. Loaded With Vitamins and Minerals

This “weed” is bursting with nutrients, including:

  • Vitamin A (for eye and skin health)

  • Vitamin C (immune support and anti-aging)

  • Vitamin E (powerful antioxidant)

  • Magnesium, calcium, potassium, and iron

Gram for gram, purslane often outperforms spinach and lettuce in nutritional value.

3. A Natural Soil Protector

In the garden, purslane acts like a living mulch. Its low-growing, spreading habit:

  • Prevents soil erosion

  • Helps retain moisture during hot weather

  • Protects beneficial soil microbes

Instead of stealing resources, purslane often improves soil conditions, especially in poor or compacted ground.

4. Extremely Drought-Resistant

Purslane is a survivor. It stores water in its leaves and thrives where other plants fail. This makes it an excellent indicator plant—if purslane is growing well, your soil likely has hidden fertility.

In dry climates or during heat waves, purslane keeps growing when other greens collapse. That resilience alone makes it valuable.

A Powerful Medicinal Plant

Traditional medicine systems have long used purslane for healing. Modern research is now backing up many of those uses.

Purslane has been linked to:

  • Lowering blood sugar levels

  • Reducing inflammation

  • Supporting heart health

  • Improving gut and digestive health

  • Fighting oxidative stress

It contains antioxidants like betalains and flavonoids that help protect cells from damage.

Yes—You Can Eat It

One of the biggest surprises? Purslane is delicious.

It has a mildly tangy, lemony crunch that works well both raw and cooked. You can:

  • Add it to salads for extra bite

  • Toss it into soups and stews

  • Sauté it with garlic and olive oil

  • Blend it into smoothies or sauces

In many cultures, purslane is a prized vegetable sold in markets—not a weed at all.

How to Use It Safely

If you plan to eat purslane, follow these simple rules:

  • Harvest only from chemical-free areas

  • Avoid roadsides or polluted soil

  • Wash thoroughly before use

Garden-grown purslane is usually the safest and best option.

Why You Should Never Step on It Again

Crushing purslane underfoot destroys a plant that:

  • Feeds your body with rare nutrients

  • Protects and enriches your soil

  • Grows for free without care

  • Thrives in extreme conditions

What many people treat as a nuisance is actually nature’s survival food—a plant that offers nutrition, medicine, and ecological benefits all in one.

Final Thoughts

Next time you see that low, sprawling green plant creeping across your garden, pause before pulling it out or stepping on it. That “weed” may be one of the healthiest plants you’ll ever grow.

In a world where superfoods are sold at premium prices, purslane grows freely at your feet—quietly waiting to be recognized for the gold mine it truly is.

Cheesy Baked Asparagus with Parmesan Garlic,and Bacon

Cheesy Baked Asparagus with Parmesan, Garlic, and Bacon: The Ultimate Flavor Explosion

If you’ve ever wondered how to elevate a simple vegetable side into a mouthwatering dish that steals the spotlight at dinner, look no further. Cheesy Baked Asparagus with Parmesan, Garlic, and Bacon is exactly what you need. This recipe combines tender, roasted asparagus with crispy, salty bacon, sharp Parmesan cheese, and the aromatic punch of garlic. The result? A dish that is both comforting and elegant—perfect for weeknight dinners, holiday feasts, or impressing your guests.

Why Asparagus Is the Star of the Show

Asparagus is more than just a pretty green vegetable. It’s packed with nutrients, including vitamins A, C, E, and K, and is a great source of fiber. Asparagus is also low in calories, making it a healthy choice that doesn’t compromise on taste. Roasting it brings out its natural sweetness, and when paired with Parmesan, garlic, and bacon, it transforms into a dish that’s rich, savory, and irresistible.

Ingredients You’ll Need

To make Cheesy Baked Asparagus with Parmesan, Garlic, and Bacon, gather the following ingredients:

  • 1 pound fresh asparagus, trimmed

  • 4 slices of bacon, chopped

  • 2 cloves garlic, minced

  • ½ cup grated Parmesan cheese

  • 2 tablespoons olive oil

  • Salt and freshly ground black pepper, to taste

  • Optional: red pepper flakes for a hint of heat

These ingredients are simple, but when combined, they create a powerful flavor profile that balances savory, nutty, and slightly sweet notes.

Step-by-Step Instructions

Step 1: Preheat Your Oven

Preheat your oven to 400°F (200°C). This temperature is perfect for roasting asparagus to a tender-crisp texture while ensuring the bacon crisps up beautifully.

Step 2: Prepare the Asparagus

Wash the asparagus thoroughly and trim the woody ends. Pat them dry to remove excess moisture, which helps them roast evenly and prevents sogginess.

Step 3: Cook the Bacon

In a skillet over medium heat, cook the chopped bacon until it’s just crispy. You want it slightly underdone because it will continue to cook in the oven. Remove the bacon with a slotted spoon and drain it on paper towels, leaving a small amount of bacon fat in the pan for added flavor.

Step 4: Sauté the Garlic

Add the minced garlic to the skillet with the bacon fat and sauté for about 30 seconds to 1 minute, until fragrant. Be careful not to burn it, as garlic can turn bitter quickly.

Step 5: Toss Asparagus with Garlic and Oil

Place the asparagus on a baking sheet. Drizzle with olive oil and toss with the sautéed garlic, salt, and black pepper. Spread them out in a single layer to ensure even roasting.

Step 6: Add Bacon and Parmesan

Sprinkle the cooked bacon evenly over the asparagus. Then, generously top the asparagus with grated Parmesan cheese. The cheese will melt during baking and create a golden, bubbly crust that’s absolutely irresistible.

Step 7: Bake to Perfection

Place the baking sheet in the preheated oven and roast for 15-20 minutes, depending on the thickness of your asparagus. You want the asparagus tender but still slightly firm, with crispy, golden-brown cheese and bacon.

Step 8: Optional Garnishes

For added flavor and presentation, sprinkle with red pepper flakes for a subtle kick or freshly chopped parsley for color. Serve immediately for the best taste and texture.

Tips for Perfect Cheesy Baked Asparagus

  1. Choose fresh asparagus: Look for firm stalks with tightly closed tips. Thicker stalks are better for roasting as they hold up well in the oven.

  2. Don’t overcrowd the pan: Giving each asparagus spear space ensures even roasting and crispy edges.

  3. Parmesan alternatives: For a sharper taste, try Pecorino Romano or a blend of Parmesan and Asiago cheese.

  4. Bacon options: Turkey bacon or pancetta work as great substitutes if you prefer a slightly leaner version.

  5. Make it ahead: You can prep the asparagus, bacon, and garlic a few hours in advance. Store separately and assemble before baking for a quick weeknight dinner.

Why This Dish Works Every Time

The combination of flavors in Cheesy Baked Asparagus with Parmesan, Garlic, and Bacon hits every savory note:

  • Asparagus brings freshness and a mild earthiness.

  • Bacon adds smoky, salty crunch.

  • Garlic infuses aromatic depth.

  • Parmesan provides a nutty, melty richness.

Together, these ingredients create a harmony that makes even picky eaters fall in love with vegetables. It’s healthy, comforting, and versatile enough to pair with anything from roasted chicken to steak or even a simple pasta dish.

Serving Suggestions

This dish is incredibly versatile. Serve it as a side for:

  • Holiday dinners: Perfect next to turkey, ham, or roast beef.

  • Weeknight meals: Pair with grilled chicken or fish for a simple, flavorful dinner.

  • Brunches: Add poached eggs on top for a decadent morning treat.

It also works great as a warm appetizer. A sprinkle of extra Parmesan and a drizzle of balsamic glaze can turn it into a party-worthy dish that disappears in minutes.

Final Thoughts

Cheesy Baked Asparagus with Parmesan, Garlic, and Bacon is proof that vegetables can shine in any meal. It’s easy to make, packed with flavor, and looks beautiful on the plate. Whether you’re cooking for family, hosting friends, or just treating yourself, this dish is guaranteed to impress.

So grab your asparagus, preheat the oven, and get ready to enjoy one of the most flavorful vegetable dishes you’ll ever taste. Your taste buds—and your dinner guests—will thank you.

I Didn’t Believe This Floor Trick Until I Tried It Now I’ll Never Go Back

I’ll be honest—I’ve seen a lot of so-called “miracle cleaning hacks” online. Most promise sparkling floors in minutes and deliver… sticky residue and disappointment. So when I first heard about this simple floor trick, I rolled my eyes. No fancy machines, no expensive cleaners, no back-breaking scrubbing? Yeah, right.

But curiosity (and very dull-looking floors) got the best of me. I tried it once. Then twice. And now? I’ll never clean my floors the old way again.

Here’s why this surprisingly simple floor trick actually works—and why it might completely change how you clean your home.


The Problem With Most Floor Cleaning Methods

Traditional mopping has a few big flaws:

  • It pushes dirty water around instead of lifting grime

  • It often leaves a sticky film that attracts more dirt

  • Strong chemical cleaners can damage floor finishes over time

  • Floors look clean… until they dry and show streaks 😒

That’s exactly what I was dealing with. No matter how often I mopped, my floors never felt truly clean—just temporarily shiny.


The Floor Trick That Changed Everything

This trick is shockingly simple and works on tile, laminate, vinyl, and sealed wood floors.

What You’ll Need:

  • 1 bucket of very warm water

  • 1 teaspoon dish soap (that’s it—no more!)

  • ½ cup white vinegar (optional for greasy floors)

  • 2 microfiber cloths or flat mop pads

  • A dry towel or socks (yes, really)


How to Do the Floor Trick (Step by Step)

Step 1: Ditch the Soaking-Wet Mop

This is the biggest mistake people make. Floors don’t need to be flooded. Too much water pushes dirt into cracks and leaves residue behind.

Dip your microfiber cloth into the warm water mixture and wring it out well. It should be damp, not dripping.

Step 2: Clean in Small Sections

Wipe the floor in small sections using gentle pressure. Microfiber grips dirt instead of smearing it around like cotton mops do.

You’ll be shocked at how much grime comes up—even if you “just cleaned” recently.

Step 3: The Secret Move (Don’t Skip This)

Here’s the part I didn’t believe.

After wiping a section, stand on a dry towel (or wear clean socks) and lightly shuffle over the damp area.

This:

  • Absorbs leftover moisture

  • Lifts remaining dirt

  • Leaves floors streak-free and smooth

This one step makes all the difference.


Why This Floor Trick Works So Well

Microfiber traps dirt, bacteria, and grease
✔ Minimal soap prevents sticky residue
✔ Warm water loosens grime naturally
✔ Dry buffing removes what mops leave behind

Instead of spreading dirt around, you’re actually removing it.


The Results After One Try

After my first attempt, I noticed:

  • Floors dried twice as fast

  • No cloudy film

  • Bare feet didn’t feel sticky

  • The floor stayed cleaner for days longer

Even high-traffic areas looked noticeably brighter without that artificial “just mopped” smell.


Best Floors for This Trick

This method works especially well on:

  • Ceramic & porcelain tile

  • Laminate flooring

  • Vinyl & luxury vinyl plank (LVP)

  • Sealed hardwood

⚠️ Avoid vinegar on unsealed hardwood or natural stone like marble.


Extra Tips for Even Better Results

  • Use hot (not boiling) water

  • Change water if it gets cloudy

  • Clean microfiber pads after every use

  • Add a drop of essential oil for a fresh scent (optional)

Less is more here. Too much cleaner ruins the magic.


Why I’ll Never Go Back to Regular Mopping

Traditional mopping now feels:

  • Slower

  • Less effective

  • Harder on my floors

This floor trick takes less time, uses fewer products, and actually works. No harsh chemicals. No expensive gadgets. Just clean floors that stay clean.

I didn’t believe it either—until I tried it.

Now? I’m never going back. 🧼✨

If Hair Grows on Your Ears It’s Because Your Body Is Trying to Tell You Something

Have you ever looked in the mirror and noticed hair growing on your ears and thought, “When did that happen?” You’re not alone. Ear hair is one of those changes that seems to appear quietly with age, often catching people by surprise. While it’s easy to laugh it off or blame genetics, ear hair growth can actually reflect a mix of biological processes happening inside your body. It’s rarely dangerous—but it is interesting, and sometimes informative.
Let’s unpack what ear hair growth really means and what your body might be signaling.

1. Hormones Are Shifting (Especially Testosterone)
One of the biggest reasons ear hair grows is hormonal change, particularly involving testosterone. As men age, testosterone levels don’t just decline—they also fluctuate. Hair follicles in certain areas, including the ears, nose, and eyebrows, can become more sensitive to this hormone over time.
This sensitivity causes thicker, darker, and longer hair growth in places that were previously barely noticeable. That’s why ear hair is far more common in middle-aged and older men than in younger people or women.
In short:
If hair grows on your ears, it’s because your body is responding differently to hormones than it did years ago.

2. Aging Changes How Hair Follicles Behave
Aging doesn’t just give you wrinkles—it changes how your hair follicles function. Some follicles shrink and stop producing hair (hello, thinning scalp), while others become overactive.
Ear hair follicles tend to fall into the second category. With age:

The hair growth cycle slows

Hair becomes coarser and longer

Trimming feels like a never-ending task

This is a normal biological process, not a sign that something is “wrong.” It’s simply part of how the body reallocates resources as it gets older.

3. Genetics Play a Bigger Role Than You Think
If your father, grandfather, or uncles had noticeable ear hair, chances are you might too. Genetics strongly influence:

Where hair grows

How thick it becomes

How early it appears

Certain populations and ethnic backgrounds are more prone to ear hair growth due to inherited traits affecting hair follicles and hormone sensitivity.
So sometimes, if hair grows on your ears, it’s because your body is following a genetic blueprint written long before you were born.

4. Your Body Hair Pattern Is Rebalancing
Hair growth isn’t random—it’s regulated by complex signals between hormones, skin, and hair follicles. As you age, your body redistributes hair growth. That’s why many people experience:

Thinner hair on the head

More hair on ears, nose, eyebrows, chest, or back

This rebalancing doesn’t mean your body is malfunctioning. It’s adapting to internal changes, especially shifts in circulation, hormones, and cellular renewal.

5. It Can Be Linked to Overall Hair Follicle Sensitivity
Some people simply have hair follicles that react strongly to internal signals. These follicles are more likely to:

Produce thicker hair

Grow hair faster

Extend the hair’s growth phase

Ear hair growth can be a visible sign of that sensitivity. While it’s mostly cosmetic, it shows how responsive your skin is to hormonal and biological cues.

6. Is Ear Hair a Sign of a Health Problem?
In most cases, no. Ear hair by itself is not a disease or a warning sign of serious illness. However, extremely rapid or unusual hair growth combined with other symptoms—such as sudden hormonal changes, fatigue, or unexplained weight shifts—may warrant a medical check-up.
But for the vast majority of people, ear hair growth is:

Normal

Harmless

Age-related

It’s more about biology than pathology.

7. Why It Seems to Grow Overnight
One of the most frustrating things about ear hair is how suddenly it seems to appear. This happens because ear hair is often:

Light-colored at first

Hidden by the ear’s shape

Slow-growing until it reaches a noticeable length

Once it crosses that visibility threshold, it feels like it popped up overnight—even though it’s been growing quietly for weeks.

8. Grooming Is a Choice, Not a Necessity
There’s no medical reason to remove ear hair unless it causes discomfort or hygiene issues. Many people choose to trim or remove it for personal or cultural reasons, and that’s perfectly fine.
Safe options include:

Electric trimmers designed for ears

Professional grooming

Careful trimming (never deep plucking, which can irritate skin)

What matters most is doing it safely and comfortably.

The Bottom Line
If hair grows on your ears, it’s because your body is responding to age, hormones, genetics, and natural biological changes. It’s a common, normal part of life—especially for men—and not something to be embarrassed about.
Think of ear hair as a quiet reminder that your body is always evolving. It may not be the most glamorous change, but it’s a very human one. And like laugh lines or gray hair, it tells a story of time, biology, and individuality—one strand at a time.