A month before a stroke your body warns you 10 signs not to ignore

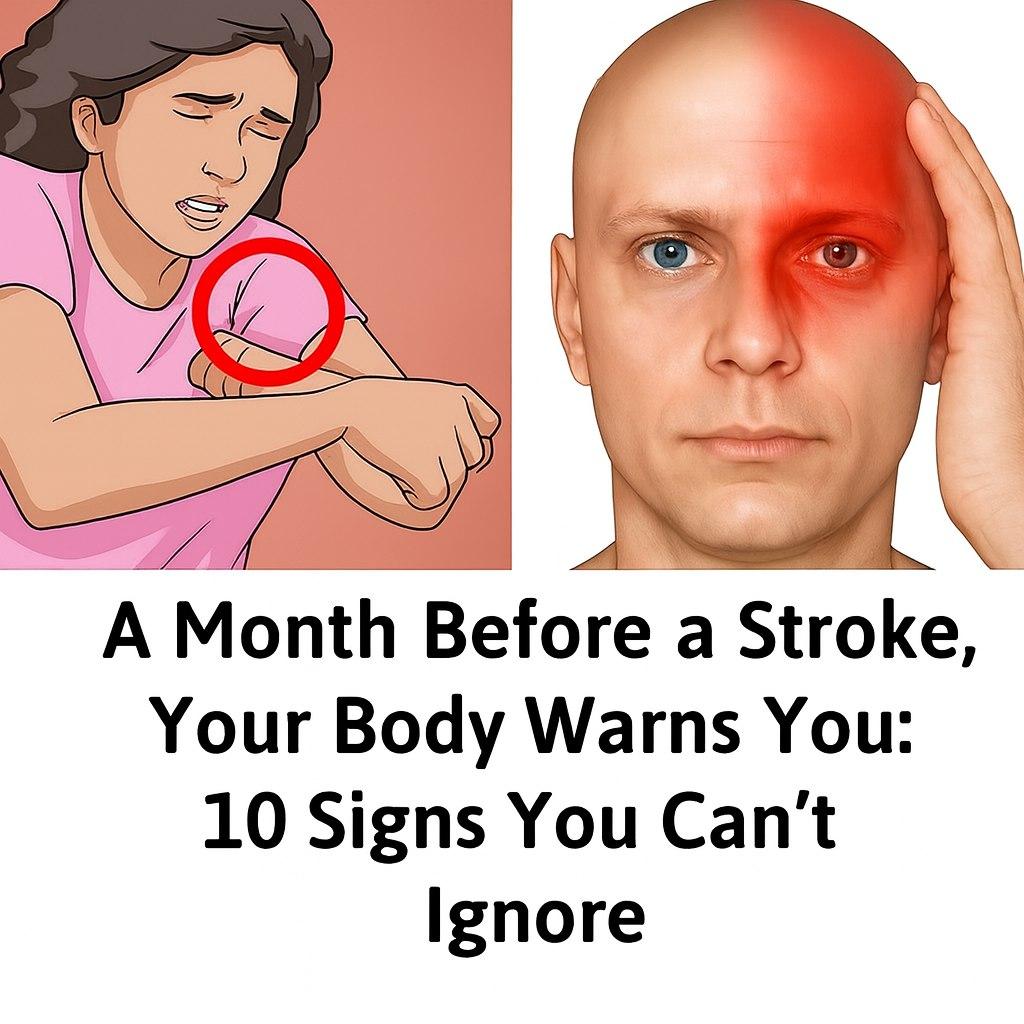
A stroke rarely comes completely out of nowhere. In many cases, the body begins to send subtle—and sometimes not-so-subtle—warning signals weeks before a major event occurs. Recognizing these early signs can be lifesaving. While not every symptom guarantees a stroke is imminent, ignoring them can be dangerous. Understanding what to watch for empowers you to seek medical help early, reduce risk, and possibly prevent a devastating outcome.

Below are 10 warning signs that may appear up to a month before a stroke—signals your body should never ignore.


1. Sudden Weakness or Numbness on One Side of the Body

One of the most classic stroke warning signs is weakness or numbness affecting the face, arm, or leg—especially on one side. You may notice your grip feels weaker, your leg drags slightly, or one side of your face feels “asleep.” Even if the sensation comes and goes, it can indicate a transient ischemic attack (TIA), often called a “mini-stroke,” which is a major red flag.


2. Frequent or Unusual Headaches

Persistent headaches that feel different from your usual pattern—especially if they are sudden, severe, or accompanied by dizziness or nausea—should raise concern. These headaches may be linked to changes in blood flow to the brain. People who rarely experience headaches should be especially cautious if they suddenly begin having them regularly.


3. Vision Problems

Blurred vision, double vision, or sudden vision loss in one or both eyes can appear weeks before a stroke. Some people describe it as a curtain coming down over their vision or difficulty focusing. These visual disturbances are often brief, which makes them easy to dismiss—but they are a serious warning sign.


4. Trouble Speaking or Understanding Words

If you find yourself slurring words, struggling to find the right words, or having difficulty understanding conversations, don’t brush it off as stress or fatigue. Even short episodes of confusion or speech difficulty can signal reduced blood flow to areas of the brain responsible for language.


5. Dizziness or Loss of Balance

Sudden dizziness, loss of coordination, or trouble walking can be an early indicator of stroke risk. You may feel unsteady, as if the room is spinning, or have difficulty maintaining balance. These symptoms are particularly concerning when they occur without an obvious cause.


6. Unexplained Fatigue

Extreme or unusual fatigue—especially when it appears suddenly and doesn’t improve with rest—can be a subtle stroke warning. Some people report feeling drained, weak, or mentally exhausted weeks before a stroke. While fatigue is common in many conditions, unexplained and persistent fatigue deserves attention.


7. Nausea or Vomiting Without Clear Cause

Feeling nauseous or vomiting without a stomach-related reason may be linked to changes in the brain or blood pressure. When combined with dizziness, headache, or visual problems, nausea can be part of a neurological warning pattern rather than a digestive issue.


8. Chest Pain or Shortness of Breath

Although more commonly associated with heart attacks, chest discomfort and shortness of breath can also be connected to stroke risk, especially when caused by heart rhythm problems or blood clots. These symptoms may indicate circulation issues that increase the likelihood of a stroke.


9. Sudden Mood Changes or Confusion

Unexpected mood swings, irritability, anxiety, or confusion may be overlooked as emotional stress. However, changes in brain blood flow can affect behavior and cognition. If you or those around you notice sudden personality or mental changes, it’s important to take them seriously.


10. High Blood Pressure Spikes

Many people with dangerously high blood pressure feel no symptoms at all—but sudden spikes can cause headaches, nosebleeds, chest discomfort, or anxiety. High blood pressure is the leading risk factor for stroke, and uncontrolled readings weeks before can set the stage for a serious event.


Why These Signs Matter

In many cases, these symptoms are caused by transient ischemic attacks (TIAs)—temporary blockages that resolve on their own but signal a high risk of a future stroke. A full stroke often follows days or weeks later if no action is taken. The good news is that early medical intervention can dramatically reduce that risk.


What You Should Do Immediately

If you experience any of these signs—even if they disappear—seek medical attention right away. Do not wait for them to happen again. A doctor can evaluate your risk, perform imaging and blood tests, and recommend treatments such as blood pressure control, blood thinners, or lifestyle changes.


Final Thoughts

Your body often whispers before it screams. A stroke is a medical emergency, but it is also frequently preventable when warning signs are recognized early. Listening to your body, acting quickly, and taking symptoms seriously can save your life—or the life of someone you love.

Fatbomb Fluff

Fatbomb fluff is one of those delightful creations that feels indulgent but fits perfectly into a low-carb, keto, or sugar-conscious lifestyle. It combines the richness of traditional fat bombs with the airy, whipped texture of a dessert mousse. The result is a spoonable, cloud-like treat that melts in your mouth while delivering satisfying fats that keep you full and energized. Whether you’re new to fat bombs or looking for a fresh way to enjoy them, fatbomb fluff deserves a place in your recipe rotation.

What Is Fatbomb Fluff?

At its core, fatbomb fluff is a whipped mixture made from high-fat ingredients such as cream cheese, heavy cream, coconut cream, butter, or nut butters, sweetened with low-carb sweeteners like erythritol, stevia, or monk fruit. Unlike traditional fat bombs that are often rolled into balls or set in molds, fluff stays soft and airy. You eat it with a spoon, spread it on low-carb baked goods, or even use it as a dip.

The name “fat bomb” comes from its macronutrient profile: high in fat, very low in carbohydrates, and moderate to low in protein. This makes it especially popular among people following ketogenic diets, where fat is the primary fuel source. The “fluff” part refers to the whipped, mousse-like texture that makes it feel lighter and more dessert-like than dense fat bombs.

Why People Love Fatbomb Fluff

One of the biggest reasons fatbomb fluff is so popular is its versatility. You can customize the flavor endlessly—chocolate, vanilla, peanut butter, cinnamon, lemon, or even coffee. It can be sweet enough to satisfy dessert cravings without causing blood sugar spikes.

Another reason is satiety. The healthy fats in fatbomb fluff help you feel full longer, which can reduce mindless snacking. Many people use it as a quick energy boost, a post-meal treat, or a way to curb sweet cravings while staying within dietary goals.

Texture also plays a major role. Traditional keto desserts can sometimes feel heavy or overly rich. Fatbomb fluff, when properly whipped, feels light and creamy, almost like a whipped cheesecake or mousse. This contrast between richness and airiness makes it especially appealing.

Common Ingredients and Their Roles

  • Cream Cheese: Adds body, tang, and creaminess. It’s often the base of fatbomb fluff.

  • Heavy Whipping Cream or Coconut Cream: Whipped to introduce air, creating the “fluff” texture.

  • Butter or Coconut Oil: Boosts fat content and adds a silky mouthfeel.

  • Sweeteners: Low-carb options like powdered erythritol or monk fruit blend dissolve easily and keep the texture smooth.

  • Flavorings: Cocoa powder, vanilla extract, cinnamon, peanut butter, lemon zest, or instant coffee granules transform the base into different flavor profiles.

Using powdered sweeteners rather than granulated ones is important because they blend more smoothly and prevent a gritty texture.

How Fatbomb Fluff Fits Different Diets

While fatbomb fluff is most commonly associated with keto, it can fit into other eating styles as well. For low-carb dieters, it offers a dessert option that won’t spike carbs. For people practicing intermittent fasting, a small serving can help ease hunger during eating windows. Even those not following strict diets may enjoy it as a lower-sugar alternative to traditional desserts.

You can also adapt it to be dairy-free by using coconut cream, vegan cream cheese, and coconut oil. Nut-free versions are possible by avoiding nut butters and using seeds or plain vanilla flavoring instead.

Flavor Variations to Try

One of the joys of fatbomb fluff is experimentation. Chocolate lovers can mix in unsweetened cocoa powder and a touch of vanilla. Peanut butter fans can add natural peanut butter for a rich, salty-sweet profile. A cinnamon-vanilla version tastes like cheesecake filling, while lemon zest and a bit of juice create a refreshing, tangy fluff.

Seasonal variations work beautifully too. Pumpkin spice in autumn, peppermint and cocoa during winter holidays, or berry-flavored extracts in summer can keep the recipe feeling new and exciting all year round.

Storage and Serving Tips

Fatbomb fluff is best stored in an airtight container in the refrigerator. Because it’s whipped, it may firm up slightly when chilled, but a quick stir usually brings back its creamy consistency. It typically keeps well for several days, making it ideal for meal prep.

Serve it in small bowls, dollop it onto keto pancakes, swirl it into coffee for a decadent twist, or use it as a dip for low-carb cookies or berries. A little goes a long way, thanks to its rich fat content.

Final Thoughts

Fatbomb fluff proves that eating mindfully doesn’t mean giving up pleasure. With its light, whipped texture and rich, satisfying flavor, it bridges the gap between nutrition and indulgence. Easy to customize, quick to prepare, and endlessly comforting, fatbomb fluff is more than just a trend—it’s a delicious reminder that simple ingredients, when treated creatively, can become something truly special.

Crispy Bacon

Crispy bacon is more than just a breakfast side—it’s a comfort food, a flavor booster, and a culinary obsession for many. That satisfying crunch, followed by a rich, smoky savor, can elevate everything from eggs and sandwiches to salads, pastas, and even desserts. Yet achieving truly crispy bacon without burning it or ending up with greasy, limp strips can feel surprisingly tricky. The good news? With the right techniques and a little patience, perfect crispy bacon is easy to master at home.


What Makes Bacon Crispy?

Bacon becomes crispy when its fat slowly renders out and the remaining meat cooks until the moisture evaporates. This process requires controlled heat. If the heat is too high, the bacon burns before the fat has time to render. Too low, and it stews in its own grease, becoming chewy instead of crisp. Understanding this balance is the key to success.

The thickness of the bacon also matters. Thin-cut bacon crisps faster and more evenly, while thick-cut bacon requires more time and careful heat control to reach that ideal crunch without charring.


Choosing the Right Bacon

For the crispiest results, start with quality bacon. Look for strips with a good balance of fat and meat—too much fat can lead to excessive grease, while too little can cause dryness. Smoked bacon adds depth of flavor, while unsmoked bacon allows the pure pork taste to shine.

If crispiness is your top priority, standard or thin-cut bacon is ideal. Thick-cut bacon can still be crispy, but it will have a meatier bite and requires longer cooking.


The Best Methods for Crispy Bacon

1. Stovetop Method (Classic and Flavorful)

This is the most traditional way to cook bacon and offers great control.

Start with a cold pan—this is crucial. Lay the bacon strips flat in a skillet without overlapping. Turn the heat to medium or medium-low and let the bacon heat gradually. As the pan warms, the fat begins to melt and render out slowly.

Flip the bacon occasionally to ensure even cooking. As the fat renders, the strips will shrink and darken. Continue cooking until they reach a deep golden-brown color and a firm texture. Remove and drain on paper towels.

Why it works: Slow rendering equals crisp bacon without burning.


2. Oven-Baked Bacon (Even and Effortless)

Oven baking is ideal for cooking large batches and produces evenly crispy bacon with minimal mess.

Preheat your oven to 200°C (400°F). Line a baking tray with foil or parchment paper and place a wire rack on top if you have one. Arrange the bacon strips in a single layer.

Bake for 15–25 minutes, depending on thickness, flipping once if not using a rack. Remove when the bacon looks deeply browned and feels firm.

Why it works: The oven provides consistent heat, allowing fat to drip away and the bacon to crisp evenly.


3. Air Fryer Bacon (Fast and Less Greasy)

The air fryer has become a favorite for crispy bacon lovers.

Set the air fryer to 180–190°C (360–375°F). Place bacon strips in a single layer in the basket. Cook for 7–10 minutes, checking halfway through.

Why it works: Hot circulating air crisps the bacon quickly while reducing excess grease.


4. Microwave Bacon (Quickest Option)

While not always the crispiest, the microwave is convenient.

Place bacon between layers of paper towels on a microwave-safe plate. Cook in 1-minute intervals until crispy.

Why it works: Paper towels absorb fat, helping the bacon crisp faster.


Tips for Extra Crispy Bacon

  • Don’t overcrowd: Bacon needs space for moisture to escape.

  • Use low to medium heat: High heat burns sugar and proteins before fat renders.

  • Pat dry if needed: Excess moisture can prevent crisping.

  • Drain properly: Always rest cooked bacon on paper towels or a rack.

  • Let it cool slightly: Bacon firms up as it cools, becoming crispier.


Common Mistakes to Avoid

  • Starting with a hot pan: This causes uneven cooking.

  • Walking away: Bacon needs attention to prevent burning.

  • Overcooking: Burnt bacon tastes bitter and loses its appeal.

  • Using too much oil: Bacon already contains plenty of fat.


Creative Ways to Use Crispy Bacon

Crispy bacon isn’t just for breakfast. Crumble it over salads, soups, and baked potatoes. Add it to pasta sauces, burgers, or grilled cheese sandwiches. Sprinkle it on deviled eggs or mix it into savory muffins and biscuits. Even desserts like chocolate bark or maple-glazed donuts benefit from a touch of crispy bacon for a sweet-salty contrast.


Final Thoughts

Crispy bacon is all about patience, technique, and understanding how fat and heat work together. Whether you prefer the stovetop, oven, air fryer, or microwave, mastering crispy bacon is a small skill that delivers big rewards. Once you achieve that perfect crunch, bacon transforms from a simple ingredient into a star of the plate—irresistible, aromatic, and endlessly versatile.

Homemade Baileys for Christmas

There’s something undeniably festive about a glass of creamy Irish-style liqueur during the Christmas season. Smooth, indulgent, and gently warming, Baileys has become a holiday classic—sipped by the fire, poured into coffee, or used to elevate desserts. The good news is that you can easily make a homemade Baileys-style liqueur at home, and many people find it even better than the store-bought version. It’s fresher, customizable, and makes a wonderful homemade Christmas gift.

This recipe delivers a velvety, perfectly balanced drink with notes of chocolate, vanilla, and coffee, all wrapped in a smooth whiskey finish. Best of all, it comes together in just minutes and requires no cooking.


Why Make Homemade Baileys at Christmas?

Christmas is the season of warmth, generosity, and indulgence. Homemade Baileys fits beautifully into that spirit. It’s economical, free from unnecessary preservatives, and can be tailored to your personal taste—sweeter, stronger, or more chocolatey. Presented in a glass bottle with a festive ribbon, it becomes a thoughtful and impressive gift that feels far more personal than anything store-bought.


Ingredients (Makes About 1 Liter)

  • 1 cup heavy cream

  • 1 can (395 g) sweetened condensed milk

  • 1½ cups Irish whiskey (Jameson-style works best)

  • 2 tablespoons chocolate syrup

  • 1 tablespoon instant coffee granules

  • 1 teaspoon pure vanilla extract

  • ½ teaspoon almond extract (optional but highly recommended)

  • 1 pinch of salt


Step-by-Step Instructions

1. Dissolve the coffee
In a small bowl, mix the instant coffee granules with 1 tablespoon of hot water. Stir until completely dissolved. This step ensures a smooth texture without gritty bits.

2. Blend the base
Pour the heavy cream and sweetened condensed milk into a blender. Blend on low speed for about 15–20 seconds until fully combined and silky.

3. Add flavorings
Add the chocolate syrup, dissolved coffee, vanilla extract, almond extract (if using), and the pinch of salt. Blend again briefly to incorporate the flavors evenly.

4. Add the whiskey
With the blender on low speed, slowly pour in the Irish whiskey. Blend just until combined. Avoid over-blending, as too much air can thin the texture.

5. Taste and adjust
Taste your homemade Baileys. If you want it sweeter, add a little more condensed milk. For a stronger kick, add a splash more whiskey. If you love chocolate, an extra teaspoon of chocolate syrup works beautifully.

6. Chill before serving
Transfer the mixture to a clean glass bottle or jar with a tight-fitting lid. Refrigerate for at least 2 hours before serving. This resting time allows the flavors to meld and deepen.


Serving Ideas for the Holidays

Homemade Baileys is incredibly versatile during Christmas:

  • Classic: Serve chilled in a small glass, straight or over ice

  • Coffee Upgrade: Add a generous splash to hot coffee and top with whipped cream

  • Dessert Drizzle: Pour over vanilla ice cream, brownies, or chocolate cake

  • Festive Cocktails: Mix with hot chocolate, espresso, or even eggnog

It also pairs beautifully with Christmas cookies, mince pies, and rich desserts.


Storage and Shelf Life

Because this recipe uses fresh cream, it should be stored in the refrigerator at all times. When kept in an airtight container, homemade Baileys lasts up to 2 weeks. Shake gently before each use, as natural separation may occur.

If you plan to give it as a gift, include a small label with the preparation date and storage instructions.


Custom Flavor Variations

One of the joys of homemade Baileys is how easy it is to customize:

  • Chocolate Orange: Add ½ teaspoon orange zest or a drop of orange extract

  • Mint Chocolate: Add a few drops of peppermint extract

  • Spiced Christmas Baileys: Blend in a pinch of cinnamon or nutmeg

  • Caramel: Replace chocolate syrup with caramel sauce for a buttery twist

Each variation brings a new festive personality to the drink.


A Perfect Homemade Christmas Gift

Pour your Baileys into decorative glass bottles, add a handwritten tag, and tie with twine or a red ribbon. It’s a gift that feels luxurious, thoughtful, and handmade—perfect for Christmas gatherings, host gifts, or cozy nights in.


Final Thoughts

Homemade Baileys is more than just a drink—it’s a celebration of the season. Creamy, comforting, and deeply indulgent, it captures the essence of Christmas in every sip. Whether you’re sharing it with loved ones, gifting it to friends, or enjoying a quiet moment by the fire, this recipe is sure to become a cherished holiday tradition.

Once you try making it yourself, you may never go back to the store-bought version again. Cheers to a warm, joyful, and delicious Christmas! 🎄🥛🥃

If you have cramps in your legs at night, it means that you have

Waking up in the middle of the night with a sudden, sharp pain in your leg can be alarming. Nighttime leg cramps—often affecting the calves, feet, or thighs—are common, especially among adults and older individuals. These cramps can last from a few seconds to several minutes and may leave lingering soreness afterward. While occasional cramps are usually harmless, frequent or severe nighttime leg cramps may signal underlying issues your body wants you to notice.

Below are the most common reasons why leg cramps occur at night and what they may mean for your overall health.


1. Dehydration and Electrolyte Imbalance

One of the most common causes of nighttime leg cramps is dehydration. When your body lacks sufficient fluids, muscles can contract involuntarily, leading to cramping. Along with water, your muscles rely on electrolytes such as potassium, magnesium, calcium, and sodium to function properly.

If these minerals are out of balance—due to sweating, illness, poor diet, or not drinking enough water—muscle nerves can misfire, causing painful cramps at night when your muscles are relaxed.

What it may mean:
Your body may be low on fluids or essential minerals and needs better hydration and nutrition.


2. Poor Blood Circulation

Healthy blood flow is essential for delivering oxygen and nutrients to your muscles. Reduced circulation—often caused by sitting or standing for long periods, lack of physical activity, or narrowed blood vessels—can contribute to nighttime leg cramps.

When you lie down, changes in blood flow may trigger cramping, especially in people with circulation issues.

What it may mean:
Your muscles may not be getting enough oxygen-rich blood, signaling circulation problems that should not be ignored.


3. Muscle Fatigue or Overuse

Using your leg muscles excessively during the day—such as prolonged walking, standing, heavy exercise, or physical labor—can overstress muscle fibers. At night, when muscles try to recover, they may tighten and spasm.

This is common in people who suddenly increase physical activity or maintain poor posture throughout the day.

What it may mean:
Your muscles may be overworked and need proper rest, stretching, and recovery.


4. Magnesium or Potassium Deficiency

Magnesium and potassium play a vital role in muscle relaxation and nerve signaling. A deficiency in either mineral can increase muscle excitability, making cramps more likely at night.

Older adults, people on certain medications (such as diuretics), and those with digestive issues are more prone to these deficiencies.

What it may mean:
Your diet may lack essential minerals needed for normal muscle function.


5. Nerve Compression or Spinal Issues

In some cases, leg cramps at night can be linked to nerve problems, particularly those involving the lower spine. Conditions such as lumbar spinal stenosis or herniated discs can compress nerves that control leg muscles, leading to cramping or spasms when lying down.

What it may mean:
Your nervous system may be under strain, and spinal or nerve-related issues could be involved.


6. Medical Conditions

Certain medical conditions are known to increase the risk of nighttime leg cramps, including:

  • Diabetes

  • Kidney disease

  • Thyroid disorders

  • Peripheral artery disease (PAD)

  • Liver disease

These conditions can affect nerve function, blood flow, or mineral balance, all of which play a role in muscle health.

What it may mean:
Frequent leg cramps could be a symptom of an underlying health issue that requires medical attention.


7. Medication Side Effects

Some medications list muscle cramps as a side effect. These include diuretics, statins, blood pressure medications, and asthma drugs. These medicines may alter fluid levels or mineral balance in the body, increasing the likelihood of cramps.

What it may mean:
Your body may be reacting to a medication, and an adjustment might be needed.


8. Lack of Stretching and Poor Sleep Position

Tight muscles are more prone to cramping. Sleeping with your feet pointed downward or in awkward positions can shorten calf muscles during the night, triggering cramps.

What it may mean:
Your muscles may be tight and need regular stretching and better sleep posture.


How to Reduce Nighttime Leg Cramps

  • Drink enough water throughout the day

  • Eat mineral-rich foods (bananas, leafy greens, nuts, dairy)

  • Stretch calves and legs before bed

  • Stay physically active, but avoid overexertion

  • Massage cramped muscles gently

  • Keep blankets loose around your feet

  • Consult a doctor if cramps are frequent or severe


When to See a Doctor

You should seek medical advice if leg cramps:

  • Occur frequently or worsen over time

  • Are accompanied by swelling, redness, or numbness

  • Interfere with sleep regularly

  • Appear alongside other symptoms like fatigue or weakness


Final Thoughts

If you have cramps in your legs at night, it doesn’t necessarily mean something serious—but it does mean your body is sending you a signal. Whether it’s dehydration, mineral deficiency, muscle fatigue, or circulation issues, nighttime leg cramps are often a sign that something needs attention. Listening to your body, making simple lifestyle changes, and seeking medical guidance when necessary can go a long way toward peaceful, pain-free sleep.

7 psychological reasons why a child might not value their mother

Here are seven psychological reasons why a child might not value their mother, explored with depth, balance, and sensitivity. This topic is complex and emotionally charged, so it’s important to approach it without blame and with an understanding that a child’s behavior often reflects unmet needs, confusion, or learned patterns rather than cruelty or ingratitude.


1. Emotional Neglect or Inconsistent Nurturing

One of the most significant psychological reasons a child may fail to value their mother is emotional neglect, whether intentional or unintentional. Emotional neglect does not always mean a lack of physical care; a child may be well-fed, clothed, and educated, yet still feel emotionally unseen or unheard. When a mother is frequently overwhelmed, depressed, stressed, or emotionally unavailable, the child may learn that their feelings do not matter.

Over time, this can lead the child to emotionally detach as a protective mechanism. Instead of seeking closeness, they may devalue the mother to avoid the pain of unmet emotional needs. In adulthood, this detachment can manifest as indifference, resentment, or an inability to recognize the mother’s efforts and sacrifices.


2. Insecure Attachment Formation

Attachment theory suggests that early relationships shape how children perceive love, trust, and emotional safety. If a child develops an insecure attachment—whether anxious, avoidant, or disorganized—they may struggle to form a healthy bond with their mother.

A child with avoidant attachment may suppress emotional needs and appear distant or dismissive, interpreting dependence as weakness. Such children often grow up minimizing the importance of their mother because closeness feels uncomfortable or unsafe. This does not mean the child lacks love; rather, they have learned to disconnect emotionally to survive.


3. Exposure to Parental Conflict or Negative Narratives

Children are deeply influenced by their environment. When they grow up witnessing constant parental conflict, especially if one parent openly criticizes or undermines the mother, the child may unconsciously adopt those negative perceptions. This is particularly common in high-conflict divorces or households where blame and resentment dominate.

A child may feel pressured to “choose sides” and align emotionally with the parent they perceive as stronger or more approving. Over time, this alignment can distort the child’s view of the mother, leading them to undervalue or disrespect her, even if she has not directly harmed them.


4. Unresolved Childhood Anger or Hurt

Children often lack the emotional vocabulary to express disappointment, sadness, or frustration. When their needs are unmet—whether through perceived unfairness, strictness, absence, or misunderstanding—those feelings may turn into unresolved anger.

Rather than processing this pain, some children internalize it and later express it as emotional distance or devaluation. They may focus on their mother’s perceived flaws while minimizing her positive qualities. In many cases, the child is reacting not to the mother as she is now, but to unresolved emotional wounds from the past.


5. Overindulgence or Lack of Healthy Boundaries

Surprisingly, overindulgence can also lead a child to undervalue their mother. When a mother consistently sacrifices her own needs, avoids setting boundaries, or shields the child from consequences, the child may grow up expecting constant accommodation.

Without learning appreciation, responsibility, or empathy, the child may begin to take the mother for granted. Psychologically, value is often developed through balance—care combined with limits. When limits are absent, the child may fail to recognize the mother as an individual deserving of respect, rather than as a resource that exists solely to serve them.


6. Identity Development and Emotional Separation

As children grow, especially during adolescence and early adulthood, they go through a natural phase of individuation—the process of separating emotionally and psychologically from parents to form their own identity. During this stage, some children devalue their mother as a way to assert independence.

This distancing is not always permanent, but if combined with unresolved emotional issues, it can harden into long-term disregard. The child may associate the mother with control, limitation, or dependency and reject her value as part of rejecting their own vulnerability or past self.


7. Modeling Learned Behavior from Society or Family Culture

Children learn how to treat others by observation. If a child grows up in a culture or family system where mothers are undervalued, overburdened, or disrespected—especially women in caregiving roles—they may internalize those beliefs.

This modeling can come from fathers, extended family, media, or societal norms that normalize emotional labor while minimizing its worth. As a result, the child may fail to appreciate their mother’s contributions, viewing them as “expected” rather than meaningful.


Final Thoughts

A child not valuing their mother is rarely about a lack of love. More often, it reflects emotional wounds, learned behaviors, unmet needs, or developmental struggles. Understanding these psychological reasons does not excuse harmful behavior, but it helps explain it—and explanation is the first step toward healing.

With awareness, open communication, therapy, and emotional growth, many children eventually come to recognize and appreciate their mother’s role in their lives. Healing is possible on both sides when compassion replaces blame and understanding replaces silence.

Neither daily nor weekly: What is the ideal shower frequency for people over 65

As we age, many everyday habits that once felt automatic—like showering—deserve a second look. For people over 65, the question of how often to shower is not as simple as “every day” or “once a week.” In fact, dermatologists and geriatric health experts increasingly agree that neither daily nor weekly showering is ideal for most older adults. Instead, the best frequency lies somewhere in between and depends on skin health, activity level, climate, and overall well-being.

Why Showering Needs Change After 65

Aging brings natural changes to the skin. After about age 60, the skin produces less natural oil (sebum), becomes thinner, and loses moisture more easily. This makes older skin more vulnerable to:

  • Dryness and flaking

  • Itching and irritation

  • Cracks that can lead to infections

  • Worsening of eczema or psoriasis

Daily hot showers—especially with harsh soaps—can strip away the remaining protective oils, leaving skin even drier and more fragile.

At the same time, showering too infrequently can lead to hygiene issues, odor, bacterial buildup, and skin infections, particularly in skin folds.

So, What Is the Ideal Shower Frequency?

For most people over 65, showering 2–4 times per week is considered ideal.

This middle-ground approach helps maintain cleanliness without damaging the skin’s natural barrier. It also reduces the risk of slips and falls in the bathroom, which is an important safety consideration for seniors.

However, this is not a rigid rule. The “right” frequency varies from person to person.

Factors That Influence Shower Frequency

1. Activity Level

  • More active seniors (walking daily, exercising, gardening) may need to shower more often—sometimes every other day.

  • Less active or homebound individuals may be perfectly fine with 2–3 showers per week.

2. Climate

  • In hot or humid climates, sweating may require more frequent rinsing.

  • In cold or dry climates, fewer showers help prevent excessive dryness.

3. Skin Conditions

People with conditions like eczema, diabetes, or very dry skin often benefit from less frequent showers combined with daily moisturizing.

4. Incontinence or Medical Needs

Some seniors may need more frequent washing of specific areas without taking a full shower.

Daily Cleaning Without Daily Showers

Not showering every day does not mean neglecting hygiene. Experts often recommend:

  • Daily sponge baths or washcloth cleaning for:

    • Face

    • Underarms

    • Groin area

    • Feet

  • Gentle cleansing after sweating or toileting

  • Changing underwear and socks daily

This approach keeps the body fresh while protecting sensitive skin.

How to Shower Safely and Gently After 65

When you do shower, how you shower matters just as much as how often.

Use Lukewarm Water

Hot water feels soothing but strips oils quickly. Lukewarm water is far gentler on aging skin.

Limit Shower Time

Keep showers to 5–10 minutes to reduce moisture loss.

Choose the Right Cleanser

  • Use mild, fragrance-free soaps or body washes

  • Avoid antibacterial soaps unless medically necessary

  • Clean only necessary areas—not the entire body aggressively

Moisturize Immediately

Apply a thick, fragrance-free moisturizer within 3 minutes of stepping out of the shower to lock in moisture.

The Safety Factor: An Often-Overlooked Issue

Bathroom falls are a major concern for older adults. Showering less frequently can actually reduce risk, especially when combined with:

  • Non-slip mats

  • Grab bars

  • Shower chairs

  • Handheld showerheads

Choosing safer shower routines is just as important as choosing the right frequency.

What About Hair Washing?

Hair also changes with age. The scalp produces less oil, and hair becomes drier and more brittle.

  • Most people over 65 only need to wash hair 1–2 times per week

  • Over-washing can lead to scalp itching and hair breakage

  • Gentle shampoos and conditioners are best

When Daily Showers Might Be Necessary

There are situations where daily showering—or at least daily rinsing—is appropriate, such as:

  • Heavy sweating

  • Certain medical conditions

  • Wound care needs

  • Exposure to dirt or pollutants

Even then, using gentle products and moisturizing afterward is essential.

The Bottom Line

For people over 65, the ideal shower frequency is neither daily nor weekly, but typically every other day or 2–4 times per week. This balance protects the skin, maintains hygiene, and reduces safety risks.

The most important rule is to listen to your body. If your skin feels tight, itchy, or flaky, you may be showering too often. If you feel uncomfortable or notice skin irritation in folds, you may need more frequent cleansing in specific areas.

Crinkle Cake

Crinkle Cake is one of those desserts that looks elegant and impressive yet is surprisingly easy to prepare. Made primarily with phyllo dough, butter, eggs, cream or milk, and a lightly sweet syrup, this cake has recently become a viral favorite—and for good reason. Its signature “crinkled” appearance creates dramatic golden ridges that bake up crisp on the outside and tender on the inside, offering a perfect balance of texture and flavor.

This cake has roots in Middle Eastern and Mediterranean kitchens, where phyllo-based desserts are deeply loved. However, Crinkle Cake feels refreshingly modern, appealing to home bakers who want bakery-style results without complicated techniques. Whether served as a simple afternoon treat or a stunning dessert for guests, Crinkle Cake always delivers.

What Makes Crinkle Cake Special?

Unlike traditional layered phyllo desserts, Crinkle Cake relies on a relaxed, almost playful approach. Sheets of phyllo dough are gently scrunched or folded accordion-style and placed upright in a baking dish. This creates deep folds and air pockets that allow butter, custard, and syrup to seep into every layer.

As it bakes, the exposed edges of the phyllo turn beautifully golden and crisp, while the inner folds stay soft and custard-like. Once soaked with warm syrup, the cake becomes rich without being heavy, sweet but never cloying.

Ingredients You’ll Need

Crinkle Cake uses simple, widely available ingredients:

  • Phyllo dough sheets

  • Unsalted butter, melted

  • Eggs

  • Milk or heavy cream

  • Sugar

  • Vanilla extract

  • Optional flavorings: orange zest, lemon zest, rose water, or cinnamon

For the syrup:

  • Sugar

  • Water

  • Lemon juice or orange blossom water

Optional toppings include powdered sugar, crushed pistachios, almonds, or a drizzle of honey.

Step-by-Step Preparation

1. Prepare the Phyllo
Preheat your oven to 180°C (350°F). Gently unroll the phyllo dough and keep it covered with a clean towel to prevent drying. Take one sheet at a time, scrunch it loosely from the long side like an accordion, and place it upright in a greased baking dish. Repeat until the dish is full and the sheets are snug but not tightly packed.

2. Bake Until Lightly Golden
Brush or drizzle melted butter generously over the phyllo, making sure it seeps into the folds. Bake for about 10–15 minutes, just until the phyllo begins to turn lightly golden and holds its shape.

3. Prepare the Custard
Whisk together eggs, milk or cream, sugar, and vanilla until smooth. If you enjoy aromatic desserts, add citrus zest or a drop of rose water.

4. Pour and Bake Again
Carefully pour the custard over the partially baked phyllo, allowing it to sink into all the crevices. Return the dish to the oven and bake for another 25–30 minutes, until the top is deeply golden and the custard is set.

5. Make the Syrup
While the cake bakes, simmer sugar and water for about 8–10 minutes. Add lemon juice at the end and let the syrup cool slightly.

6. Syrup Finish
Once the cake comes out of the oven, immediately pour the warm (not hot) syrup evenly over the cake. You’ll hear a gentle sizzle as the syrup absorbs—this is exactly what you want.

Texture and Flavor Experience

Crinkle Cake is all about contrast. The top layers are crisp and flaky, while the interior remains soft, creamy, and almost pudding-like. The syrup adds moisture and shine without making the cake soggy. Each bite delivers buttery richness, gentle sweetness, and delicate vanilla notes.

Because the flavors are subtle, Crinkle Cake pairs beautifully with tea, coffee, or even fresh fruit. It can be enjoyed warm or at room temperature, making it ideal for make-ahead entertaining.

Variations to Try

  • Nutty Crinkle Cake: Sprinkle crushed pistachios or walnuts between the phyllo folds before baking.

  • Chocolate Twist: Drizzle melted dark chocolate over the finished cake.

  • Citrus Crinkle Cake: Use orange zest in the custard and orange blossom water in the syrup.

  • Less Sweet Version: Reduce the syrup quantity for a lighter dessert.

Serving and Storage Tips

Let the cake rest for at least 20 minutes after adding syrup to allow full absorption. Slice carefully with a sharp knife to preserve the beautiful ridges. Store leftovers covered in the refrigerator for up to three days; reheat briefly in the oven to restore crispness.

Final Thoughts

Crinkle Cake proves that stunning desserts don’t have to be complicated. With humble ingredients and a forgiving technique, this cake transforms phyllo dough into something truly memorable. Whether you’re baking for family, guests, or simply yourself, Crinkle Cake is a recipe worth keeping—it’s comforting, elegant, and endlessly satisfying.

Banana Pudding Trifle with Chocolate Chips

Few desserts strike the perfect balance between comfort and celebration quite like a banana pudding trifle. Creamy, sweet, and layered with nostalgic flavors, this dessert takes the classic Southern banana pudding and elevates it into a show-stopping centerpiece. The addition of chocolate chips adds a delightful twist—tiny bursts of rich chocolate that contrast beautifully with the smooth vanilla pudding, ripe bananas, and soft cake or cookies. Whether you’re hosting a family gathering, preparing a holiday dessert, or simply craving something indulgent yet familiar, this banana pudding trifle with chocolate chips is guaranteed to please.

Why This Trifle Works So Well

A trifle is all about layers, textures, and visual appeal. In this recipe, each spoonful delivers something special: fluffy whipped cream, velvety pudding, tender bananas, soft cake or wafers, and the gentle crunch of chocolate chips. The flavors are simple and comforting, but when combined, they create a dessert that feels both nostalgic and modern.

Chocolate chips might seem like a small addition, but they make a big difference. They cut through the sweetness of the pudding and bananas, adding depth and a slightly bittersweet note that keeps the dessert from feeling too heavy.

Ingredients You’ll Need

This recipe is designed to be approachable, using ingredients that are easy to find and simple to work with.

  • Bananas: Choose ripe but firm bananas. They should be sweet and fragrant without being mushy.

  • Vanilla pudding: You can use homemade vanilla pudding for a richer flavor or instant pudding for convenience.

  • Milk: Cold milk works best for pudding, especially if using instant.

  • Heavy cream: For homemade whipped cream that’s light and airy.

  • Powdered sugar: Adds sweetness to the whipped cream without graininess.

  • Vanilla extract: Enhances the overall flavor.

  • Vanilla wafers or sponge cake: Traditional banana pudding uses vanilla wafers, but pound cake or sponge cake also works beautifully.

  • Chocolate chips: Mini chocolate chips are ideal, as they distribute more evenly through the layers.

  • Optional extras: Chocolate shavings, caramel drizzle, or crushed cookies for garnish.

Step-by-Step Preparation

1. Prepare the pudding
If you’re making homemade pudding, allow it to cool completely before assembling the trifle. If using instant pudding, whisk it with cold milk until thick and smooth, then refrigerate for a few minutes to fully set. The pudding should be creamy but firm enough to hold its shape in layers.

2. Whip the cream
In a chilled bowl, beat the heavy cream with powdered sugar and vanilla extract until soft peaks form. Be careful not to overwhip—you want the cream to be fluffy and smooth, not stiff or grainy.

3. Slice the bananas
Just before assembling the trifle, slice the bananas into even rounds. Cutting them at the last minute helps prevent browning and keeps them looking fresh.

4. Prepare the base layer
At the bottom of a large glass trifle dish (or individual serving glasses), add a layer of vanilla wafers or cake pieces. This layer absorbs moisture from the pudding and bananas, becoming soft and cake-like.

5. Start layering
Spread a layer of vanilla pudding over the base, followed by a layer of banana slices. Sprinkle a generous handful of chocolate chips over the bananas. Then add a layer of whipped cream, spreading it gently to keep the layers distinct.

6. Repeat the layers
Continue layering wafers or cake, pudding, bananas, chocolate chips, and whipped cream until the dish is full. Aim for at least two to three complete sets of layers for the best visual and textural impact.

7. Finish with flair
Top the trifle with a final layer of whipped cream. Sprinkle chocolate chips, chocolate shavings, or crushed vanilla wafers on top. A few banana slices or a light drizzle of caramel can add an elegant finishing touch.

Chilling and Serving

For best results, refrigerate the trifle for at least 2–4 hours before serving. This resting time allows the flavors to meld and the layers to set properly. The wafers soften, the pudding thickens slightly, and the dessert becomes easier to scoop.

When ready to serve, use a large spoon to dig deep into the trifle, ensuring each portion includes every layer. The contrast of creamy pudding, soft fruit, and chocolate makes every bite satisfying.

Tips for the Perfect Banana Pudding Trifle

  • Use mini chocolate chips: They distribute more evenly and don’t overpower the dessert.

  • Prevent banana browning: If preparing slightly ahead, lightly brush banana slices with lemon juice, though this is usually unnecessary if assembling close to serving time.

  • Balance sweetness: If your chocolate chips are very sweet, consider using dark or semi-sweet chocolate.

  • Make it your own: Add peanut butter chips, white chocolate chips, or a layer of chocolate pudding for variation.

A Dessert for Any Occasion

This banana pudding trifle with chocolate chips is the kind of dessert that brings people back for seconds. It’s comforting enough for a casual family dinner yet impressive enough for parties and celebrations. With its beautiful layers, familiar flavors, and irresistible chocolate twist, it’s a dessert that feels both timeless and exciting—proof that even classic recipes can shine with a small, thoughtful upgrade.

A Timeless Italian Classic Torta della Nonna

Few desserts capture the warmth and nostalgia of Italian home baking quite like Torta della Nonna, which translates simply to “Grandmother’s Cake.” This beloved Tuscan dessert is a celebration of simplicity and balance: a tender shortcrust pastry filled with silky vanilla custard, topped with pine nuts and a gentle snowfall of powdered sugar. It’s the kind of cake that doesn’t shout for attention, yet once tasted, it leaves a lasting impression—much like the grandmothers who inspired it.

Traditionally served after Sunday lunch or with an afternoon espresso, Torta della Nonna has endured for generations because it relies on honest ingredients and careful technique rather than extravagance. Below is a classic, authentic recipe that brings this timeless Italian favorite into your kitchen.

Ingredients

For the Italian Shortcrust Pastry (Pasta Frolla)

  • 2 ½ cups (315 g) all-purpose flour

  • ½ cup (100 g) granulated sugar

  • ¾ cup (170 g) unsalted butter, cold and cubed

  • 2 large egg yolks

  • 1 whole egg

  • Zest of 1 lemon

  • 1 teaspoon vanilla extract

  • Pinch of salt

For the Pastry Cream (Crema Pasticcera)

  • 2 cups (500 ml) whole milk

  • 4 large egg yolks

  • ½ cup (100 g) granulated sugar

  • ¼ cup (30 g) cornstarch

  • Zest of 1 lemon

  • 1 teaspoon vanilla extract

For Topping

  • 3 tablespoons pine nuts

  • Powdered sugar, for dusting

Step-by-Step Instructions

1. Prepare the Pastry Cream

Begin with the custard, as it needs time to cool. In a saucepan, gently heat the milk with the lemon zest until it is warm but not boiling. Remove from heat and let it infuse.

In a bowl, whisk together the egg yolks and sugar until pale and creamy. Add the cornstarch and whisk until smooth. Slowly pour the warm milk into the egg mixture, whisking constantly to avoid curdling. Return everything to the saucepan and cook over medium-low heat, stirring continuously, until the custard thickens to a smooth, pudding-like consistency.

Remove from heat, stir in the vanilla extract, and discard the lemon zest. Transfer the custard to a bowl, cover with plastic wrap pressed directly onto the surface, and let it cool completely.

2. Make the Pasta Frolla

In a large bowl, combine the flour, sugar, salt, and lemon zest. Add the cold butter cubes and rub them into the flour using your fingertips until the mixture resembles coarse crumbs.

Add the egg yolks, whole egg, and vanilla extract. Gently mix until the dough comes together. Avoid overworking it; the dough should be soft but not sticky. Shape into a disk, wrap in plastic, and refrigerate for at least 30 minutes.

3. Assemble the Cake

Preheat your oven to 350°F (175°C). Butter and lightly flour a 9-inch (23 cm) tart pan.

Divide the chilled dough into two portions, one slightly larger than the other. Roll out the larger portion on a lightly floured surface and use it to line the bottom and sides of the tart pan. Trim any excess.

Spread the cooled pastry cream evenly over the dough base. Roll out the remaining dough and gently place it over the custard filling. Seal the edges by pressing lightly.

4. Add the Classic Topping

Sprinkle the pine nuts evenly over the top of the cake. They will toast beautifully in the oven, adding a subtle nutty aroma and traditional finish.

5. Bake

Bake the Torta della Nonna for 40–45 minutes, or until the pastry is golden and firm to the touch. Allow the cake to cool completely in the pan before removing it.

Once cooled, dust generously with powdered sugar.

Serving and Storage

Torta della Nonna is best served at room temperature, when the custard is fully set and the flavors are well balanced. Slice it cleanly with a sharp knife and serve with espresso, cappuccino, or a light dessert wine.

The cake keeps well in the refrigerator for up to 3 days. Simply bring it to room temperature before serving for the best texture and flavor.

Tips for Authentic Flavor

  • Use real vanilla and fresh lemon zest for a traditional Italian aroma.

  • Pine nuts are essential; substituting them changes the character of the cake.

  • Don’t rush the chilling time for the dough—it ensures a tender, flaky crust.

Final Thoughts

Torta della Nonna is more than just a dessert; it’s a slice of Italian tradition passed down through generations. With its buttery crust, creamy custard, and delicate pine nut topping, it embodies comfort, elegance, and timeless appeal. Whether you’re baking it for family, guests, or simply yourself, this classic recipe brings a touch of Italian grandmotherly love to every bite.