Most people will go their entire life without ever knowing what the drawer under the oven was actually designed for

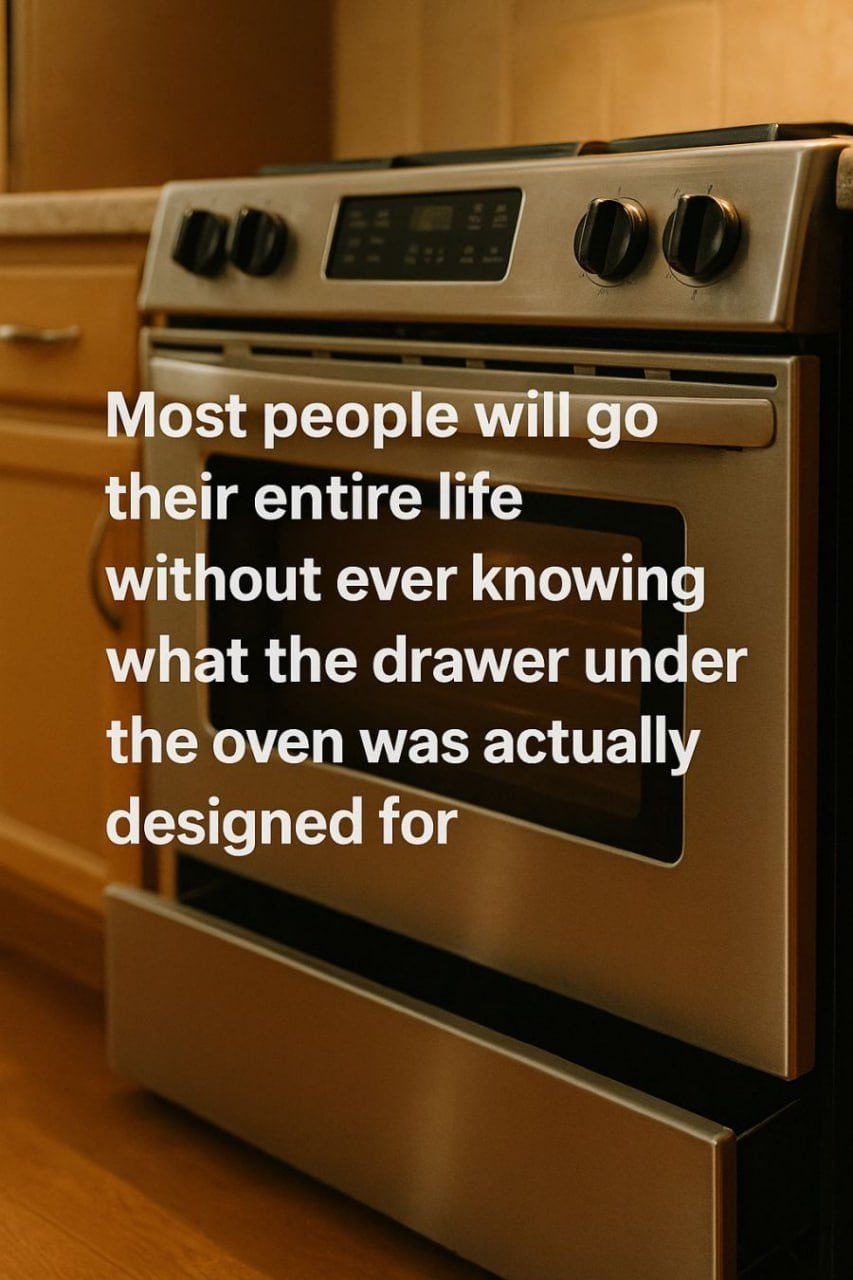
If you’ve ever pulled open the drawer under your oven, you might have paused for a moment, wondering: what is this actually for? For most people, this is a kitchen enigma, a seemingly purposeless space at the bottom of an appliance they use every day. Some store baking sheets there, others toss old pots or even snacks, while a few leave it closed, never quite sure what belongs inside. Yet, despite its common presence, the true purpose of the oven drawer is something that has eluded the notice of millions.

A Common Misconception

Many assume the drawer is simply extra storage, and in some ways, that isn’t entirely wrong. Manufacturers have long marketed it as a convenient place to keep pans, trays, or casserole dishes close at hand. After all, it sits perfectly near the oven, making it tempting to store the tools of your baking trade right below where you’ll need them. But this interpretation only scratches the surface.

In reality, the function of that drawer depends largely on the type of oven you own. Older and more traditional ovens, for example, often included what’s called a “warming drawer” — a feature that was originally intended to keep food warm until it was ready to be served. On modern ovens, however, the drawer often serves a different, sometimes purely mechanical purpose, which can lead to a lot of confusion.

The Warming Drawer: A Forgotten Feature

The original design of many oven drawers was simple yet clever: it was a warming drawer. These drawers are meant to maintain a low, consistent heat, usually around 150–200°F (65–93°C). The idea was to keep your roast hot, your bread rolls soft, or your cooked vegetables at serving temperature while the rest of the meal was finishing on the stove or table.

Unlike a microwave, the drawer wouldn’t cook your food further; it would just hold it at a safe, warm temperature. This was especially handy in households where timing meals perfectly was a challenge — the warming drawer allowed you to prepare dishes ahead of time and serve everything piping hot, no matter when each component finished cooking.

However, not all drawers are functional warming drawers. Many modern ovens feature a drawer that doesn’t heat at all. In these cases, the space exists mainly to cover the oven mechanics, such as insulation, wiring, or heating elements, and sometimes to catch crumbs and debris from the oven above. If you attempt to use these for warming food, you may find that nothing heats up, or worse, you might risk fire hazards or damaging the appliance.

Storage or Safety Feature?

For ovens where the drawer doesn’t heat, people often repurpose it as a storage area. This is how it became commonly seen as a place for pots, pans, muffin tins, or even plastic containers — even though storing flammable items there can be risky if the oven does heat up unexpectedly. In fact, most appliance manuals explicitly caution against placing anything combustible in the drawer. Yet, despite warnings, this practical use became part of household tradition.

Interestingly, in some designs, the drawer is actually there for ventilation. The space allows hot air to circulate, helping the oven maintain its temperature and preventing the bottom of the appliance from overheating. Essentially, the drawer is part of the oven’s “breathing system,” a hidden component in the engineering that ensures safety and efficiency. So, while it may appear to be a simple storage compartment, its presence may be critical to your oven’s performance.

How to Use It Correctly

So how can you make use of the oven drawer safely and effectively? First, check your oven’s manual. If it’s a true warming drawer, it likely has temperature settings and clear guidance on what can be stored inside while heating. These drawers are perfect for:

  • Keeping bread rolls and pastries warm without drying them out.

  • Holding cooked meats while finishing other dishes.

  • Softening butter or chocolate gently without melting it too fast.

If your drawer doesn’t heat, it’s safest to stick to cold storage of oven-safe items only, such as baking sheets or trays. Avoid anything flammable or plastic, as these could melt or catch fire if residual heat from the oven seeps downward.

A Kitchen Quirk with Hidden Genius

The drawer under the oven is a perfect example of everyday design that goes unnoticed until curiosity strikes. It’s one of those features most people pass by every day without ever asking why it exists. Some may never know its true purpose until moving into a new home, receiving an appliance manual, or stumbling upon a discussion online.

Whether a warming drawer, a storage compartment, or part of the oven’s ventilation system, this small feature demonstrates the ingenuity hidden in our kitchens. It reminds us that even the most mundane items in our homes have a story, a history, or an engineering rationale behind them. The next time you slide open that drawer, take a moment to consider its design — and maybe, if you’re lucky, put it to proper use, keeping your bread warm, your pies perfect, or simply marveling at the clever thought that went into a detail most people overlook.

Conclusion

The drawer under the oven is far more than just a forgotten compartment. For some, it’s a warming haven for freshly baked goods; for others, it’s a storage solution; and for a few, it’s a vital part of the oven’s structure. Its presence in kitchens around the world is a subtle testament to design thinking, combining convenience, safety, and versatility. So, the next time you reach for that drawer, remember: there’s more to it than meets the eye. You may finally uncover the secret that millions have overlooked their entire lives.

If you spot these red dots on your skin you had better know what they mean

Noticing small red dots on your skin can be surprising—and sometimes worrying. While many people immediately fear the worst, the truth is that red spots on the skin can appear for a wide range of reasons, most of which are harmless. However, some red dots can signal underlying health issues that deserve attention. Understanding what these marks might mean can help you decide when to relax and when to seek medical advice.

Below is a clear, balanced guide to the most common causes of red dots on the skin and what they may be telling you.


1. Cherry Angiomas: The Most Common Cause

One of the most frequent explanations for tiny red dots is cherry angiomas. These are small, bright red or purple bumps caused by clusters of dilated blood vessels near the skin’s surface.

What you should know:

  • They are very common, especially after age 30

  • They are completely benign

  • They can appear anywhere on the body

  • They do not require treatment unless they bleed or cause cosmetic concern

Cherry angiomas are not cancerous and are not linked to serious disease. Many people develop more of them as they age.


2. Petechiae: Tiny Red Warning Signs

Petechiae are very small, flat red or purple dots that do not turn white when pressed. Unlike cherry angiomas, they often appear suddenly and in clusters.

Possible causes include:

  • Minor trauma or excessive pressure (such as heavy coughing or vomiting)

  • Certain medications (especially blood thinners)

  • Viral or bacterial infections

  • Blood clotting disorders

If petechiae appear without an obvious reason or are accompanied by fever, fatigue, or bruising, medical attention is important. In rare cases, they can indicate serious conditions affecting the blood or immune system.


3. Heat Rash: Blocked Sweat Glands

In hot or humid conditions, red dots may be a sign of heat rash (also called miliaria). This happens when sweat becomes trapped under the skin.

Common features:

  • Small red or pink bumps

  • Itching or prickling sensation

  • Often appears on the neck, chest, back, or skin folds

Heat rash is harmless and usually clears once the skin cools down and stays dry.


4. Allergic Reactions and Skin Sensitivities

Red dots may appear as part of an allergic reaction to food, medication, cosmetics, detergents, or environmental triggers.

Signs include:

  • Itchy red bumps or patches

  • Sudden onset after exposure to a new product or food

  • Sometimes accompanied by swelling

Mild allergic reactions often resolve on their own, but severe reactions—especially those involving breathing difficulty—require immediate medical care.


5. Folliculitis: Inflamed Hair Follicles

Folliculitis occurs when hair follicles become inflamed, usually due to bacteria, fungi, or irritation from shaving.

Typical symptoms:

  • Small red dots with a white center

  • Tender or itchy bumps

  • Often found on legs, arms, scalp, or beard area

Most cases are mild, but persistent or painful folliculitis may need treatment.


6. Insect Bites: Small but Noticeable

Mosquitoes, fleas, bedbugs, and mites can leave behind clusters of red dots.

Clues it may be a bite:

  • Itching is common

  • Dots appear in groups or lines

  • Often noticed after sleeping or outdoor exposure

While usually harmless, infected bites or severe allergic responses should be evaluated by a healthcare professional.


7. Skin Conditions Like Eczema or Psoriasis

Chronic skin conditions can also present as red spots or patches.

  • Eczema often causes itchy, inflamed red areas

  • Psoriasis may produce red patches with silvery scales

These conditions are not contagious but may require long-term management.


8. When Red Dots Could Signal a Bigger Problem

In rare cases, red dots can be associated with more serious medical conditions, such as:

  • Vasculitis (inflammation of blood vessels)

  • Autoimmune disorders

  • Certain infections

  • Blood-related illnesses

Seek medical advice if red dots:

  • Appear suddenly and spread rapidly

  • Do not fade over time

  • Are accompanied by fever, weakness, or unexplained bruising

  • Bleed easily or become painful


Final Thoughts

Red dots on the skin are common and usually harmless, but they should never be ignored without thought. Your body often uses the skin to signal internal changes, stress, or reactions to your environment. Paying attention to size, color, texture, and accompanying symptoms can help you understand what’s normal—and what isn’t.

If you’re ever unsure, especially if the spots change or are linked to other symptoms, consulting a healthcare professional is always the safest choice. Awareness, not fear, is the key to protecting your health.

Cheesy Meatloaf with Mashed Potatoes

Few meals bring the same sense of warmth and nostalgia as cheesy meatloaf served with creamy mashed potatoes. This timeless comfort dish has graced dinner tables for generations, offering hearty flavors, simple ingredients, and soul-satisfying goodness. Whether you’re cooking for family, guests, or simply craving a cozy homemade meal, this cheesy meatloaf with mashed potatoes delivers on every level.

What sets this version apart is the gooey melted cheese tucked inside the meatloaf, creating a savory surprise in every slice. Paired with fluffy, buttery mashed potatoes, it’s the kind of meal that feels like a hug on a plate.


Why This Cheesy Meatloaf Recipe Works

Traditional meatloaf can sometimes be dry or bland, but this recipe solves both problems. The combination of ground meat, breadcrumbs, eggs, milk, and cheese keeps the loaf moist and tender. A flavorful glaze caramelizes on top while baking, adding a slightly sweet and tangy finish that perfectly balances the savory interior.

The mashed potatoes are smooth, rich, and creamy—ideal for soaking up every drop of sauce and melted cheese. Together, these two classics form a complete, satisfying meal that never goes out of style.


Ingredients for Cheesy Meatloaf

For the Meatloaf:

  • 1½ pounds ground beef (80/20 for best flavor)

  • 1 cup breadcrumbs or crushed crackers

  • 2 large eggs

  • 1 cup shredded cheese (cheddar, mozzarella, or a blend)

  • ½ cup milk

  • 1 small onion, finely chopped

  • 2 cloves garlic, minced

  • ½ cup ketchup

  • 2 tablespoons Worcestershire sauce

  • 1 teaspoon salt

  • ½ teaspoon black pepper

  • 1 teaspoon paprika

  • 1 teaspoon Italian seasoning

For the Glaze:

  • ½ cup ketchup

  • 2 tablespoons brown sugar

  • 1 tablespoon mustard


Ingredients for Mashed Potatoes

  • 2 pounds potatoes (Yukon Gold or Russet)

  • ½ cup milk or cream

  • 4 tablespoons butter

  • Salt to taste

  • Optional: garlic, sour cream, or cream cheese for extra richness


How to Make Cheesy Meatloaf

Step 1: Prepare the Meatloaf Mixture

Preheat your oven to 375°F (190°C). In a large bowl, combine ground beef, breadcrumbs, eggs, milk, onion, garlic, Worcestershire sauce, ketchup, salt, pepper, paprika, and Italian seasoning. Mix gently until just combined—overmixing can make the meatloaf dense.

Fold in half of the shredded cheese, saving the rest for the center or topping.

Step 2: Shape and Fill

Lightly grease a loaf pan or line a baking sheet with parchment paper. Press half of the meat mixture into the pan, creating a small indentation down the center. Sprinkle the remaining cheese evenly over the middle, then cover with the rest of the meat mixture, sealing the edges.

Step 3: Add the Glaze

Mix ketchup, brown sugar, and mustard in a small bowl. Spread generously over the top of the meatloaf.

Step 4: Bake

Bake uncovered for 55–65 minutes, or until the internal temperature reaches 160°F (71°C). Let the meatloaf rest for 10 minutes before slicing—this helps it hold together and keeps it juicy.


How to Make Perfect Mashed Potatoes

Step 1: Cook the Potatoes

Peel and cut potatoes into even chunks. Place them in a large pot, cover with cold salted water, and bring to a boil. Cook for 15–20 minutes until fork-tender.

Step 2: Mash and Season

Drain well and return potatoes to the hot pot. Add butter and let it melt. Mash until smooth, then gradually add warm milk or cream. Season with salt to taste.

For extra flavor, mix in roasted garlic, sour cream, or cream cheese.


Serving Suggestions

Serve thick slices of cheesy meatloaf over a bed of mashed potatoes, spooning extra glaze or pan juices on top. Add a simple green vegetable like steamed broccoli, green beans, or a fresh salad to balance the richness.

This dish is perfect for:

  • Family dinners

  • Meal prep and leftovers

  • Sunday comfort meals

  • Cold weather cravings


Storage and Leftovers

Cheesy meatloaf stores beautifully. Refrigerate leftovers in an airtight container for up to 4 days. Mashed potatoes can be reheated with a splash of milk to restore creaminess. The meatloaf also freezes well—wrap slices individually for easy future meals.


Final Thoughts

Cheesy Meatloaf with Mashed Potatoes is more than just a recipe—it’s a reminder of home-cooked comfort and simple pleasures. With its juicy, cheese-filled center and velvety mashed potatoes, this dish satisfies both the stomach and the soul. Easy to prepare and endlessly comforting, it’s a meal you’ll come back to again and again.

how to cleanse 15 kilos of waste from your colon at night

Promises to “cleanse 15 kilos of waste from your colon overnight” are everywhere online—but they are not grounded in medical reality. While the idea is tempting, especially if you feel bloated or uncomfortable, it’s important to understand how the colon truly works, why such claims are misleading, and what safe, evidence-based steps can actually improve digestive health.

The Myth of “15 Kilos of Waste”

The human colon does not store 15 kilos (33 pounds) of waste. In healthy adults, the amount of stool present at any given time is usually a few hundred grams to, at most, a couple of kilograms—and even that fluctuates based on diet and hydration. Claims of massive “toxic buildup” are a marketing tactic used to sell laxatives, teas, powders, or enemas.

Your digestive system is self-cleaning. The liver detoxifies the blood, the kidneys filter waste, and the intestines move digested material forward through natural muscular contractions called peristalsis. There is no hidden reservoir of old waste clinging to the colon walls for years.

Why Overnight “Colon Cleanses” Can Be Dangerous

Products or methods promising dramatic overnight results often rely on strong laxatives, stimulant herbs, or enemas. These can cause:

  • Severe dehydration

  • Electrolyte imbalances (dangerous for the heart)

  • Dependence on laxatives

  • Cramping, diarrhea, and intestinal irritation

  • Worsening constipation over time

Frequent or aggressive colon cleansing can actually weaken the colon’s natural function, making it harder to have normal bowel movements without assistance.

What That “Light” Feeling Really Is

When people report feeling lighter after a cleanse, it’s usually due to:

  • Loss of water, not fat or “toxins”

  • Temporary emptying of bowel contents

  • Reduced bloating from cutting processed foods

This is not detoxification—and any weight change is short-lived.


What Actually Helps Clean and Support Your Colon (Safely)

While you cannot—and should not—purge massive amounts of waste overnight, you can support healthy bowel movements and reduce bloating naturally.

1. Hydration Before Bed

Drinking enough water throughout the day softens stool and supports regular elimination. A warm glass of water in the evening can gently stimulate digestion—without shocking your system.

2. Fiber: The Colon’s Natural Cleaner

Fiber is the real hero of colon health. It adds bulk to stool and feeds beneficial gut bacteria.

Best fiber sources:

  • Oats and whole grains

  • Chia seeds and flaxseeds

  • Apples, pears, and berries

  • Lentils and beans

  • Leafy greens

Increase fiber gradually to avoid gas and cramps.

3. Magnesium (With Caution)

Magnesium-rich foods (like almonds, spinach, and bananas) help relax intestinal muscles and promote regularity. Some people use magnesium supplements at night, but excessive doses can cause diarrhea—so moderation is key.

4. Probiotics for Gut Balance

Fermented foods such as yogurt, kefir, sauerkraut, and kimchi support healthy gut bacteria, which play a major role in digestion and stool consistency.

5. Evening Movement

A short walk after dinner stimulates peristalsis and reduces bloating. Even gentle stretching before bed can support overnight digestive movement.

6. Consistent Bathroom Routine

Training your body to respond to natural urges—especially in the morning—supports colon health far better than forcing bowel movements at night.


Signs You Don’t Need a “Cleanse”

You likely don’t need any detox if:

  • You have regular bowel movements

  • You don’t experience chronic constipation

  • You feel relief after dietary adjustments

  • You don’t rely on laxatives

Your colon is doing its job.


When to See a Doctor

If you experience:

  • Persistent constipation

  • Severe bloating or abdominal pain

  • Blood in stool

  • Unexplained weight loss

These are medical issues, not detox problems, and should be evaluated by a healthcare professional.


The Bottom Line

There is no safe or real way to cleanse 15 kilos of waste from your colon overnight—because that waste doesn’t exist. The colon does not need flushing, purging, or harsh interventions. What it needs is fiber, hydration, balanced nutrition, and regular movement.

Lava Cake

Few desserts capture the essence of indulgence quite like the lava cake. Also known as molten chocolate cake, this heavenly treat combines the richness of a chocolate cake with the gooey pleasure of a molten center that oozes out like lava when you cut into it. Whether you’re a professional baker or a passionate home cook, mastering this dessert is a journey worth taking.

A Sweet History

The exact origin of lava cake is a topic of sweet debate among dessert enthusiasts. Many attribute its creation to French chef Michel Bras, who first introduced the concept of a chocolate cake with a liquid center in 1981. However, American chef Jean-Georges Vongerichten is often credited with popularizing the dessert in the 1990s, when he accidentally underbaked a chocolate cake, discovering that the center remained molten. Whatever its origin, the dessert quickly became a symbol of elegance and indulgence, frequently appearing in fine-dining restaurants around the world.

Ingredients That Make Magic

The magic of lava cake lies in its simplicity. Unlike many elaborate desserts, it requires only a handful of basic ingredients, but each one plays a crucial role in achieving the perfect texture:

  • High-quality chocolate: Use at least 60–70% cocoa for a rich, deep flavor. Semi-sweet chocolate also works well.

  • Unsalted butter: Adds creaminess and helps the cake hold its shape while keeping the center molten.

  • Eggs: Both whole eggs and egg yolks are used. The yolks add richness, while the whites help the cake rise slightly.

  • Sugar: Balances the bitterness of chocolate without overpowering it.

  • Flour: Just a small amount is needed to provide structure without making the cake dense.

  • Optional flavorings: A pinch of salt, a splash of vanilla extract, or a teaspoon of espresso powder can enhance the chocolate flavor.

The simplicity of these ingredients makes lava cake accessible to both beginners and seasoned bakers.

Step-by-Step Recipe

Creating the perfect lava cake requires attention to timing and temperature. Here’s a detailed guide:

Ingredients (Serves 4)

  • 100 g (3.5 oz) dark chocolate

  • 100 g (3.5 oz) unsalted butter

  • 2 whole eggs

  • 2 egg yolks

  • 50 g (1/4 cup) sugar

  • 25 g (2 tbsp) all-purpose flour

  • Pinch of salt

  • Butter and cocoa powder for greasing ramekins

Instructions

  1. Preheat your oven to 220°C (425°F). Grease four ramekins with butter and dust with cocoa powder to prevent sticking.

  2. Melt chocolate and butter together in a heatproof bowl over a pot of simmering water (double boiler method), stirring until smooth. Remove from heat and let it cool slightly.

  3. Whisk eggs and sugar together in a separate bowl until pale and frothy. This step ensures a light texture.

  4. Combine the chocolate mixture with the eggs, gently folding them together. Avoid overmixing to keep the cake tender.

  5. Sift in the flour and salt, folding gently until fully incorporated. The batter should be smooth and glossy.

  6. Divide the batter evenly among the prepared ramekins. Place them on a baking sheet.

  7. Bake for 10–12 minutes. The edges should be set while the centers remain soft. Baking times may vary slightly depending on your oven.

  8. Remove from oven and let the cakes rest for 1–2 minutes. Carefully invert onto plates. The molten center should flow out when you cut into the cake.

Serving Suggestions

Lava cake is a canvas for creativity. Traditionally, it is served warm with a dusting of powdered sugar. Other popular accompaniments include:

  • Vanilla ice cream: The contrast of warm cake and cold ice cream is irresistible.

  • Fresh berries: Strawberries, raspberries, or blueberries add a tart, fresh note.

  • Whipped cream: Light and fluffy, it balances the richness of chocolate.

  • Caramel or raspberry sauce: Adds an extra layer of flavor and elegance.

Tips for the Perfect Lava Cake

  1. Use quality chocolate: The flavor depends heavily on chocolate, so choose a brand you love.

  2. Don’t overbake: Timing is crucial. Overbaking will result in a fully set cake, losing the molten center.

  3. Room temperature eggs: They incorporate more easily into the chocolate mixture, giving a smoother batter.

  4. Prepare ramekins carefully: Properly greasing and dusting prevents sticking and ensures a perfect release.

  5. Serve immediately: Lava cake is best enjoyed fresh out of the oven when the center is perfectly molten.

Why Lava Cake Is Universally Loved

Lava cake appeals to multiple senses: the rich aroma of chocolate, the delicate texture of cake, and the dramatic reveal of molten chocolate flowing out. It’s versatile too—it can be served at formal dinners, romantic evenings, or casual family gatherings. Its visual appeal and decadent flavor make it a dessert that leaves a lasting impression.

Moreover, lava cake embodies the joy of indulgence without being overly complicated. With just a few ingredients and some attention to technique, anyone can create a dessert that feels gourmet yet comforting.

Conclusion

The lava cake is more than just a dessert; it’s an experience. From the first spoonful of warm, molten chocolate to the lingering sweetness on your palate, it celebrates the joy of chocolate in its purest form. By mastering the balance of rich cake and liquid center, you can transform a few simple ingredients into a show-stopping dessert that delights every chocolate lover. Whether served with ice cream, berries, or a drizzle of sauce, lava cake remains an iconic treat that never fails to impress.

So, the next time you crave a dessert that’s both elegant and indulgent, give lava cake a try. With its molten heart and decadent flavor, it promises to satisfy even the most serious chocoholics.

One Month Before a Heart Attack, Your Body Will Alert You: Here Are the 6 Symptoms

Heart disease remains the leading cause of death worldwide, and a heart attack can often strike without warning. However, recent studies and medical observations indicate that your body sometimes gives subtle signs weeks before a heart attack occurs. Recognizing these early warnings can save lives, allowing timely medical intervention before a major cardiac event. Here are six symptoms that may appear up to a month before a heart attack and why they should never be ignored.

1. Unexplained Fatigue

Feeling unusually tired after your usual activities may seem harmless, but persistent fatigue is one of the most common early warning signs of heart trouble. According to the American Heart Association, fatigue can occur weeks before a heart attack, especially in women. This isn’t ordinary tiredness caused by a long day; it’s often a deep, overwhelming exhaustion that rest does not alleviate.

The underlying cause is usually reduced blood flow to the heart. When your heart struggles to pump efficiently due to narrowed arteries, your muscles and organs receive less oxygen, leaving you drained even after minor activities. If fatigue suddenly intensifies or persists without a clear reason, it’s time to consult a doctor.

2. Shortness of Breath

Shortness of breath or difficulty breathing is another subtle warning sign of impending heart problems. You might notice this while performing routine tasks like climbing stairs or carrying groceries. This symptom occurs because the heart is no longer able to pump blood efficiently, causing fluid to build up in the lungs.

This symptom is particularly concerning when combined with other signs like fatigue or chest discomfort. Women, in particular, may experience this without the classic chest pain associated with heart attacks, making it easy to overlook.

3. Chest Discomfort or Pressure

While chest pain is the most well-known symptom of a heart attack, the type of discomfort experienced a month before the event can be different. It may not be sharp or intense; instead, it can feel like pressure, tightness, or mild squeezing in the chest.

This sensation often comes and goes and might be triggered by physical exertion or stress. Because it is intermittent and mild, many people ignore it. However, even mild chest discomfort is a serious warning that should prompt immediate medical evaluation.

4. Swelling in Legs, Ankles, or Feet

Swelling, or edema, is a sign that your heart is struggling to pump blood effectively. When blood flow slows, fluid can accumulate in the lower extremities, causing noticeable swelling in your legs, ankles, or feet.

If you notice that your shoes feel tighter than usual or you develop unexplained swelling, this could indicate heart dysfunction. Early detection and treatment of heart-related fluid retention can prevent complications and potentially reduce the severity of a heart attack.

5. Irregular Heartbeats

Palpitations, or an irregular heartbeat, can also occur in the weeks leading up to a heart attack. You might feel your heart racing, skipping beats, or fluttering unexpectedly. These sensations occur because the heart’s electrical system is affected by compromised blood flow or damage to heart tissue.

Not all palpitations indicate a serious problem, but when combined with other warning signs like fatigue, chest pressure, or shortness of breath, they should be taken seriously. Consulting a cardiologist for an electrocardiogram (ECG) or other heart function tests can help identify potential risks early.

6. Persistent Indigestion or Nausea

Some people experience gastrointestinal symptoms in the month before a heart attack. Persistent indigestion, nausea, or a feeling of fullness may be mistaken for stomach issues, but they can be warning signs of heart problems, particularly in women.

These symptoms occur because reduced blood flow to the heart can affect the digestive system, causing discomfort that seems unrelated to the heart. When these symptoms appear alongside fatigue, shortness of breath, or chest discomfort, they should be treated as red flags.

Why Early Detection Matters

Recognizing these subtle warning signs is crucial. According to the Centers for Disease Control and Prevention (CDC), early intervention can significantly reduce the damage caused by a heart attack. Lifestyle modifications, medications, or procedures such as angioplasty can prevent a full-blown heart attack if detected early.

Ignoring these early symptoms can be fatal. Many people attribute these warning signs to aging, stress, or minor ailments, delaying critical treatment. Paying attention to your body, keeping regular medical checkups, and communicating any unusual symptoms to a healthcare provider can make a life-saving difference.

Conclusion

A heart attack doesn’t always strike suddenly without warning. In many cases, your body provides early alerts up to a month in advance. Symptoms like persistent fatigue, shortness of breath, chest discomfort, swelling in the legs, irregular heartbeats, and gastrointestinal issues are all signals that your heart may be under stress.

If you experience one or more of these symptoms, do not dismiss them. Seek medical attention promptly. Early recognition and timely intervention can not only prevent a heart attack but also save your life. Your heart works tirelessly every day—listening to it could be the key to protecting your future.

Two Spoons in the Morning A Natural Remedy for Bone Pain Diabetes Nerves and Depression

In a world increasingly drawn to natural wellness, many people are rediscovering the power of simple morning rituals. Among these, the habit of taking two spoons in the morning—usually referring to a natural mixture made from ingredients like honey, olive oil, apple cider vinegar, or ground seeds—has gained attention for its potential to support overall health. While not a miracle cure, this gentle routine is rooted in traditional practices and supported by modern nutritional understanding. When used consistently and wisely, it may help support bone health, blood sugar balance, nerve function, and even emotional well-being.

The Philosophy Behind the Morning Spoon Ritual

Morning is when the body is most receptive to nourishment. After hours of fasting, your metabolism, digestion, and hormonal systems are ready to absorb nutrients efficiently. Taking two spoons of a nutrient-dense natural remedy on an empty stomach may help “wake up” the body, reduce inflammation, and set a balanced tone for the day.

These remedies are not new. Many cultures have long relied on combinations of natural fats, mild acids, and plant-based nutrients to support health—passed down through generations long before supplements became common.


Supporting Bone Pain and Joint Health

Bone and joint pain often stem from inflammation, mineral deficiencies, or poor circulation. Natural ingredients commonly used in morning spoon remedies may help in several ways:

  • Healthy fats (such as olive oil or sesame oil) support calcium absorption and reduce joint inflammation.

  • Honey contains antioxidants that may help fight oxidative stress linked to bone degeneration.

  • Apple cider vinegar is traditionally believed to support mineral uptake, particularly calcium and magnesium, which are essential for bone strength.

Over time, reducing inflammation and improving nutrient absorption may ease stiffness and discomfort, especially in people with age-related joint issues.


A Gentle Aid for Blood Sugar Balance

For people concerned about diabetes or insulin resistance, mornings are especially important. Blood sugar levels can spike after breakfast if the body is not well-regulated.

Certain natural morning mixtures may help by:

  • Improving insulin sensitivity

  • Slowing sugar absorption

  • Supporting liver function, which plays a major role in glucose control

For example, small amounts of raw honey paired with healthy fats may prevent sharp glucose spikes compared to refined sugars. Apple cider vinegar has been studied for its potential to modestly lower post-meal blood sugar levels when used carefully.

⚠️ Important note: These approaches are supportive, not replacements for prescribed diabetes treatments. Anyone with diabetes should consult a healthcare professional before trying new routines.


Nourishing the Nervous System

Nerve health depends heavily on proper nutrition, circulation, and reduced inflammation. Many people experience nerve discomfort due to stress, vitamin deficiencies, or chronic conditions.

Natural morning spoon ingredients may help by:

  • Providing B-vitamin–supporting compounds (found in seeds and raw honey)

  • Offering anti-inflammatory effects that calm irritated nerves

  • Supporting gut health, which is closely linked to nerve and brain function

Healthy fats also help maintain the protective myelin sheath around nerves, which is essential for proper signal transmission.


Mood, Mind, and Depression Support

Depression is complex and multifactorial, involving brain chemistry, inflammation, gut health, and lifestyle factors. While no single food can cure depression, daily nutritional habits can strongly influence emotional well-being.

Morning spoon rituals may support mental health by:

  • Stabilizing blood sugar, reducing mood swings

  • Providing antioxidants that combat brain inflammation

  • Supporting the gut-brain axis, which plays a major role in serotonin production

Honey contains natural compounds that may gently support neurotransmitter activity, while healthy fats help the brain absorb fat-soluble vitamins crucial for mood regulation.

Combined with sunlight exposure, hydration, movement, and adequate sleep, this simple habit may contribute to improved emotional balance over time.


A Simple Example Morning Spoon Blend

Here is a commonly used, gentle combination:

  • 1 tablespoon raw, unprocessed honey

  • 1 tablespoon extra virgin olive oil

  • Optional: a few drops of lemon juice or apple cider vinegar

Take slowly on an empty stomach, then wait 15–20 minutes before eating breakfast.

This blend is mild, easy to digest, and suitable for many people—though individual tolerance varies.


Consistency Matters More Than Quantity

The true benefit of this practice comes from consistency, not excess. Two spoons are enough to stimulate digestion, provide key nutrients, and support the body’s natural repair processes. Overuse or unrealistic expectations can lead to disappointment.

Think of this ritual as:

  • A daily supportive habit

  • A complement to a balanced diet

  • A moment of mindful self-care


Final Thoughts

“Two spoons in the morning” is not magic—but it represents something powerful: the return to simple, intentional health habits. When combined with proper nutrition, medical care, movement, and emotional support, natural remedies can play a meaningful role in improving quality of life.

If you struggle with chronic bone pain, diabetes, nerve issues, or depression, consider this ritual as a gentle ally—not a replacement for professional care, but a daily act of nourishment and respect for your body.

Sometimes, healing doesn’t start with something complicated. Sometimes, it starts with two simple spoons.

Ham and Cheese Puff Pastry Pockets

Few recipes manage to strike the perfect balance between simplicity and indulgence quite like ham and cheese puff pastry pockets. With their flaky, buttery layers and rich, savory filling, these pockets are a crowd-pleasing option for breakfast, lunch, snacks, or even party appetizers. Whether you’re cooking for your family, entertaining guests, or just craving something warm and satisfying, this recipe delivers maximum flavor with minimal effort.

What makes puff pastry pockets so irresistible is the contrast in textures: the delicate crunch of the pastry paired with gooey, melted cheese and savory ham inside. Best of all, they’re incredibly versatile and forgiving, making them ideal for both beginner and experienced home cooks.

Why Ham and Cheese Is a Timeless Combination

Ham and cheese has long been a classic pairing in global cuisine. The saltiness of cured ham complements the creamy richness of cheese, creating a balanced flavor profile that never feels heavy or bland. When wrapped in puff pastry, this combination is elevated to bakery-level comfort food.

You can customize the filling endlessly—use smoked ham for deeper flavor, honey-glazed ham for sweetness, or even turkey as a lighter alternative. Cheese options range from sharp cheddar to Swiss, mozzarella, Gruyère, or a blend for extra creaminess.

Ingredients You’ll Need

This recipe keeps things straightforward while leaving room for creativity:

  • 1 sheet of puff pastry (thawed if frozen)

  • 150–200 g sliced ham (thinly sliced works best)

  • 1 to 1½ cups grated or sliced cheese

  • 1 egg (for egg wash)

  • 1 tablespoon milk or water

  • Optional additions: Dijon mustard, black pepper, herbs, or sesame seeds

Using quality puff pastry is key. Store-bought works perfectly, saving time while still delivering excellent results.

Preparing the Puff Pastry

Start by preheating your oven to 200°C (400°F). Line a baking tray with parchment paper.

Roll out the puff pastry slightly on a floured surface to even it out, then cut it into equal squares or rectangles. The size depends on whether you want snack-sized pockets or larger meal portions, but 10–12 cm squares work well.

Keep the pastry cool while working—warm pastry can become sticky and difficult to handle.

Filling and Shaping the Pockets

Place a slice of ham in the center of each pastry square, folding or trimming it so it fits neatly without hanging over the edges. Add a generous amount of cheese on top. Be careful not to overfill; too much cheese can leak out during baking.

For extra flavor, spread a thin layer of Dijon mustard or sprinkle a little black pepper or dried herbs over the ham before adding the cheese.

Fold the pastry over to form a triangle or rectangle, depending on the cut. Press the edges together gently, then seal them with the tines of a fork. This not only keeps the filling inside but also creates a decorative edge.

Egg Wash for a Golden Finish

Whisk the egg with milk or water to create an egg wash. Brush it lightly over the tops of the pockets—this step is essential for achieving that beautiful golden-brown color and glossy finish.

If you like, sprinkle sesame seeds, poppy seeds, or a little grated cheese on top for extra texture and visual appeal.

Baking to Perfection

Place the pockets on the prepared baking tray, leaving space between them so they can puff up properly. Bake for 15–20 minutes, or until the pastry is fully risen and deep golden brown.

Once baked, remove them from the oven and allow them to cool for a few minutes. The filling will be extremely hot straight out of the oven.

Serving Suggestions

Ham and cheese puff pastry pockets are best enjoyed warm, when the cheese is still melted and stretchy. Serve them on their own or pair them with:

  • A fresh green salad

  • Tomato soup for dipping

  • Mustard or honey-mustard sauce

  • Pickles or coleslaw for contrast

They also make excellent additions to lunchboxes or picnic spreads, as they taste great even at room temperature.

Storage and Make-Ahead Tips

These pockets can be prepared ahead of time and refrigerated (unbaked) for up to 24 hours. Simply bake them fresh when needed. You can also freeze them before baking; just add a few extra minutes to the baking time when cooking from frozen.

Leftover baked pockets can be stored in the refrigerator for up to 3 days and reheated in the oven to restore crispness.

Final Thoughts

Ham and cheese puff pastry pockets are a perfect example of how a few simple ingredients can create something truly satisfying. Crispy on the outside, warm and cheesy on the inside, they’re a comfort food classic that never disappoints. Whether served as a quick snack or a hearty meal, these golden pockets are sure to become a favorite in your kitchen.

A month before a stroke your body warns you 10 signs not to ignore

A stroke rarely comes completely out of nowhere. In many cases, the body begins to send subtle—and sometimes not-so-subtle—warning signals weeks before a major event occurs. Recognizing these early signs can be lifesaving. While not every symptom guarantees a stroke is imminent, ignoring them can be dangerous. Understanding what to watch for empowers you to seek medical help early, reduce risk, and possibly prevent a devastating outcome.

Below are 10 warning signs that may appear up to a month before a stroke—signals your body should never ignore.


1. Sudden Weakness or Numbness on One Side of the Body

One of the most classic stroke warning signs is weakness or numbness affecting the face, arm, or leg—especially on one side. You may notice your grip feels weaker, your leg drags slightly, or one side of your face feels “asleep.” Even if the sensation comes and goes, it can indicate a transient ischemic attack (TIA), often called a “mini-stroke,” which is a major red flag.


2. Frequent or Unusual Headaches

Persistent headaches that feel different from your usual pattern—especially if they are sudden, severe, or accompanied by dizziness or nausea—should raise concern. These headaches may be linked to changes in blood flow to the brain. People who rarely experience headaches should be especially cautious if they suddenly begin having them regularly.


3. Vision Problems

Blurred vision, double vision, or sudden vision loss in one or both eyes can appear weeks before a stroke. Some people describe it as a curtain coming down over their vision or difficulty focusing. These visual disturbances are often brief, which makes them easy to dismiss—but they are a serious warning sign.


4. Trouble Speaking or Understanding Words

If you find yourself slurring words, struggling to find the right words, or having difficulty understanding conversations, don’t brush it off as stress or fatigue. Even short episodes of confusion or speech difficulty can signal reduced blood flow to areas of the brain responsible for language.


5. Dizziness or Loss of Balance

Sudden dizziness, loss of coordination, or trouble walking can be an early indicator of stroke risk. You may feel unsteady, as if the room is spinning, or have difficulty maintaining balance. These symptoms are particularly concerning when they occur without an obvious cause.


6. Unexplained Fatigue

Extreme or unusual fatigue—especially when it appears suddenly and doesn’t improve with rest—can be a subtle stroke warning. Some people report feeling drained, weak, or mentally exhausted weeks before a stroke. While fatigue is common in many conditions, unexplained and persistent fatigue deserves attention.


7. Nausea or Vomiting Without Clear Cause

Feeling nauseous or vomiting without a stomach-related reason may be linked to changes in the brain or blood pressure. When combined with dizziness, headache, or visual problems, nausea can be part of a neurological warning pattern rather than a digestive issue.


8. Chest Pain or Shortness of Breath

Although more commonly associated with heart attacks, chest discomfort and shortness of breath can also be connected to stroke risk, especially when caused by heart rhythm problems or blood clots. These symptoms may indicate circulation issues that increase the likelihood of a stroke.


9. Sudden Mood Changes or Confusion

Unexpected mood swings, irritability, anxiety, or confusion may be overlooked as emotional stress. However, changes in brain blood flow can affect behavior and cognition. If you or those around you notice sudden personality or mental changes, it’s important to take them seriously.


10. High Blood Pressure Spikes

Many people with dangerously high blood pressure feel no symptoms at all—but sudden spikes can cause headaches, nosebleeds, chest discomfort, or anxiety. High blood pressure is the leading risk factor for stroke, and uncontrolled readings weeks before can set the stage for a serious event.


Why These Signs Matter

In many cases, these symptoms are caused by transient ischemic attacks (TIAs)—temporary blockages that resolve on their own but signal a high risk of a future stroke. A full stroke often follows days or weeks later if no action is taken. The good news is that early medical intervention can dramatically reduce that risk.


What You Should Do Immediately

If you experience any of these signs—even if they disappear—seek medical attention right away. Do not wait for them to happen again. A doctor can evaluate your risk, perform imaging and blood tests, and recommend treatments such as blood pressure control, blood thinners, or lifestyle changes.


Final Thoughts

Your body often whispers before it screams. A stroke is a medical emergency, but it is also frequently preventable when warning signs are recognized early. Listening to your body, acting quickly, and taking symptoms seriously can save your life—or the life of someone you love.

Fatbomb Fluff

Fatbomb fluff is one of those delightful creations that feels indulgent but fits perfectly into a low-carb, keto, or sugar-conscious lifestyle. It combines the richness of traditional fat bombs with the airy, whipped texture of a dessert mousse. The result is a spoonable, cloud-like treat that melts in your mouth while delivering satisfying fats that keep you full and energized. Whether you’re new to fat bombs or looking for a fresh way to enjoy them, fatbomb fluff deserves a place in your recipe rotation.

What Is Fatbomb Fluff?

At its core, fatbomb fluff is a whipped mixture made from high-fat ingredients such as cream cheese, heavy cream, coconut cream, butter, or nut butters, sweetened with low-carb sweeteners like erythritol, stevia, or monk fruit. Unlike traditional fat bombs that are often rolled into balls or set in molds, fluff stays soft and airy. You eat it with a spoon, spread it on low-carb baked goods, or even use it as a dip.

The name “fat bomb” comes from its macronutrient profile: high in fat, very low in carbohydrates, and moderate to low in protein. This makes it especially popular among people following ketogenic diets, where fat is the primary fuel source. The “fluff” part refers to the whipped, mousse-like texture that makes it feel lighter and more dessert-like than dense fat bombs.

Why People Love Fatbomb Fluff

One of the biggest reasons fatbomb fluff is so popular is its versatility. You can customize the flavor endlessly—chocolate, vanilla, peanut butter, cinnamon, lemon, or even coffee. It can be sweet enough to satisfy dessert cravings without causing blood sugar spikes.

Another reason is satiety. The healthy fats in fatbomb fluff help you feel full longer, which can reduce mindless snacking. Many people use it as a quick energy boost, a post-meal treat, or a way to curb sweet cravings while staying within dietary goals.

Texture also plays a major role. Traditional keto desserts can sometimes feel heavy or overly rich. Fatbomb fluff, when properly whipped, feels light and creamy, almost like a whipped cheesecake or mousse. This contrast between richness and airiness makes it especially appealing.

Common Ingredients and Their Roles

  • Cream Cheese: Adds body, tang, and creaminess. It’s often the base of fatbomb fluff.

  • Heavy Whipping Cream or Coconut Cream: Whipped to introduce air, creating the “fluff” texture.

  • Butter or Coconut Oil: Boosts fat content and adds a silky mouthfeel.

  • Sweeteners: Low-carb options like powdered erythritol or monk fruit blend dissolve easily and keep the texture smooth.

  • Flavorings: Cocoa powder, vanilla extract, cinnamon, peanut butter, lemon zest, or instant coffee granules transform the base into different flavor profiles.

Using powdered sweeteners rather than granulated ones is important because they blend more smoothly and prevent a gritty texture.

How Fatbomb Fluff Fits Different Diets

While fatbomb fluff is most commonly associated with keto, it can fit into other eating styles as well. For low-carb dieters, it offers a dessert option that won’t spike carbs. For people practicing intermittent fasting, a small serving can help ease hunger during eating windows. Even those not following strict diets may enjoy it as a lower-sugar alternative to traditional desserts.

You can also adapt it to be dairy-free by using coconut cream, vegan cream cheese, and coconut oil. Nut-free versions are possible by avoiding nut butters and using seeds or plain vanilla flavoring instead.

Flavor Variations to Try

One of the joys of fatbomb fluff is experimentation. Chocolate lovers can mix in unsweetened cocoa powder and a touch of vanilla. Peanut butter fans can add natural peanut butter for a rich, salty-sweet profile. A cinnamon-vanilla version tastes like cheesecake filling, while lemon zest and a bit of juice create a refreshing, tangy fluff.

Seasonal variations work beautifully too. Pumpkin spice in autumn, peppermint and cocoa during winter holidays, or berry-flavored extracts in summer can keep the recipe feeling new and exciting all year round.

Storage and Serving Tips

Fatbomb fluff is best stored in an airtight container in the refrigerator. Because it’s whipped, it may firm up slightly when chilled, but a quick stir usually brings back its creamy consistency. It typically keeps well for several days, making it ideal for meal prep.

Serve it in small bowls, dollop it onto keto pancakes, swirl it into coffee for a decadent twist, or use it as a dip for low-carb cookies or berries. A little goes a long way, thanks to its rich fat content.

Final Thoughts

Fatbomb fluff proves that eating mindfully doesn’t mean giving up pleasure. With its light, whipped texture and rich, satisfying flavor, it bridges the gap between nutrition and indulgence. Easy to customize, quick to prepare, and endlessly comforting, fatbomb fluff is more than just a trend—it’s a delicious reminder that simple ingredients, when treated creatively, can become something truly special.