5 Symptoms of a Mini Stroke in Seniors That Shouldn’t Be Ignored

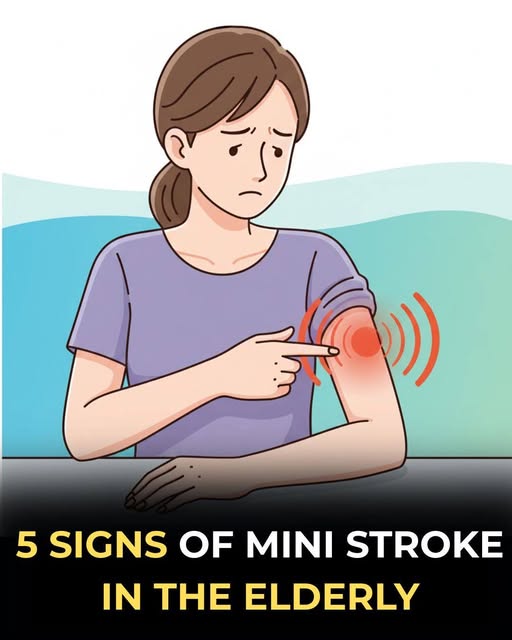
A mini stroke, medically known as a Transient Ischemic Attack (TIA), is often described as a “warning stroke.” While its symptoms may last only a few minutes to a few hours and then disappear, a TIA is a serious medical emergency—especially in seniors. It signals that a major stroke could occur in the near future, sometimes within days or weeks. Recognizing the early signs can save a life and prevent long-term disability.

Here are five critical symptoms of a mini stroke in seniors that should never be ignored, even if they seem mild or temporary.


1. Sudden Weakness or Numbness on One Side of the Body

One of the most common and recognizable signs of a mini stroke is sudden weakness or numbness, particularly affecting one side of the body. This may involve:

  • The face (one side drooping)

  • An arm or leg feeling heavy, weak, or “asleep”

  • Difficulty lifting one arm evenly

In seniors, this symptom is sometimes brushed off as arthritis, nerve problems, or fatigue. However, the key difference is sudden onset. If weakness or numbness appears abruptly and without explanation, it could be a TIA.

Even if the sensation fades after a short time, it does not mean the danger has passed. The temporary nature of the symptom is exactly what defines a mini stroke—and makes it so dangerous when ignored.


2. Trouble Speaking or Understanding Speech

Another alarming symptom is a sudden change in speech or comprehension. Seniors experiencing a mini stroke may:

  • Slur their words

  • Speak slowly or incoherently

  • Struggle to find simple words

  • Have difficulty understanding what others are saying

Family members may notice that the person sounds confused or “not like themselves.” In some cases, the senior may be aware of what they want to say but be unable to express it clearly.

These speech-related symptoms are often mistaken for memory problems or early dementia. However, when speech difficulties appear suddenly, they should always be treated as a possible stroke-related event.


3. Sudden Vision Problems in One or Both Eyes

Vision changes are another key warning sign that is frequently overlooked in older adults. A mini stroke can cause:

  • Blurred or double vision

  • Partial loss of vision in one eye

  • A dark curtain or shadow moving across the field of vision

  • Difficulty focusing

Because seniors may already have eye conditions such as cataracts or macular degeneration, sudden vision changes may be dismissed as “just eye trouble.” The important clue is speed—vision problems related to a TIA typically appear suddenly and without pain.

Any abrupt visual disturbance, even if it clears quickly, should be evaluated immediately.


4. Sudden Dizziness, Loss of Balance, or Coordination Problems

A mini stroke can affect areas of the brain responsible for balance and coordination. Seniors may suddenly experience:

  • Dizziness or lightheadedness

  • Trouble walking straight

  • Loss of balance or unexplained falls

  • Difficulty coordinating movements

These symptoms are especially dangerous for older adults because they increase the risk of serious falls and injuries. Unfortunately, they are often attributed to aging, inner ear problems, or low blood pressure.

If dizziness or balance problems appear suddenly—especially when combined with other symptoms like vision or speech changes—it may be a sign of a mini stroke and requires urgent medical attention.


5. Sudden Confusion or Changes in Mental State

A less obvious but equally serious symptom of a mini stroke is sudden confusion or mental changes. This may include:

  • Difficulty concentrating

  • Disorientation about time or place

  • Trouble following simple instructions

  • Sudden memory lapses

In seniors, these signs are often mistaken for normal aging, stress, or early Alzheimer’s disease. However, the defining feature of a TIA-related mental change is its abrupt onset.

If a senior suddenly seems confused, withdrawn, or mentally “foggy,” even for a short period, it should not be ignored—especially if they were mentally sharp just hours earlier.


Why Mini Strokes in Seniors Are So Dangerous

The biggest danger of a mini stroke is not the event itself, but what comes next. Studies show that a significant number of people who experience a TIA go on to have a full-blown stroke, often within days. Seniors are at even higher risk due to factors such as high blood pressure, diabetes, heart disease, and reduced blood vessel elasticity.

A TIA is the body’s way of sending a clear warning signal. Ignoring it can mean losing the chance to prevent permanent brain damage.


What to Do If You Suspect a Mini Stroke

If you notice any of these symptoms—whether they last minutes or hours—seek emergency medical care immediately. Do not wait for symptoms to pass or assume they are harmless.

A helpful way to remember stroke warning signs is the FAST method:

  • Face drooping

  • Arm weakness

  • Speech difficulty

  • Time to call emergency services

Quick medical evaluation can lead to treatments that significantly reduce the risk of a major stroke.


Final Thoughts

Mini strokes in seniors are often silent, brief, and easy to dismiss—but they are never harmless. Sudden weakness, speech problems, vision changes, dizziness, or confusion are the body’s urgent warning signs. Recognizing these symptoms early and acting fast can mean the difference between recovery and lifelong disability.

When it comes to mini strokes, it’s always better to overreact than to ignore the signs.

boil LEMON PEEL with SALT and you won’t need to buy it at home anymore

Did you know that boiling lemon peel with salt can replace several expensive household products? This simple, natural remedy has been used for generations and is now making a comeback as people search for natural home remedies, eco-friendly cleaning solutions, and zero-waste hacks. Instead of throwing away lemon peels, you can turn them into a powerful, multipurpose solution that saves money and reduces chemical use at home.

Let’s explore why lemon peel and salt are so powerful, how to prepare them, and the many ways this natural mixture can replace store-bought products.

Why Lemon Peel and Salt Are So Powerful

Lemon Peel Benefits

Lemon peels are rich in:

  • Natural citric acid

  • Antibacterial properties

  • Fresh citrus oils

  • Natural deodorizing compounds

They are widely searched online for natural cleaning hacks, lemon peel uses, and DIY household cleaners.

Salt Benefits

Salt is one of the most versatile household ingredients. It:

  • Acts as a natural disinfectant

  • Absorbs moisture and odors

  • Enhances cleaning power

  • Helps preserve natural solutions

When combined, lemon peel and salt create a natural alternative to many chemical products you buy regularly.

How to Boil Lemon Peel with Salt (Simple Recipe)

Ingredients:

  • Peels from 2–3 fresh lemons

  • 1 tablespoon coarse salt (sea salt or rock salt works best)

  • 2 cups water

Instructions:

  1. Add lemon peels and salt to a pot.

  2. Pour in the water.

  3. Bring to a boil, then simmer for 10–15 minutes.

  4. Allow the mixture to cool.

  5. Strain and store the liquid in a glass bottle or spray container.

This solution can be kept in the refrigerator for up to one week.

You Won’t Need to Buy These Products Anymore

1. Natural All-Purpose Cleaner

One of the most searched uses of lemon peel is DIY natural cleaner. This solution:

  • Cleans kitchen counters

  • Removes grease from stovetops

  • Freshens sinks and tiles

  • Leaves a clean citrus scent

Simply spray and wipe—no harsh chemicals required.

2. Powerful Odor Remover

Boiled lemon peel with salt works as a natural deodorizer for:

  • Refrigerators

  • Trash cans

  • Bathrooms

  • Shoe cabinets

The citrus oils neutralize odors while salt absorbs lingering smells.

3. Glass and Mirror Cleaner

Forget expensive glass sprays. This solution:

  • Removes fingerprints

  • Leaves no streaks

  • Adds shine naturally

Spray lightly and wipe with a microfiber cloth.

4. Natural Ant Repellent

Lemons are a well-known natural insect deterrent. Spray this mixture:

  • Along windowsills

  • Near doors

  • Around sinks

Ants and small insects dislike the citrus aroma, helping keep them away naturally.

5. Grease-Cutting Dish Booster

Add a small amount of this lemon-salt liquid to greasy dishes before washing. It:

  • Breaks down oil

  • Reduces dish soap usage

  • Removes lingering food odors

6. Floor Freshener

Add one cup of the solution to a bucket of warm water to:

  • Clean tile and marble floors

  • Remove dull odors

  • Leave a fresh, clean scent

7. Natural Air Freshener

Boiling lemon peel with salt releases a refreshing aroma. Many people search for natural air freshener recipes to avoid artificial sprays. You can:

  • Reheat the mixture

  • Let the steam refresh your home

  • Pour into a spray bottle for quick use

Why This Hack Is Trending on Google

Search terms like:

  • “boil lemon peel with salt”

  • “lemon peel uses at home”

  • “natural cleaning solutions”

  • “DIY eco-friendly cleaner”

  • “stop buying cleaning products”

are trending as people look for cheap home remedies, sustainable living tips, and chemical-free cleaning methods.

Extra Tips for Best Results

  • Use organic lemons if possible

  • Avoid using on unfinished wood or delicate stone

  • Always do a spot test first

  • Store in glass for longer freshness

Final Thoughts

Boiling lemon peel with salt is one of the simplest and most effective home hacks you can try today. It’s affordable, eco-friendly, and incredibly versatile. Once you start using this natural solution, you’ll realize you no longer need to spend money on multiple cleaning products.

Sometimes the best solutions are already in your kitchen—just waiting to be rediscovered.

Put 4 drops in your ear and you will hear like new again

If you’ve seen headlines claiming “Put 4 drops in your ear and you will hear like new again,” you’re not alone. This eye-catching promise circulates widely online, especially among people experiencing muffled hearing, ear fullness, or ringing sounds. But does it really work, or is it just another health myth designed to grab attention?

Let’s separate fact from fiction and explore what ear drops can and cannot do for your hearing—based on science, safety, and common medical practice.

Why Hearing Suddenly Feels “Blocked”

Before understanding ear drops, it’s important to know why hearing problems happen in the first place. In many cases, reduced hearing is not caused by permanent damage but by temporary blockages, such as:

  • Excess earwax (cerumen buildup)

  • Trapped water after bathing or swimming

  • Mild ear canal inflammation

  • Dry, hardened earwax in older adults

  • Use of earbuds or hearing aids pushing wax deeper

In these situations, sound waves cannot travel efficiently through the ear canal, creating the sensation of dull or reduced hearing.

👉 This is where ear drops may help—but only in specific cases.

The Truth About “4 Drops” in the Ear

There is no magical liquid that instantly restores hearing for everyone. However, doctors do recommend certain ear drops to soften earwax, making it easier for the ear to clear naturally or for a professional to remove it safely.

Commonly used ear-safe solutions include:

  • Sterile saline

  • Mineral oil

  • Olive oil (medical grade)

  • Glycerin

  • Hydrogen peroxide solutions made specifically for ears

In many instructions, people are told to use 2–5 drops, once or twice daily, for a few days—not as a miracle cure, but as part of ear hygiene management.

⚠️ Important: The “4 drops” idea is a general guideline, not a guaranteed solution or universal rule.

When Ear Drops Can Help Improve Hearing

Ear drops may help restore clearer hearing only if the cause is earwax buildup or dryness. Benefits may include:

  • Softer wax that moves out naturally

  • Reduced pressure and fullness

  • Improved sound clarity

  • Less itching and irritation

Many people report noticeable improvement within a few days, not instantly.

When Ear Drops Will NOT Help

Ear drops will not fix hearing problems caused by:

  • Inner ear damage

  • Age-related hearing loss (presbycusis)

  • Nerve damage

  • Ear infections behind the eardrum

  • Ruptured eardrum

  • Chronic tinnitus

In these cases, using drops repeatedly may delay proper treatment and worsen symptoms.

Dangerous Mistakes to Avoid 🚫

Never put drops in your ear if you have:

  • Severe ear pain

  • Pus or fluid leaking from the ear

  • Sudden hearing loss

  • Dizziness or vertigo

  • A known or suspected perforated eardrum

Also avoid:

  • Garlic oil, vinegar, or alcohol mixtures

  • Undiluted hydrogen peroxide

  • Random “viral” remedies

  • Using cotton swabs to dig inside the ear

These practices can damage the ear canal and eardrum.

Safe Way to Use Ear Drops (If Appropriate)

If a healthcare professional confirms wax buildup, safe use usually looks like this:

  1. Lie on your side with the affected ear facing up

  2. Place the recommended number of drops gently

  3. Stay in position for 3–5 minutes

  4. Let excess fluid drain out naturally

  5. Repeat as advised (usually for 2–5 days)

If hearing does not improve, stop and seek medical care.

When to See a Doctor

You should consult a doctor or ENT specialist if:

  • Hearing loss lasts more than a few days

  • Symptoms worsen

  • You feel pain, ringing, or dizziness

  • Ear drops don’t help

  • You wear hearing aids and experience blockage

Professional ear cleaning is safe, quick, and far more effective than home experiments.

Final Verdict: Can “4 Drops” Make You Hear Like New?

✔️ Sometimes, if the issue is simple earwax buildup
Never, as a guaranteed or instant cure
⚠️ Potentially harmful if misused or used blindly

The phrase “Put 4 drops in your ear and you will hear like new again” is a marketing exaggeration, not medical truth. While ear drops have their place, hearing health deserves proper diagnosis and care.

Danger at home! 8 household items that could harm your health

Home is supposed to be the safest place to relax, recharge, and protect your well-being. Yet many everyday household items—things we use without a second thought—can quietly pose risks to our health. The danger isn’t always obvious, and long-term exposure can sometimes be more harmful than sudden accidents. Being aware of these hidden threats is the first step toward creating a safer living environment. Here are eight common household items that could harm your health, along with tips to reduce the risk.

1. Non-Stick Cookware (When Damaged or Overheated)

Non-stick pans are popular because they make cooking and cleaning easier. However, when these pans are scratched, worn, or overheated, they can release harmful fumes and chemicals. Some coatings may break down at high temperatures, potentially causing respiratory irritation and other health concerns.

How to reduce risk:
Avoid overheating non-stick cookware, replace pans that are scratched or peeling, and use wooden or silicone utensils instead of metal ones.

2. Air Fresheners and Scented Candles

That pleasant smell in your living room may come at a cost. Many air fresheners and scented candles contain synthetic fragrances and chemicals that can irritate the lungs, trigger headaches, or worsen asthma. Burning candles can also release soot and volatile compounds into the air.

How to reduce risk:
Ventilate rooms regularly, choose unscented or naturally scented products, or use alternatives like fresh flowers, essential oil diffusers (in moderation), or simply open windows.

3. Cleaning Products with Strong Chemicals

Household cleaners are designed to kill germs, but some contain harsh chemicals that can irritate the skin, eyes, and respiratory system. Mixing certain products—such as bleach and ammonia—can even create toxic fumes.

How to reduce risk:
Read labels carefully, never mix cleaning products, wear gloves when cleaning, and consider using milder or homemade alternatives like vinegar and baking soda for everyday tasks.

4. Plastic Food Containers

Many plastic containers are convenient for storing food, but some can release harmful substances when heated or used repeatedly. This is especially concerning when microwaving food or storing hot meals in plastic.

How to reduce risk:
Use glass or stainless-steel containers whenever possible, avoid microwaving food in plastic, and discard old or cracked plastic containers.

5. Old Mattresses and Pillows

You spend a significant portion of your life sleeping, yet old mattresses and pillows can harbor dust mites, mold, and allergens. Over time, they can contribute to allergies, breathing problems, and poor sleep quality.

How to reduce risk:
Replace pillows every 1–2 years and mattresses every 7–10 years. Use washable, allergen-resistant covers and clean bedding regularly.

6. Mold in Damp Areas

Bathrooms, kitchens, basements, and poorly ventilated rooms are common breeding grounds for mold. Mold exposure can cause coughing, sneezing, skin irritation, and may worsen asthma or other respiratory conditions.

How to reduce risk:
Fix leaks promptly, use exhaust fans, keep humidity levels low, and clean visible mold with appropriate solutions while wearing protective gloves.

7. Electronics in the Bedroom

Phones, tablets, and televisions are a normal part of modern life, but keeping them close while sleeping can affect your health. Blue light exposure may disrupt sleep patterns, and constant notifications can increase stress and anxiety.

How to reduce risk:
Keep electronics out of the bedroom when possible, turn off screens at least an hour before sleep, and use night-mode settings to reduce blue light.

8. Old Paint and Household Dust

In older homes, peeling paint and household dust may contain harmful substances. Even in newer homes, dust can carry allergens, chemicals, and pollutants that affect breathing and overall health.

How to reduce risk:
Clean floors and surfaces regularly with a damp cloth, vacuum with a HEPA filter, and avoid sanding or scraping old paint without proper safety measures.

Final Thoughts

Most household dangers don’t announce themselves loudly—they build up quietly over time. The good news is that awareness and small changes can significantly reduce the risks. You don’t need to replace everything at once or live in fear of your surroundings. Instead, focus on ventilation, cleanliness, safer materials, and mindful use of everyday products.

Your home should support your health, not compromise it. By paying attention to these common household items and making simple adjustments, you can create a safer, healthier space for yourself and your loved ones—starting today.

How to Use Baking Soda to Remove Dark Spots Wrinkles and Dark Circles from Your Face

Baking soda (sodium bicarbonate) is a common household ingredient often praised online as a miracle solution for skin problems such as dark spots, wrinkles, and dark circles. While baking soda does have certain properties that may benefit the skin when used very carefully, it is also a highly alkaline substance that can damage the skin barrier if misused. Understanding how it works—and its limitations—is essential before applying it to your face.

This article explains what baking soda can and cannot do, how to use it safely, and better alternatives for long-term skin health.

Why Baking Soda Is Popular in Skincare

Baking soda has three main characteristics that attract skincare enthusiasts:

  1. Mild exfoliating ability
    Its fine granules can help remove dead skin cells from the surface of the skin.

  2. Oil-absorbing properties
    It can temporarily reduce excess oil, making skin appear smoother.

  3. pH-altering effect
    Baking soda is alkaline, which can neutralize acids—but this is also where risk comes in.

Healthy facial skin has a natural pH of about 4.5–5.5. Baking soda’s pH is around 9, which means frequent or improper use can disrupt the skin barrier, leading to dryness, irritation, and even darker pigmentation over time.

Can Baking Soda Remove Dark Spots?

Dark spots (hyperpigmentation) are usually caused by sun exposure, acne scars, hormonal changes, or aging. Baking soda does not bleach or erase pigment, but gentle exfoliation may help:

  • Remove surface dead skin cells

  • Make the skin look slightly brighter temporarily

  • Allow other skincare products to absorb better

Gentle Baking Soda Exfoliation (Occasional Use Only)

Ingredients:

  • ½ teaspoon baking soda

  • 1 tablespoon honey or plain yogurt

How to use:

  1. Mix into a smooth paste

  2. Apply lightly to clean skin

  3. Massage gently for no more than 20 seconds

  4. Rinse with lukewarm water

  5. Apply moisturizer immediately

Frequency: Once every 10–14 days only

⚠️ Overuse can worsen dark spots by causing irritation and inflammation.

Can Baking Soda Reduce Wrinkles?

Wrinkles are caused by:

  • Loss of collagen and elastin

  • Sun damage

  • Dehydration

  • Natural aging

Baking soda cannot reverse wrinkles. However, temporary exfoliation may make skin feel smoother by removing rough, dry surface layers.

What Baking Soda Can Do:

✔ Smooth texture temporarily
✔ Make skin feel softer
✘ Does NOT stimulate collagen
✘ Does NOT erase fine lines

For wrinkles, ingredients like retinol, vitamin C, peptides, and sunscreen are far more effective.

Can Baking Soda Help Dark Circles?

Dark circles are caused by:

  • Thin skin

  • Blood vessel visibility

  • Genetics

  • Fatigue

  • Dehydration

⚠️ Baking soda should NOT be used under the eyes.
The under-eye area is extremely thin and sensitive, and baking soda can cause:

  • Burning

  • Redness

  • Increased darkness

  • Fine lines

Safer Alternatives for Dark Circles:

  • Cold compresses

  • Caffeine-based eye creams

  • Aloe vera gel

  • Vitamin E oil

  • Proper sleep and hydration

Important Safety Guidelines

If you choose to use baking soda on your face, follow these rules strictly:

  • Never use it daily

  • Never leave it on longer than 1 minute

  • Never use near eyes

  • Always moisturize after

  • Stop immediately if burning or redness occurs

  • Avoid if you have sensitive, dry, or acne-prone skin

Dermatologists generally do not recommend baking soda for regular facial care due to its high alkalinity.

Better Natural Alternatives for Skin Concerns

Instead of baking soda, consider gentler, proven options:

For Dark Spots:

  • Aloe vera gel

  • Licorice root extract

  • Vitamin C serum

  • Niacinamide

For Wrinkles:

  • Rosehip oil

  • Retinol (low strength)

  • Hyaluronic acid

  • Sunscreen (most important)

For Dark Circles:

  • Cucumber slices

  • Almond oil

  • Green tea bags

  • Caffeine eye gel

Final Thoughts

Baking soda is not a miracle skincare solution. While it may offer very mild exfoliation when used sparingly and correctly, frequent or improper use can damage your skin, worsen pigmentation, and accelerate aging.

If you decide to use it:

  • Do so rarely

  • Mix it with soothing ingredients

  • Treat it as an occasional exfoliant—not a treatment

For lasting improvement in dark spots, wrinkles, and dark circles, consistent sun protection, hydration, and proven skincare ingredients are far safer and more effective than harsh DIY remedies.

Healthy skin is not about quick fixes—it’s about gentle care, patience, and protection.

what happens when bread goes into the freezer

When bread goes into the freezer, it may seem like nothing more than a simple act of preservation—but a lot is happening at a microscopic and chemical level. Freezing bread affects its moisture, texture, flavor, and shelf life in fascinating ways. Understanding what actually happens can help you store bread better, reduce waste, and enjoy a loaf that tastes almost as fresh as the day it was baked.

The moment bread enters the freezer

As soon as bread is placed in the freezer, the temperature drop begins to slow down the processes that cause spoilage. Bread normally goes stale because of starch retrogradation—a process where starch molecules recrystallize and squeeze out moisture, making the bread dry and firm. Cold temperatures dramatically slow this process. Unlike refrigeration, which actually accelerates staling, freezing almost puts it on pause.

At the same time, any yeast or mold spores present in the bread become inactive. They are not necessarily killed, but freezing stops them from growing and spreading. This is why bread can last months in the freezer without developing mold, while it may spoil in just a few days at room temperature.

What happens to the water inside bread

Bread contains a significant amount of water, even when it feels dry to the touch. When bread freezes, this water turns into ice crystals. If freezing happens slowly, these crystals can grow larger and disrupt the bread’s internal structure. That disruption is what can lead to a crumbly texture or sogginess after thawing.

This is why wrapping bread tightly and freezing it quickly is so important. Smaller ice crystals cause less damage, preserving the bread’s soft crumb and elasticity. Commercial bakeries often use flash freezing for this very reason—it locks in texture and quality.

Changes in texture and structure

Frozen bread often feels firmer or harder when you first take it out of the freezer, but this doesn’t mean it’s ruined. Once thawed properly, much of the original softness returns. However, repeated freezing and thawing can permanently damage the bread’s structure. Each freeze-thaw cycle allows moisture to migrate and escape, leaving the bread drier over time.

Crusty breads like baguettes and sourdough behave differently than soft sandwich loaves. Crusty breads may lose some crispness after freezing, but reheating them in an oven can revive their texture surprisingly well. Soft breads, on the other hand, tend to maintain their shape but may become slightly more fragile if not wrapped properly.

Flavor preservation (and loss)

One of the biggest advantages of freezing bread is that it largely preserves flavor. The cold temperatures slow down oxidation—the process that causes fats and oils in bread to become rancid. This is especially important for whole-grain breads, which contain natural oils that spoil faster than refined white bread.

That said, bread can still absorb odors from the freezer. If it’s not well wrapped, it may pick up flavors from nearby foods like fish, onions, or garlic. This is why airtight packaging is crucial. A freezer-safe bag or double wrapping with plastic and foil works best.

Freezing vs. refrigerating bread

Many people assume the refrigerator is a good place to store bread, but this is a common mistake. Refrigeration speeds up starch retrogradation, making bread stale faster than leaving it on the counter. Freezing, by contrast, slows this process to a crawl.

If you don’t plan to eat bread within two or three days, the freezer is actually the best option. Bread stored properly in the freezer can last up to three months with minimal quality loss.

What happens when bread is thawed

When frozen bread is thawed, the ice crystals melt and moisture redistributes throughout the loaf. If the bread was frozen properly, this redistribution is fairly even, and the bread regains much of its original softness.

Thawing at room temperature works well for sliced bread, while whole loaves benefit from gentle reheating in an oven. Toasting frozen bread directly is also perfectly safe and often results in a crisp exterior and warm interior—sometimes even better than fresh bread.

Does freezing change nutritional value?

Freezing bread does not significantly alter its nutritional content. Calories, fiber, protein, and minerals remain essentially the same. Interestingly, freezing and thawing bread may slightly increase the amount of resistant starch, which behaves like fiber and can help regulate blood sugar levels. While the effect is modest, it’s an unexpected benefit of freezing bread.

The best way to freeze bread

To get the best results:

  • Freeze bread as fresh as possible

  • Slice it before freezing if you plan to use it gradually

  • Wrap it tightly to prevent freezer burn

  • Store it away from strong-smelling foods

When done right, freezing is one of the most effective ways to extend the life of bread without sacrificing taste or quality.

Final thoughts

When bread goes into the freezer, time nearly stands still for it. Spoilage slows, staling pauses, and flavor is preserved. While minor changes in texture can occur, proper freezing and thawing techniques can make frozen bread almost indistinguishable from fresh. Instead of letting bread go to waste, the freezer transforms it into a convenient, long-lasting staple—ready whenever you are.

Honey Lemon Turmeric Gummies

Honey Lemon Turmeric Gummies are a delicious way to enjoy ingredients that have been treasured for generations. These soft, chewy gummies combine the warm earthiness of turmeric, the bright freshness of lemon, and the soothing sweetness of honey into one easy, enjoyable bite. Unlike store-bought supplements filled with artificial flavors and preservatives, homemade gummies allow you to control exactly what goes into your body—naturally.

Perfect for adults who dislike swallowing pills and for anyone looking to add a comforting daily ritual, these gummies are as enjoyable as they are practical.

Why Honey, Lemon, and Turmeric Work So Well Together

This trio has been used across cultures for centuries, especially in traditional home remedies and wellness drinks.

Turmeric
Turmeric contains curcumin, a compound known for its antioxidant properties. It has long been used in cooking and traditional wellness practices, particularly in South Asia. When paired with black pepper, turmeric’s absorption improves significantly.

Honey
Raw honey is naturally sweet and contains trace enzymes and antioxidants. It also helps balance turmeric’s bitterness, making these gummies pleasant to eat while acting as a natural binder and preservative.

Lemon
Fresh lemon juice adds vitamin C and a refreshing tang. Its acidity helps brighten the flavor and complements honey beautifully.

Together, these ingredients create gummies that taste more like a treat than a supplement.

Benefits of Honey Lemon Turmeric Gummies (Without Medical Claims)

While these gummies are not medicine, many people enjoy them as part of a balanced lifestyle because they:

  • Add natural antioxidants to the diet

  • Encourage consistent use of turmeric in a tasty form

  • Offer a comforting daily ritual

  • Replace sugary candies with a homemade alternative

  • Are easy to store and carry

They’re especially popular during seasonal changes, early mornings, or as a gentle after-meal treat.

Ingredients You’ll Need

To make about 25–30 gummies:

  • 1 cup fresh lemon juice (strained)

  • 2 tablespoons ground turmeric (or 3 tablespoons fresh grated turmeric)

  • 3 tablespoons raw honey (adjust to taste)

  • 1 tablespoon fresh ginger juice (optional but recommended)

  • 2 tablespoons grass-fed gelatin powder

  • 1/4 teaspoon ground black pepper

  • Silicone gummy molds

Step-by-Step Recipe Instructions

Step 1: Warm the Liquid Base

In a small saucepan over low heat, combine the lemon juice, honey, turmeric, ginger juice, and black pepper. Stir gently and warm the mixture without boiling. Heat just until everything is well combined.

Step 2: Bloom the Gelatin

Slowly sprinkle the gelatin over the warm mixture while whisking continuously. This prevents clumping and ensures smooth gummies.

Step 3: Fully Dissolve

Continue whisking over low heat for 2–3 minutes until the gelatin is completely dissolved. Do not let the mixture boil, as this can weaken the gelatin’s setting power.

Step 4: Pour into Molds

Carefully pour the mixture into silicone molds using a spoon or dropper. Work quickly, as the mixture thickens as it cools.

Step 5: Chill and Set

Place the molds in the refrigerator for at least 1–2 hours until fully set.

Step 6: Store Properly

Remove gummies from molds and store them in an airtight container in the refrigerator for up to 2 weeks.

Tips for Perfect Gummies Every Time

  • Use silicone molds for easy removal

  • Stir constantly when adding gelatin to avoid lumps

  • Adjust sweetness by increasing or reducing honey

  • Wear gloves when handling turmeric—it stains

  • Add orange juice for a sweeter citrus flavor

How to Enjoy These Gummies

  • Take 1–2 gummies daily as part of your routine

  • Enjoy in the morning with warm water or tea

  • Use as a healthy alternative to candy cravings

  • Pair with a balanced diet for best results

Consistency matters more than quantity.

Variations You Can Try

  • Vegan version: Use agar-agar instead of gelatin

  • Spiced version: Add cinnamon or clove

  • Immune blend: Add a splash of elderberry juice

  • Cooling twist: Mix in mint extract

Final Thoughts

Honey Lemon Turmeric Gummies are a simple, enjoyable way to bring traditional ingredients into modern life. They’re easy to make, naturally flavored, and customizable to your taste. Whether you’re looking for a daily wellness habit or a homemade treat with purpose, these gummies strike the perfect balance between flavor and function.

Once you try them, they’re likely to become a staple in your kitchen—one chewy bite at a time. 🍯🍋✨

5 Signs of a Mini Stroke in the Elderly

A mini stroke, medically known as a Transient Ischemic Attack (TIA), is a serious warning sign that should never be ignored—especially in older adults. Although the symptoms often disappear within minutes or hours, a mini stroke is a strong predictor of a future, more severe stroke. In fact, many people who experience a major stroke report having a mini stroke days or weeks beforehand.

Because symptoms can be subtle and easily mistaken for normal aging, recognizing the early signs in the elderly is critical. Prompt medical attention can prevent permanent brain damage and even save a life. Below are five key signs of a mini stroke in the elderly, explained in a simple and practical way.

1. Sudden Weakness or Numbness on One Side of the Body

One of the most common signs of a mini stroke is sudden weakness or numbness, especially affecting one side of the body. This may involve the face, arm, leg, or all three.

An elderly person may suddenly drop an object, struggle to lift an arm, or feel tingling in the hand or leg. Sometimes the face may droop slightly on one side, which can be noticed when smiling. Because this weakness often passes quickly, many people dismiss it—but it should never be ignored.

This symptom occurs when blood flow to part of the brain is temporarily blocked, disrupting the brain’s ability to send signals to muscles.

2. Sudden Confusion or Trouble Speaking

Another major warning sign is difficulty speaking or understanding speech. An elderly person may suddenly:

  • Slur their words

  • Speak incoherently

  • Struggle to find simple words

  • Have trouble understanding what others are saying

Family members may notice that the person sounds “off” or confused, even if only for a few minutes. This is not normal aging or simple forgetfulness—it may indicate that the brain’s language center is being affected.

Even brief episodes of speech difficulty should be treated as a medical emergency.

3. Sudden Vision Problems in One or Both Eyes

Mini strokes can also affect vision. An elderly person may experience:

  • Blurred vision

  • Double vision

  • Partial loss of vision

  • Sudden darkness or shadow in one eye

Some describe it as a “curtain” coming down over their vision. These visual changes often come on suddenly and may resolve quickly, which leads many to ignore them.

However, vision problems during a TIA signal reduced blood flow to the areas of the brain responsible for sight—or to the eye itself—and strongly increase the risk of a future stroke.

4. Dizziness, Loss of Balance, or Trouble Walking

Sudden dizziness or balance problems are another important sign, especially in older adults. The person may feel:

  • Lightheaded

  • Unsteady on their feet

  • Unable to walk straight

  • As if the room is spinning

While dizziness can have many causes in the elderly, sudden onset combined with other symptoms should raise concern. A mini stroke can affect the brain areas that control coordination and balance, increasing the risk of falls and injury.

If balance problems appear out of nowhere, especially alongside weakness or vision changes, emergency care is essential.

5. Sudden, Severe Headache With No Known Cause

Although less common, a sudden and severe headache can be a sign of a mini stroke. The headache may feel different from usual headaches and come on rapidly without warning.

Elderly individuals may describe it as the “worst headache of their life” or an intense pressure in the head. While not every stroke involves pain, this symptom should never be overlooked—particularly if it occurs with confusion, vision problems, or weakness.

Why Mini Strokes Are Especially Dangerous for the Elderly

As people age, blood vessels naturally become narrower and less flexible. Conditions such as high blood pressure, diabetes, high cholesterol, heart disease, and atrial fibrillation significantly increase stroke risk in older adults.

A mini stroke is often the body’s final warning. According to medical studies, up to 1 in 3 people who have a TIA will suffer a major stroke, often within the first year—sometimes within days.

What to Do Immediately

If you notice any of these signs—even if they disappear quickly—call emergency services right away. Do not wait or assume the problem has passed.

Use the FAST rule:

  • Face drooping

  • Arm weakness

  • Speech difficulty

  • Time to call emergency services

Early treatment can prevent permanent damage and drastically reduce the risk of a full stroke.

Final Thoughts

Mini strokes are silent warnings that the brain is in danger. In the elderly, symptoms may be subtle, brief, or mistaken for aging—but they are always serious. Knowing these five signs and acting quickly can mean the difference between recovery and lifelong disability.

When it comes to strokes, minutes matter. Never ignore sudden changes—your response could save a life.

7 signs your soul is preparing to return to the spirit world

Across cultures and spiritual traditions, many believe that the soul gives gentle signals as it prepares to transition from the physical world to the spirit realm. These signs are not meant to inspire fear, but awareness, peace, and acceptance. Often subtle and deeply personal, they may appear long before physical death, especially in those who have lived full lives or undergone profound inner change. Below are seven commonly recognized signs that your soul may be preparing for its return to the spirit world.

1. A Deep Sense of Inner Peace

One of the most common signs is a profound and lasting sense of calm. Worries that once felt overwhelming begin to fade, and emotional turbulence settles. Even in challenging circumstances, there is an inner stillness—a feeling that everything is somehow “as it should be.”

This peace is not indifference, but acceptance. Many describe it as a quiet trust in life itself. The soul no longer feels the need to struggle, prove, or control outcomes. Instead, it rests in knowing.

2. Detachment from Material Things

As the soul prepares to transition, attachment to possessions, status, or achievements often lessens. Objects that once felt important may lose their emotional charge. There is less interest in acquiring more and more desire to simplify.

This does not mean abandoning life or responsibilities, but rather seeing material things for what they are—temporary. The soul begins to prioritize meaning, memories, and love over accumulation.

3. Increased Reflection on Life’s Meaning

People experiencing this stage often reflect deeply on their life journey. Memories surface—both joyful and painful—not to cause regret, but understanding. There is a desire to make sense of experiences, forgive past hurts, and see how everything fits together.

This life review may happen quietly, in moments of solitude. The soul seeks completion, not perfection. Many feel gratitude for lessons learned and peace with paths taken or missed.

4. Stronger Connection to the Spiritual or Divine

Another sign is a heightened awareness of the spiritual realm. This may appear as stronger faith, vivid dreams, intuitive insights, or a sense of connection to something greater than oneself.

Some report feeling closer to loved ones who have passed, sensing their presence through memories, symbols, or dreams. Others feel drawn to prayer, meditation, or contemplation—even if they were not previously spiritual.

5. Reduced Fear of Death

Fear of death often diminishes as the soul prepares for transition. Instead of anxiety, there may be curiosity or calm acceptance. Death is no longer seen as an ending, but a return or continuation.

This does not mean wanting to die, but rather being at peace with the idea when the time comes. The soul recognizes that it has existed before the body and will continue beyond it.

6. Heightened Sensitivity and Awareness

Many experience increased sensitivity—to emotions, energy, sounds, or nature. Small moments feel more meaningful: a sunrise, a familiar song, a gentle breeze. There is a sense of being more present, more aware of life’s subtle beauty.

This sensitivity reflects the soul turning inward, becoming less anchored to the physical and more attuned to the unseen layers of existence.

7. A Desire to Reconcile and Express Love

As the soul prepares for transition, there is often a strong desire to heal relationships. People may feel compelled to forgive, apologize, or express love openly. Words left unsaid suddenly feel important.

This is the soul’s way of releasing emotional weight. Love becomes central—more important than pride, conflict, or old wounds. In this stage, connection matters more than being right.

A Gentle Reminder

These signs are not predictions or rules. They are patterns described across spiritual traditions and personal experiences. Not everyone will experience all of them, and they can appear at different times in life—not only near physical death, but during major spiritual awakenings or life transitions.

Most importantly, these signs are not about leaving life behind, but completing it. They invite us to live more consciously, love more deeply, and release what no longer serves us.

If your soul is preparing for its return, it is not a cause for fear. It is a reminder that life is sacred, temporary, and meaningful—and that beyond this world, many believe, something gentle and familiar awaits.

The 5 foods with the most powerful laxative effect

Digestive discomfort and constipation are surprisingly common problems, affecting people of all ages. While over-the-counter laxatives can offer short-term relief, many come with side effects such as cramping, dependency, and dehydration. Nature, however, provides powerful alternatives. Certain foods stimulate bowel movements naturally by increasing stool bulk, drawing water into the intestines, or activating gut muscles.

Below are five foods known for having some of the strongest natural laxative effects, along with how they work and the best way to consume them safely.

1. Prunes – The Gold Standard of Natural Laxatives

Prunes consistently top the list when it comes to relieving constipation. Their effectiveness comes from a unique combination of dietary fiber, sorbitol, and phenolic compounds.

Sorbitol is a sugar alcohol that draws water into the intestines, softening stools and making them easier to pass. At the same time, prunes provide both soluble and insoluble fiber, which adds bulk and stimulates intestinal movement.

Studies have shown that prunes can be more effective than fiber supplements for improving stool frequency and consistency. Just a small serving—about 5 to 6 prunes per day—can produce noticeable results.

Best way to eat them: Whole prunes or unsweetened prune juice. Drink water alongside them to enhance the effect.

Caution: Eating too many at once can cause gas, bloating, or diarrhea.

2. Chia Seeds – Tiny Seeds With a Big Impact

Chia seeds may be small, but they pack a serious digestive punch. When mixed with liquid, they absorb up to 10 times their weight in water, forming a gel-like substance that helps soften stool and promote smooth bowel movements.

They are exceptionally high in soluble fiber, which feeds beneficial gut bacteria and improves overall digestive health. This gel also lubricates the intestines, making elimination easier and less straining.

Chia seeds are especially helpful for people who suffer from dry or hard stools, often caused by dehydration or low fiber intake.

Best way to eat them: Soak 1 tablespoon of chia seeds in water, milk, or yogurt for at least 15–30 minutes before consuming.

Caution: Never eat chia seeds dry—they can swell and cause discomfort.

3. Flaxseeds – Gentle but Highly Effective

Flaxseeds are another fiber-rich food known for their mild yet reliable laxative effect. They contain both soluble fiber, which softens stool, and insoluble fiber, which speeds up intestinal transit.

Additionally, flaxseeds are rich in healthy fats that help lubricate the digestive tract. This makes them particularly useful for people experiencing sluggish digestion rather than severe constipation.

Ground flaxseeds are more effective than whole seeds, as the body absorbs their nutrients more efficiently.

Best way to eat them: Add 1–2 tablespoons of ground flaxseed to oatmeal, smoothies, or yogurt.

Caution: Increase intake gradually and drink plenty of water to avoid bloating.

4. Papaya – Nature’s Digestive Enzyme Booster

Papaya is more than just a tropical fruit—it’s a powerful digestive aid. It contains papain, an enzyme that helps break down proteins and supports smoother digestion.

In addition to enzymes, papaya provides a moderate amount of fiber and a high water content, both of which help soften stools and encourage regular bowel movements.

Papaya is particularly helpful for people who experience constipation along with bloating or indigestion, as it supports digestion at multiple stages.

Best way to eat it: Fresh, ripe papaya on an empty stomach or between meals.

Caution: Unripe papaya can be harsh on the stomach and should be avoided.

5. Coffee – A Fast-Acting Intestinal Stimulant

Coffee may surprise some people, but it is one of the most immediate natural bowel stimulants. Both caffeinated and decaffeinated coffee can activate the muscles of the colon, triggering the urge to go—often within minutes.

Coffee stimulates the release of gastrin, a hormone that increases colon activity. For many people, this effect is stronger in the morning when digestion naturally ramps up.

Unlike fiber-based foods, coffee works by stimulating intestinal contractions, not by changing stool texture.

Best way to consume it: Black coffee or coffee with minimal additives.

Caution: Excess coffee can cause dehydration or diarrhea, especially in sensitive individuals.

Final Thoughts

While these foods can be extremely effective, balance is key. Overusing even natural laxatives can disrupt digestion and lead to dependency. The best approach is to combine these foods with adequate hydration, regular movement, and a fiber-rich diet.

If constipation persists for weeks or is accompanied by pain, bleeding, or unexplained weight loss, it’s important to consult a healthcare professional. Used wisely, however, these five foods can help restore regularity naturally and safely—no harsh chemicals required.