5 Signs of a Mini Stroke in the Elderly

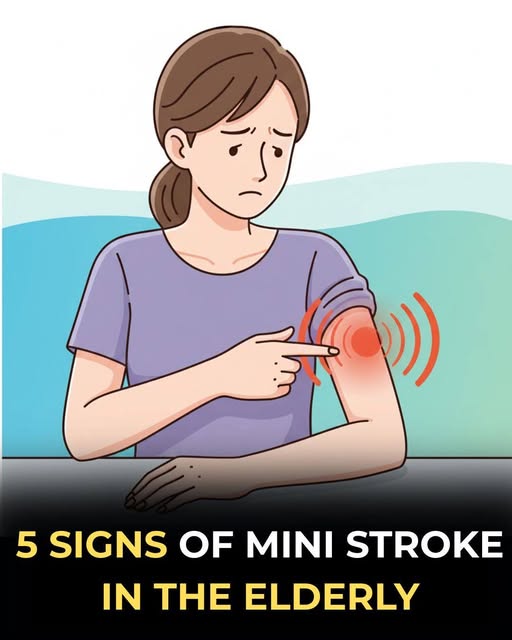
A mini stroke, medically known as a Transient Ischemic Attack (TIA), is a serious warning sign that should never be ignored—especially in older adults. Although the symptoms often disappear within minutes or hours, a mini stroke is a strong predictor of a future, more severe stroke. In fact, many people who experience a major stroke report having a mini stroke days or weeks beforehand.

Because symptoms can be subtle and easily mistaken for normal aging, recognizing the early signs in the elderly is critical. Prompt medical attention can prevent permanent brain damage and even save a life. Below are five key signs of a mini stroke in the elderly, explained in a simple and practical way.

1. Sudden Weakness or Numbness on One Side of the Body

One of the most common signs of a mini stroke is sudden weakness or numbness, especially affecting one side of the body. This may involve the face, arm, leg, or all three.

An elderly person may suddenly drop an object, struggle to lift an arm, or feel tingling in the hand or leg. Sometimes the face may droop slightly on one side, which can be noticed when smiling. Because this weakness often passes quickly, many people dismiss it—but it should never be ignored.

This symptom occurs when blood flow to part of the brain is temporarily blocked, disrupting the brain’s ability to send signals to muscles.

2. Sudden Confusion or Trouble Speaking

Another major warning sign is difficulty speaking or understanding speech. An elderly person may suddenly:

  • Slur their words

  • Speak incoherently

  • Struggle to find simple words

  • Have trouble understanding what others are saying

Family members may notice that the person sounds “off” or confused, even if only for a few minutes. This is not normal aging or simple forgetfulness—it may indicate that the brain’s language center is being affected.

Even brief episodes of speech difficulty should be treated as a medical emergency.

3. Sudden Vision Problems in One or Both Eyes

Mini strokes can also affect vision. An elderly person may experience:

  • Blurred vision

  • Double vision

  • Partial loss of vision

  • Sudden darkness or shadow in one eye

Some describe it as a “curtain” coming down over their vision. These visual changes often come on suddenly and may resolve quickly, which leads many to ignore them.

However, vision problems during a TIA signal reduced blood flow to the areas of the brain responsible for sight—or to the eye itself—and strongly increase the risk of a future stroke.

4. Dizziness, Loss of Balance, or Trouble Walking

Sudden dizziness or balance problems are another important sign, especially in older adults. The person may feel:

  • Lightheaded

  • Unsteady on their feet

  • Unable to walk straight

  • As if the room is spinning

While dizziness can have many causes in the elderly, sudden onset combined with other symptoms should raise concern. A mini stroke can affect the brain areas that control coordination and balance, increasing the risk of falls and injury.

If balance problems appear out of nowhere, especially alongside weakness or vision changes, emergency care is essential.

5. Sudden, Severe Headache With No Known Cause

Although less common, a sudden and severe headache can be a sign of a mini stroke. The headache may feel different from usual headaches and come on rapidly without warning.

Elderly individuals may describe it as the “worst headache of their life” or an intense pressure in the head. While not every stroke involves pain, this symptom should never be overlooked—particularly if it occurs with confusion, vision problems, or weakness.

Why Mini Strokes Are Especially Dangerous for the Elderly

As people age, blood vessels naturally become narrower and less flexible. Conditions such as high blood pressure, diabetes, high cholesterol, heart disease, and atrial fibrillation significantly increase stroke risk in older adults.

A mini stroke is often the body’s final warning. According to medical studies, up to 1 in 3 people who have a TIA will suffer a major stroke, often within the first year—sometimes within days.

What to Do Immediately

If you notice any of these signs—even if they disappear quickly—call emergency services right away. Do not wait or assume the problem has passed.

Use the FAST rule:

  • Face drooping

  • Arm weakness

  • Speech difficulty

  • Time to call emergency services

Early treatment can prevent permanent damage and drastically reduce the risk of a full stroke.

Final Thoughts

Mini strokes are silent warnings that the brain is in danger. In the elderly, symptoms may be subtle, brief, or mistaken for aging—but they are always serious. Knowing these five signs and acting quickly can mean the difference between recovery and lifelong disability.

When it comes to strokes, minutes matter. Never ignore sudden changes—your response could save a life.

7 signs your soul is preparing to return to the spirit world

Across cultures and spiritual traditions, many believe that the soul gives gentle signals as it prepares to transition from the physical world to the spirit realm. These signs are not meant to inspire fear, but awareness, peace, and acceptance. Often subtle and deeply personal, they may appear long before physical death, especially in those who have lived full lives or undergone profound inner change. Below are seven commonly recognized signs that your soul may be preparing for its return to the spirit world.

1. A Deep Sense of Inner Peace

One of the most common signs is a profound and lasting sense of calm. Worries that once felt overwhelming begin to fade, and emotional turbulence settles. Even in challenging circumstances, there is an inner stillness—a feeling that everything is somehow “as it should be.”

This peace is not indifference, but acceptance. Many describe it as a quiet trust in life itself. The soul no longer feels the need to struggle, prove, or control outcomes. Instead, it rests in knowing.

2. Detachment from Material Things

As the soul prepares to transition, attachment to possessions, status, or achievements often lessens. Objects that once felt important may lose their emotional charge. There is less interest in acquiring more and more desire to simplify.

This does not mean abandoning life or responsibilities, but rather seeing material things for what they are—temporary. The soul begins to prioritize meaning, memories, and love over accumulation.

3. Increased Reflection on Life’s Meaning

People experiencing this stage often reflect deeply on their life journey. Memories surface—both joyful and painful—not to cause regret, but understanding. There is a desire to make sense of experiences, forgive past hurts, and see how everything fits together.

This life review may happen quietly, in moments of solitude. The soul seeks completion, not perfection. Many feel gratitude for lessons learned and peace with paths taken or missed.

4. Stronger Connection to the Spiritual or Divine

Another sign is a heightened awareness of the spiritual realm. This may appear as stronger faith, vivid dreams, intuitive insights, or a sense of connection to something greater than oneself.

Some report feeling closer to loved ones who have passed, sensing their presence through memories, symbols, or dreams. Others feel drawn to prayer, meditation, or contemplation—even if they were not previously spiritual.

5. Reduced Fear of Death

Fear of death often diminishes as the soul prepares for transition. Instead of anxiety, there may be curiosity or calm acceptance. Death is no longer seen as an ending, but a return or continuation.

This does not mean wanting to die, but rather being at peace with the idea when the time comes. The soul recognizes that it has existed before the body and will continue beyond it.

6. Heightened Sensitivity and Awareness

Many experience increased sensitivity—to emotions, energy, sounds, or nature. Small moments feel more meaningful: a sunrise, a familiar song, a gentle breeze. There is a sense of being more present, more aware of life’s subtle beauty.

This sensitivity reflects the soul turning inward, becoming less anchored to the physical and more attuned to the unseen layers of existence.

7. A Desire to Reconcile and Express Love

As the soul prepares for transition, there is often a strong desire to heal relationships. People may feel compelled to forgive, apologize, or express love openly. Words left unsaid suddenly feel important.

This is the soul’s way of releasing emotional weight. Love becomes central—more important than pride, conflict, or old wounds. In this stage, connection matters more than being right.

A Gentle Reminder

These signs are not predictions or rules. They are patterns described across spiritual traditions and personal experiences. Not everyone will experience all of them, and they can appear at different times in life—not only near physical death, but during major spiritual awakenings or life transitions.

Most importantly, these signs are not about leaving life behind, but completing it. They invite us to live more consciously, love more deeply, and release what no longer serves us.

If your soul is preparing for its return, it is not a cause for fear. It is a reminder that life is sacred, temporary, and meaningful—and that beyond this world, many believe, something gentle and familiar awaits.

This Is the Vitamin Your Body Is Missing When Your Legs and Bones Hurt

This Is the Vitamin Your Body Is Missing When Your Legs and Bones Hurt

Aching legs. Sore bones. That deep, dull pain that seems to come from nowhere and refuses to go away. Many people blame age, arthritis, long hours on their feet, or even bad weather. While those factors can certainly play a role, there is one extremely common and often overlooked cause behind persistent leg and bone pain: vitamin D deficiency.

Vitamin D is not just another supplement on the shelf. It plays a central role in how your bones, muscles, and nerves function. When your body doesn’t have enough of it, pain is often one of the first warning signs.

Why Vitamin D Matters So Much

Vitamin D is essential for calcium absorption. Without it, your body cannot effectively absorb calcium from the food you eat, no matter how calcium-rich your diet is. Calcium is what gives bones their strength and density. When vitamin D levels are low, bones gradually become weaker, softer, and more prone to pain.

But bones are not the only tissues affected. Vitamin D also plays a key role in muscle function, nerve signaling, and inflammation control. That’s why deficiency can cause pain that feels muscular, skeletal, or both.

The Hidden Link Between Vitamin D and Leg Pain

One of the most common symptoms of low vitamin D is aching or throbbing pain in the legs, especially in the calves, thighs, and hips. Many people describe it as a deep bone pain rather than surface muscle soreness.

This happens because vitamin D deficiency can lead to a condition called osteomalacia in adults. Osteomalacia causes bones to soften, making them more sensitive to pressure and movement. Even simple activities like walking, climbing stairs, or standing for long periods can trigger discomfort.

At the same time, muscles weakened by low vitamin D may fatigue more easily, cramp frequently, or feel heavy and sore. This combination of weak bones and weak muscles often shows up first in the legs because they carry the weight of your body every day.

Bone Pain Isn’t Just “Getting Older”

Many people accept bone and joint pain as an inevitable part of aging. However, studies consistently show that vitamin D deficiency is widespread, even among younger adults. People who spend most of their time indoors, cover their skin from the sun, or live in areas with limited sunlight are especially at risk.

Older adults are even more vulnerable because aging skin produces less vitamin D from sunlight, and the kidneys become less efficient at converting it into its active form.

Bone pain caused by vitamin D deficiency often affects:

  • The shins and lower legs

  • Hips and pelvis

  • Lower back

  • Knees

Unlike arthritis, this pain may feel more diffuse and persistent rather than sharp or localized.

Other Warning Signs You Shouldn’t Ignore

Leg and bone pain rarely appear alone. Low vitamin D often comes with additional symptoms, including:

  • Frequent muscle cramps or spasms

  • Weakness when standing up or climbing stairs

  • Fatigue and low energy

  • Increased risk of falls

  • Slow recovery after exercise

  • Brittle bones or frequent fractures

If you experience several of these symptoms together, vitamin D deficiency becomes even more likely.

Why Deficiency Is So Common Today

Despite being called the “sunshine vitamin,” modern lifestyles make it surprisingly hard to get enough vitamin D naturally.

Common reasons include:

  • Spending most of the day indoors

  • Regular use of sunscreen (important for skin health, but it blocks vitamin D production)

  • Air pollution reducing UV exposure

  • Limited dietary sources of vitamin D

  • Poor absorption due to gut or kidney issues

Even people living in sunny regions can be deficient if they avoid direct sun exposure or have darker skin, which naturally produces less vitamin D.

How to Restore Healthy Vitamin D Levels

The good news is that vitamin D deficiency is one of the easiest nutritional problems to correct.

Sunlight
Exposing your skin to sunlight for about 15–30 minutes several times a week can significantly boost vitamin D levels, depending on skin tone, location, and time of year.

Dietary Sources
Foods that naturally contain or are fortified with vitamin D include:

  • Fatty fish like salmon, sardines, and mackerel

  • Egg yolks

  • Fortified milk and yogurt

  • Fortified cereals

However, diet alone is often not enough.

Supplements
Many healthcare professionals recommend vitamin D supplements, especially for people with confirmed deficiency. Vitamin D3 (cholecalciferol) is generally considered the most effective form.

When Pain Begins to Fade

One of the most encouraging signs that vitamin D was the missing piece is how quickly symptoms can improve. Many people report reduced leg pain, stronger muscles, and better mobility within weeks to a few months of correcting their levels.

Bones take longer to rebuild strength, but consistent vitamin D intake helps stop further weakening and supports long-term skeletal health.

The Bottom Line

If your legs ache, your bones feel sore, and nothing seems to explain the pain, your body may be quietly asking for vitamin D. This essential nutrient supports bone strength, muscle function, and pain regulation—and without it, discomfort becomes almost inevitable.

Before assuming pain is simply part of life, consider that your body might just be missing one crucial vitamin. Restoring vitamin D levels doesn’t just reduce pain—it helps you move, stand, and live with greater strength and confidence every day.

BOOST LEG CIRCULATION QUICKLY THE ULTIMATE NATURAL DRINK GUIDE

Poor leg circulation is more common than many people realize. Cold feet, swelling around the ankles, tingling, cramps, or a heavy feeling in the legs are often signs that blood flow isn’t as strong as it should be. While movement and lifestyle changes are essential, what you drink can also play a powerful supporting role. Certain natural beverages help hydrate the blood, relax blood vessels, reduce inflammation, and support healthy circulation—sometimes with surprisingly quick effects.

This guide walks you through the best natural drinks to help boost leg circulation safely and effectively, along with tips on how and when to use them.

Why Circulation in the Legs Matters

Your legs work against gravity all day. Blood must travel downward easily and return upward efficiently to the heart. When circulation slows, oxygen and nutrients don’t reach tissues properly, and waste products linger longer than they should. Over time, this can contribute to swelling, discomfort, varicose veins, and fatigue.

Hydration, minerals, antioxidants, and mild vasodilators found in natural drinks can help blood flow more smoothly—especially when paired with light movement.

1. Warm Lemon Water with Ginger

This simple drink is one of the fastest ways to support circulation in the morning.

Why it works:

  • Ginger gently warms the body and encourages blood vessel dilation

  • Lemon supports hydration and blood vessel flexibility

  • Warm liquids stimulate blood flow better than cold ones

How to make it:

  • 1 cup warm (not boiling) water

  • Juice of ½ lemon

  • ½ teaspoon freshly grated ginger

Drink first thing in the morning or before walking. Many people notice warmer feet and less stiffness within 30–60 minutes.

2. Beetroot Juice (Nature’s Circulation Tonic)

Beets are rich in natural nitrates, which the body converts into nitric oxide—a compound that helps blood vessels relax and widen.

Benefits for legs:

  • Improves blood flow to lower extremities

  • May reduce leg fatigue during walking

  • Supports oxygen delivery to muscles

How to drink it:

  • ½ to 1 cup fresh beet juice

  • Best taken mid-morning or before activity

If the taste is strong, blend beet juice with apple or carrot juice.

3. Pomegranate Juice

Pomegranate is packed with antioxidants that support blood vessel health and reduce oxidative stress.

Why it helps circulation:

  • Protects arteries from stiffness

  • Encourages smoother blood flow

  • Supports healthy blood pressure

How much to drink:

  • ½ cup daily

  • Choose unsweetened, pure juice

This drink is especially helpful for people who sit or stand for long hours.

4. Cinnamon and Honey Water

This traditional combination has been used for centuries to support circulation and warmth in the body.

How it helps:

  • Cinnamon improves blood flow and reduces inflammation

  • Honey supports energy and gentle vessel relaxation

How to prepare:

  • 1 cup warm water

  • ¼ teaspoon cinnamon powder

  • 1 teaspoon raw honey

Drink in the afternoon or early evening. Many people report reduced coldness in the feet after consistent use.

5. Green Tea

Green tea contains flavonoids that support the lining of blood vessels and improve circulation over time.

Leg circulation benefits:

  • Reduces inflammation in blood vessels

  • Improves flexibility of arteries

  • Helps reduce leg swelling

How to use it:

  • 1–2 cups daily

  • Avoid adding sugar

For best results, drink between meals.

6. Cayenne Pepper Water (Use Carefully)

Cayenne contains capsaicin, which stimulates blood flow and warmth.

Why it works:

  • Encourages blood vessel dilation

  • Improves circulation to hands and feet

How to make it:

  • 1 cup warm water

  • A pinch (⅛ teaspoon) cayenne pepper

  • Optional: lemon juice

Start small. This drink is powerful and not suitable for sensitive stomachs.

7. Hydration with Mineral-Rich Water

Sometimes the biggest circulation booster is simply drinking enough water.

Why it matters:

  • Dehydration thickens the blood

  • Proper hydration improves blood flow speed

  • Minerals support muscle and vessel function

Add a pinch of natural salt or a splash of coconut water to one glass per day for electrolytes.

When You’ll Feel Results

Many people notice:

  • Warmer feet within 30–90 minutes

  • Reduced swelling within a few days

  • Less leg heaviness after one week of consistent use

Results improve dramatically when paired with light walking, ankle rotations, and leg elevation.

Important Safety Notes

  • These drinks support circulation but do not replace medical treatment

  • If you have diabetes, kidney disease, or are on blood pressure medication, use juices in moderation

  • Stop if you experience dizziness, discomfort, or digestive upset

Final Thoughts

Boosting leg circulation doesn’t always require complicated supplements or extreme routines. Simple, natural drinks—used consistently—can gently and effectively support blood flow, warmth, and comfort in your legs. Choose one or two that fit your lifestyle, drink them regularly, and combine them with light movement for the best results.

Homemade Bread with Just 4 Ingredients

Homemade Bread with Just 4 Ingredients – Simple, Soft, and Foolproof

There’s something deeply comforting about the smell of freshly baked bread filling your kitchen. For many people, baking bread sounds complicated, time-consuming, or intimidating. The truth is, homemade bread can be incredibly simple. In fact, you only need four basic ingredients—no fancy equipment, no preservatives, and no advanced baking skills.

This recipe proves that real bread doesn’t have to be complicated. With flour, water, yeast, and salt, you can create a soft, flavorful loaf that rivals bakery bread and tastes far better than anything store-bought.

Why Make Bread at Home?

Store-bought bread often contains additives, dough conditioners, sugars, and preservatives to extend shelf life. Homemade bread gives you full control over what goes into your food. It’s healthier, fresher, and surprisingly affordable.

Beyond nutrition, bread baking is satisfying. Kneading dough can be relaxing, and watching a simple mixture transform into a golden loaf feels like a small everyday miracle.

The 4 Ingredients Explained

  1. All-Purpose Flour
    Flour is the foundation of bread. All-purpose flour works perfectly for this recipe, giving you a soft interior and a lightly crisp crust. You don’t need bread flour to get great results.

  2. Warm Water
    Water activates the yeast and hydrates the flour. The water should be warm—not hot—about the temperature of a warm bath. Water that’s too hot can kill the yeast.

  3. Yeast
    Yeast is what makes the bread rise. Active dry yeast or instant yeast both work well. Yeast feeds on the natural sugars in the flour, producing carbon dioxide that creates air pockets in the dough.

  4. Salt
    Salt enhances flavor and strengthens the dough structure. Without salt, bread tastes flat and bland.

Ingredients List

  • 3½ cups all-purpose flour

  • 1½ cups warm water

  • 2 teaspoons yeast

  • 1½ teaspoons salt

That’s it. No oil, no sugar, no milk, no eggs.

Step-by-Step Instructions

1. Activate the Yeast

In a large bowl, pour the warm water and sprinkle the yeast over it. Let it sit for 5–10 minutes until it becomes foamy. This step ensures your yeast is alive and ready to work.

2. Add Flour and Salt

Add the flour and salt to the bowl. Mix with a spoon or your hands until a rough dough forms. The dough will look slightly sticky—that’s normal.

3. Knead the Dough

Transfer the dough to a lightly floured surface. Knead for about 8–10 minutes. Push the dough away with the heel of your hand, fold it back over itself, and repeat. The dough should become smooth, elastic, and soft.

4. First Rise

Place the dough in a lightly floured bowl. Cover with a clean kitchen towel. Let it rise in a warm place for 1 to 1½ hours, or until it doubles in size.

5. Shape the Dough

Punch down the risen dough to release air. Shape it into a loaf or round ball. Place it on a baking tray lined with parchment paper or lightly floured.

6. Second Rise

Cover again and let it rise for 30–45 minutes. This second rise gives the bread a lighter texture.

7. Bake

Preheat your oven to 220°C (425°F). Bake for 25–30 minutes, until the crust is golden brown and the loaf sounds hollow when tapped on the bottom.

8. Cool Before Slicing

Let the bread cool for at least 20 minutes before cutting. This allows the interior to set properly.

What Makes This Bread So Good?

  • Crispy crust with a soft interior

  • Pure wheat flavor without additives

  • Perfect for sandwiches, toast, or dipping

  • Beginner-friendly and nearly fail-proof

Because the recipe is so simple, the natural flavor of the flour really shines.

Tips for Perfect Results

  • If your kitchen is cold, let the dough rise inside an oven that’s turned off but slightly warm.

  • If the dough feels too sticky, add a tablespoon of flour at a time—don’t overdo it.

  • For a crunchier crust, place a small oven-safe dish of water in the oven while baking.

  • Store bread wrapped in a cloth or paper bag for up to two days, or freeze slices for longer storage.

Final Thoughts

This 4-ingredient homemade bread recipe proves that great food doesn’t need to be complicated. With just flour, water, yeast, and salt, you can bake a wholesome loaf that’s fresher, healthier, and more satisfying than anything from the store.

Once you make this bread, you may never go back to buying it again. Simple ingredients, honest flavor, and the joy of baking—this is bread the way it was meant to be. 🍞

Homemade Mounjaro Recipe with Pink Salt

Homemade Mounjaro Recipe with Pink Salt: A Refreshing Health Elixir

Mounjaro, a rising star in the world of health drinks, is celebrated for its hydrating, mineral-rich properties and its natural ability to support energy and wellness. Traditionally enjoyed in its simplest form as a rejuvenating beverage, it can now be crafted at home with just a few wholesome ingredients, including the magical touch of pink Himalayan salt. This recipe will guide you step by step to create a delicious, nutrient-packed drink that revitalizes the body, replenishes electrolytes, and delights the taste buds.

Ingredients You’ll Need

To make about 4 servings of homemade Mounjaro, gather the following ingredients:

  • 4 cups (1 liter) of filtered water – using filtered or spring water ensures a clean, pure base.

  • 1 teaspoon of pink Himalayan salt – packed with trace minerals that support hydration and electrolyte balance.

  • 2 tablespoons of raw honey – for natural sweetness and immune support.

  • 1 fresh lemon or lime – for vitamin C, tang, and freshness.

  • 1 teaspoon of apple cider vinegar (optional) – adds a gentle tang and digestive benefits.

  • Fresh herbs like mint or basil (optional) – to enhance flavor and add a refreshing aroma.

  • Ice cubes (optional) – for a chilled, refreshing drink.

Step-by-Step Preparation

Step 1: Prepare Your Water Base
Start with 4 cups of filtered or spring water. Using pure water is essential as it allows the minerals and flavors to shine without interference from chemicals like chlorine, which are present in tap water. Pour the water into a large jug or pitcher for easy mixing.

Step 2: Add Pink Himalayan Salt
Pink Himalayan salt is the secret ingredient that transforms plain water into a rejuvenating mineral drink. Unlike regular table salt, pink salt contains over 80 trace minerals, including potassium, magnesium, and calcium, which help maintain electrolyte balance. Add 1 teaspoon to your water and stir thoroughly until fully dissolved. The water should have a light briny taste, but it shouldn’t be overwhelming.

Step 3: Sweeten Naturally
Next, add 2 tablespoons of raw honey. Raw honey is preferred because it retains enzymes, antioxidants, and nutrients lost during processing. Stir well to ensure the honey dissolves completely into the water. For those who prefer a less sweet version, start with 1 tablespoon and adjust to taste.

Step 4: Add Citrus Zest and Juice
Cut your lemon or lime in half and squeeze the juice into the mixture. Citrus juice not only adds a refreshing flavor but also provides vitamin C, which boosts immunity and helps the body absorb minerals more efficiently. For an extra touch of aroma, you can add a small strip of lemon or lime zest.

Step 5: Optional Boosts
If you want to elevate your Mounjaro even further, add 1 teaspoon of apple cider vinegar. This addition introduces probiotics and supports digestion while giving a slight tanginess that pairs beautifully with honey and citrus. Fresh herbs like mint or basil can also be added for aroma and a gentle cooling effect.

Step 6: Chill or Serve Immediately
You can enjoy your homemade Mounjaro immediately or let it chill in the refrigerator for about 30 minutes to an hour. Adding ice cubes is perfect for hot days or post-workout hydration. Stir well before serving, as some minerals or honey may settle at the bottom.

Tips for the Perfect Mounjaro

  1. Balance Salt and Sweetness: The pink salt should complement the sweetness of honey. Taste as you go to avoid an overly salty or sweet drink.

  2. Use Fresh Ingredients: Always use fresh citrus and herbs to maintain the maximum nutritional content and vibrant flavor.

  3. Customize Flavor: Try adding a slice of ginger or a few berries for a flavor twist and extra antioxidants.

  4. Store Properly: Keep Mounjaro in a sealed container in the fridge for up to 2 days. Shake or stir before drinking.

  5. Hydration Boost: For athletes or anyone needing a hydration boost, Mounjaro is a natural electrolyte drink. It’s perfect post-workout or on a long hike.

Health Benefits of Homemade Mounjaro

  • Electrolyte Replenishment: The combination of pink salt and water provides essential electrolytes, supporting nerve and muscle function.

  • Immune Support: Lemon juice and honey contribute vitamin C and antioxidants, which help the body fight off infections.

  • Digestive Aid: Apple cider vinegar and warm water can improve digestion, balance stomach acidity, and support gut health.

  • Detoxification: The mineral content in pink salt may aid the body in flushing out toxins, while hydration helps maintain kidney function.

  • Natural Energy Boost: Unlike sugary sodas or energy drinks, Mounjaro provides a subtle, sustained energy lift thanks to electrolytes and natural sugars from honey.

Serving Suggestions

Serve Mounjaro in clear glasses to showcase its light golden hue. Garnish with a thin lemon slice or a sprig of fresh mint for a visually appealing touch. For a spa-like experience, serve alongside fresh fruit or cucumber slices to create a refreshing, nutrient-rich hydration station.

Homemade Mounjaro with pink Himalayan salt is not just a beverage—it’s a lifestyle choice for anyone looking to enhance hydration, improve wellness, and enjoy a delicious, natural drink. With minimal ingredients and simple preparation, this drink can become a staple in your daily routine. Whether you’re recovering from a workout, combating fatigue, or simply seeking a refreshing drink, Mounjaro delivers both taste and nourishment in every sip.

Pinto Beans with Smoked Ham Hocks and Cornbread

There are some meals that feel like home the moment they start simmering, and pinto beans with smoked ham hocks is one of them. This humble, slow-cooked dish has been a staple across the American South and beyond for generations, prized for its deep flavor, affordability, and comforting simplicity. Paired with a pan of golden cornbread, it becomes a complete, soul-warming meal that’s perfect for family dinners, cold evenings, or anytime you crave honest, nourishing food.

Why This Dish Endures

Pinto beans are mild, creamy, and incredibly satisfying. When cooked low and slow with smoked ham hocks, they absorb rich, smoky flavors that transform them into something far greater than the sum of their parts. Ham hocks, taken from the lower leg of the pig, contain meat, fat, and collagen that melt into the beans as they cook, creating a broth that’s silky, savory, and deeply comforting.

Cornbread is the natural partner to these beans. Its slightly sweet, crumbly texture contrasts beautifully with the smoky, tender beans, and it’s perfect for soaking up every last spoonful of that flavorful pot liquor.


Pinto Beans with Smoked Ham Hocks

Ingredients

  • 1 pound dried pinto beans

  • 2 smoked ham hocks

  • 1 medium onion, diced

  • 3 cloves garlic, minced

  • 1 teaspoon smoked paprika

  • 1 teaspoon black pepper

  • 1/2 teaspoon dried thyme (optional)

  • 1 bay leaf

  • 6–8 cups water or low-sodium chicken broth

  • Salt, to taste

Preparation

Start by sorting and rinsing the pinto beans, removing any debris or damaged beans. For best results, soak them overnight in plenty of cold water. This step helps the beans cook more evenly and improves their texture. If you’re short on time, you can use a quick-soak method by boiling the beans for two minutes, then letting them rest for an hour before draining.

In a large, heavy-bottomed pot or Dutch oven, place the soaked beans and ham hocks. Add the diced onion, garlic, smoked paprika, black pepper, thyme, and bay leaf. Pour in enough water or broth to cover everything by about two inches.

Bring the pot to a gentle boil, then reduce the heat to low. Cover partially and let the beans simmer slowly for 2 to 2½ hours, stirring occasionally. As they cook, the ham hocks will release smoky flavor and richness into the broth.

After about two hours, check the beans for tenderness. They should be soft and creamy but not falling apart. Remove the ham hocks and let them cool slightly. Shred any usable meat from the bones and return it to the pot, discarding skin and excess fat. Taste the beans and add salt as needed—be cautious, as ham hocks can be quite salty.

For a thicker consistency, lightly mash some of the beans against the side of the pot and stir them back in. Remove the bay leaf before serving.


Classic Skillet Cornbread

Ingredients

  • 1 cup cornmeal

  • 1 cup all-purpose flour

  • 1 tablespoon baking powder

  • 1/2 teaspoon salt

  • 2 tablespoons sugar (optional)

  • 1 cup milk or buttermilk

  • 2 large eggs

  • 1/4 cup melted butter or oil

Preparation

Preheat your oven to 425°F (220°C). If you have a cast-iron skillet, place it in the oven while it heats—this gives the cornbread its signature crisp crust.

In a large bowl, whisk together the cornmeal, flour, baking powder, salt, and sugar if using. In another bowl, mix the milk, eggs, and melted butter. Combine the wet and dry ingredients just until blended; do not overmix.

Carefully remove the hot skillet from the oven and grease it lightly. Pour in the batter—it should sizzle slightly. Bake for 20–25 minutes, or until the top is golden and a toothpick inserted in the center comes out clean.


Serving and Variations

Serve the pinto beans hot, with chunks of ham nestled throughout and plenty of broth in each bowl. Add a wedge of warm cornbread on the side, along with butter, hot sauce, or sliced raw onions if you like.

This dish is endlessly adaptable. Some cooks add diced jalapeños or green chilies for heat, while others stir in a splash of apple cider vinegar at the end to brighten the flavors. Leftovers are even better the next day, as the beans continue to absorb the smoky broth.


A Meal That Feeds More Than Hunger

Pinto beans with smoked ham hocks and cornbread isn’t fancy, but it doesn’t need to be. It’s the kind of meal that brings people together, stretches ingredients, and fills the kitchen with aromas that feel like tradition itself. Simple, hearty, and deeply satisfying, it’s proof that the best food often comes from patience, care, and a well-loved pot on the stove.

Wrap potatoes in tin foil and put in crock pot

Wrapping potatoes in tin foil and cooking them in a crock pot may sound almost too simple, but this slow-cooking method delivers surprisingly delicious results. Soft, fluffy on the inside with a gently steamed skin, crock pot foil-wrapped potatoes are perfect for busy days, family meals, or anytime you want a hands-off way to prepare a comforting staple. This method requires minimal ingredients, almost no monitoring, and works beautifully whether you’re cooking for two people or a crowd.

Why Use a Crock Pot for Potatoes?

The crock pot (slow cooker) is ideal for potatoes because it provides steady, even heat over several hours. Unlike boiling, which can waterlog potatoes, or baking, which requires precise timing, slow cooking gently steams the potatoes in their own moisture. Wrapping them in tin foil helps trap heat and steam, ensuring even cooking and preventing the potatoes from drying out or scorching on the bottom of the pot.

This technique is especially useful when your oven is already full, during hot weather when you don’t want to turn on the oven, or when you need a reliable “set it and forget it” side dish.

Choosing the Right Potatoes

Almost any potato works well in a crock pot, but some varieties shine more than others:

  • Russet potatoes: Best for classic baked-style potatoes. They become fluffy and light inside.

  • Yukon Gold potatoes: Creamy and slightly buttery, perfect if you plan to mash or top generously.

  • Red potatoes: Firmer texture, great for serving whole or slicing after cooking.

Choose potatoes that are similar in size so they cook evenly.

Basic Ingredients

You only need a few simple ingredients to get started:

  • Potatoes (as many as will comfortably fit in your crock pot)

  • Aluminum (tin) foil

  • Olive oil or butter (optional)

  • Salt and black pepper (optional)

Everything else—cheese, herbs, sour cream, or spices—can be added after cooking.

Step-by-Step Instructions

  1. Wash and scrub the potatoes
    Rinse the potatoes thoroughly under running water and scrub off any dirt. Since the skins will be eaten, this step is important.

  2. Dry and season (optional)
    Pat the potatoes dry with a towel. If you like, rub each potato lightly with olive oil or butter and sprinkle with salt and pepper. This adds flavor but isn’t strictly necessary.

  3. Wrap in tin foil
    Wrap each potato individually in aluminum foil. Make sure the foil is sealed well but not so tight that it tears. Individual wrapping helps the potatoes cook evenly and prevents them from sticking together.

  4. Place in the crock pot
    Arrange the foil-wrapped potatoes in a single layer if possible. Stacking is fine if you’re cooking many potatoes, but avoid overcrowding too tightly.

  5. Cook low and slow

    • On LOW: 7–8 hours

    • On HIGH: 3–4 hours

    Cooking time depends on the size of the potatoes. Larger potatoes may need a bit longer.

  6. Check for doneness
    Carefully unwrap one potato (watch for steam) and pierce it with a fork or knife. It should slide in easily with no resistance.

Serving Ideas

Once cooked, crock pot potatoes are incredibly versatile. Here are a few serving ideas:

  • Classic baked potato: Split open and top with butter, sour cream, salt, pepper, and chives.

  • Loaded potatoes: Add shredded cheese, bacon bits, green onions, and a dollop of sour cream.

  • Herb butter potatoes: Mash lightly and mix with butter, garlic, and fresh herbs like parsley or thyme.

  • Simple side dish: Slice and serve with a drizzle of olive oil and a pinch of sea salt.

Tips for Best Results

  • Don’t add water: The potatoes create their own steam inside the foil. Adding water can make them soggy.

  • Avoid puncturing the foil during cooking: Holes allow steam to escape and may lead to uneven cooking.

  • Keep the lid closed: Every time you lift the crock pot lid, heat escapes and increases cooking time.

  • Use a liner if desired: While not necessary, a crock pot liner makes cleanup even easier.

Can You Cook Potatoes Without Foil?

Yes, you can cook potatoes directly in the crock pot without foil, but wrapping them provides more consistent results and prevents over-drying. Without foil, potatoes may develop a tougher skin or cook unevenly, especially if they sit against the sides of the pot.

Make-Ahead and Storage

Crock pot potatoes are great for meal prep. Once cooked, let them cool, then store them in the refrigerator (still wrapped or unwrapped) for up to 4 days. Reheat in the microwave, oven, or even back in the crock pot on low.

Final Thoughts

Wrapping potatoes in tin foil and cooking them in a crock pot is one of the easiest, most reliable ways to prepare this humble vegetable. With almost no effort, you get tender, flavorful potatoes that can be dressed up or kept simple depending on your mood. Whether you’re planning a family dinner, a holiday meal, or just want a dependable side dish, this method deserves a permanent place in your kitchen routine.

Homemade Pickled Beets Recipe

Homemade Pickled Beets Recipe (Sweet, Tangy & Old-Fashioned)

Homemade pickled beets are a timeless classic—vibrant in color, sweet-tangy in flavor, and incredibly versatile. Whether you remember them from your grandmother’s kitchen or you’re discovering them for the first time, pickled beets are one of those simple recipes that deliver big rewards with minimal effort. Making them at home not only tastes better than store-bought versions, but it also allows you to control the sweetness, acidity, and spices to suit your preference.

This recipe creates tender beets soaked in a balanced vinegar brine that’s perfect for salads, sandwiches, side dishes, or simply eaten straight from the jar.


Why Make Pickled Beets at Home?

Homemade pickled beets have several advantages:

  • No preservatives or artificial colors

  • Customizable flavor (more sweet, more tangy, or extra spiced)

  • Budget-friendly

  • Long refrigerator life

Beets are also packed with nutrients like fiber, folate, potassium, and antioxidants, making this recipe both delicious and wholesome.


Ingredients

For the beets:

  • 2 pounds fresh beets (red beets are traditional)

  • Water (for boiling)

For the pickling brine:

  • 1 cup white vinegar or apple cider vinegar

  • ½ cup granulated sugar

  • ½ cup water

  • ½ teaspoon salt

  • ½ teaspoon whole cloves

  • ½ teaspoon whole allspice

  • 1 small cinnamon stick (optional, but highly recommended)

  • 1 small onion, thinly sliced (optional)


Step-by-Step Instructions

Step 1: Prepare the Beets

Wash the beets thoroughly under running water to remove dirt. Leave the skins on and trim the stems to about 1 inch to prevent bleeding during cooking.

Place the beets in a large pot and cover them with water. Bring to a boil, then reduce heat and simmer for 30–45 minutes, depending on size, until a knife slides easily into the center.

Drain and let the beets cool slightly. Once cool enough to handle, rub off the skins using your fingers or a paper towel. Slice the beets into rounds, wedges, or cubes according to your preference.


Step 2: Make the Pickling Brine

In a medium saucepan, combine vinegar, sugar, water, salt, cloves, allspice, cinnamon stick, and onion (if using). Bring the mixture to a gentle boil, stirring until the sugar dissolves completely.

Reduce heat and let the brine simmer for about 5 minutes to allow the spices to infuse.


Step 3: Combine Beets and Brine

Place the sliced beets into clean glass jars or a heat-safe container. Carefully pour the hot brine over the beets until they are fully submerged.

Let the mixture cool to room temperature, then cover and refrigerate.


Step 4: Let Them Pickle

For the best flavor, allow the beets to pickle for at least 24 hours, though they become even better after 3–5 days. The longer they sit, the deeper and richer the flavor becomes.


Flavor Variations

One of the joys of homemade pickled beets is how easy they are to customize:

  • Less sweet: Reduce sugar to ⅓ cup

  • More tangy: Increase vinegar slightly and reduce water

  • Spicy: Add a few peppercorns or a pinch of red chili flakes

  • Herbal: Add a bay leaf or fresh dill

  • Citrus twist: Add a strip of orange peel to the brine


How to Serve Pickled Beets

Pickled beets are incredibly versatile and can be enjoyed in many ways:

  • As a classic side dish with roasted meats

  • Sliced into green salads with goat cheese or feta

  • Chopped into potato or pasta salads

  • Served on sandwiches and burgers

  • Paired with hard-boiled eggs for a protein-rich snack

They also add stunning color and flavor to cheese boards.


Storage Tips

  • Store pickled beets in an airtight container in the refrigerator

  • They keep well for up to 3–4 weeks

  • Always use clean utensils to prevent contamination

If you want to store them long-term at room temperature, proper water-bath canning techniques must be used.


Helpful Tips for Best Results

  • Use fresh, firm beets for the best texture

  • Smaller beets tend to be sweeter and more tender

  • Don’t overcook the beets—they should be tender, not mushy

  • Glass jars are best, as metal can react with vinegar


Final Thoughts

Homemade pickled beets are a perfect blend of simplicity and tradition. With just a handful of ingredients and a little patience, you can create a colorful, flavorful dish that elevates everyday meals. Once you try making them yourself, you’ll never want to go back to store-bought jars again.

Whether you like them sweet, tangy, or boldly spiced, this recipe is a wonderful starting point that you can adjust again and again to make it truly your own.

Our grandparents ate it every day and they were healthy it cleanses the intestines, lowers cholesterol and is excellent for losing weight

Our Grandparents Ate It Every Day and They Were Healthy: Why Oats Still Deserve a Place on Your Table

Long before protein powders, detox teas, and diet trends flooded our screens, our grandparents relied on simple, wholesome foods to stay strong and healthy. One of the most trusted staples on their tables was oats. Affordable, filling, and easy to prepare, oats were eaten daily in many households—and not without reason. Modern nutrition science now confirms what previous generations knew by experience: oats support digestive health, help manage cholesterol levels, and can be an excellent ally for healthy weight loss.

A Humble Grain with Powerful Benefits

Oats are whole grains, meaning they contain all parts of the grain kernel: the bran, germ, and endosperm. This makes them naturally rich in fiber, vitamins, minerals, and plant compounds. Unlike refined grains, oats are slowly digested, providing steady energy and keeping you full for longer periods.

Our grandparents may not have known the biochemical details, but they understood that a bowl of oats in the morning could sustain them through hours of hard physical work. Today, that same quality makes oats ideal for people trying to control appetite and avoid unnecessary snacking.

Cleansing the Intestines—Gently and Naturally

One of the most celebrated benefits of oats is their positive effect on digestion. Oats are especially rich in a type of soluble fiber called beta-glucan. When mixed with water in the digestive tract, beta-glucan forms a gel-like substance that helps soften stool and promote regular bowel movements.

Rather than acting as a harsh “cleanse,” oats support the intestines in a gentle, natural way. The fiber feeds beneficial gut bacteria, helping maintain a balanced microbiome. A healthy gut is linked not only to better digestion, but also to improved immunity, mood, and metabolic health.

For people who struggle with constipation or irregular digestion, eating oats regularly—along with adequate water—can make a noticeable difference over time.

Helping Lower Cholesterol Levels

Heart disease was far less common in our grandparents’ youth than it is today, and diet played a major role. Oats have been extensively studied for their cholesterol-lowering properties. The beta-glucan fiber binds to cholesterol-rich bile acids in the intestines and helps remove them from the body.

As a result, the liver draws more cholesterol from the bloodstream to produce new bile acids, which can help lower total and LDL (“bad”) cholesterol levels. This effect is most noticeable when oats are eaten consistently as part of a balanced diet low in excessive saturated fats.

It’s no coincidence that many heart-health guidelines still recommend oats as one of the best grains for cardiovascular support.

An Excellent Food for Weight Loss

Despite being filling and comforting, oats can be very helpful for weight loss when prepared correctly. Their high fiber content slows digestion and stabilizes blood sugar levels, reducing sudden hunger spikes and cravings.

A bowl of oats provides:

  • Long-lasting fullness

  • Fewer blood sugar fluctuations

  • Reduced urge to snack between meals

This makes it easier to maintain a calorie deficit without feeling deprived. Unlike many modern “diet foods,” oats don’t rely on artificial ingredients or extreme restrictions. They simply work with your body’s natural signals of hunger and satiety.

How Oats Support Metabolism

Oats contain important nutrients such as magnesium, iron, zinc, and B vitamins, all of which play roles in energy production and metabolism. A well-nourished metabolism functions more efficiently, helping the body use food for energy rather than storing it as fat.

Additionally, the steady release of glucose from oats supports physical activity and mental focus, making it easier to stay active—another key factor in healthy weight management.

How Our Grandparents Ate Oats

Traditionally, oats were eaten in simple ways:

  • Cooked slowly with water or milk

  • Lightly salted or sweetened with fruit

  • Sometimes fermented or soaked overnight

They were rarely loaded with sugar. This simplicity is important. Many modern oat products are heavily processed and sweetened, which can reduce their benefits.

The Best Way to Eat Oats Today

To get the most benefits:

  • Choose whole oats, steel-cut oats, or rolled oats

  • Avoid instant oats with added sugars and flavors

  • Pair oats with protein (like yogurt, nuts, or seeds)

  • Add fiber-rich fruits such as apples or berries

Soaking oats overnight or cooking them slowly can improve digestibility and nutrient absorption.

A Timeless Food for Modern Health

Oats are proof that good health doesn’t require complicated solutions. What sustained our grandparents through long lives of physical work and resilience can still support us today. By nourishing the intestines, supporting heart health, and helping control weight naturally, oats remain one of the most valuable foods you can eat regularly.

In a world constantly searching for the next miracle ingredient, perhaps the real secret has been sitting in our kitchens all along—simple, humble oats, just as our grandparents enjoyed them every day.