Eating Just One Bite is Already Harmful, But Many Still Eat It Without Worry

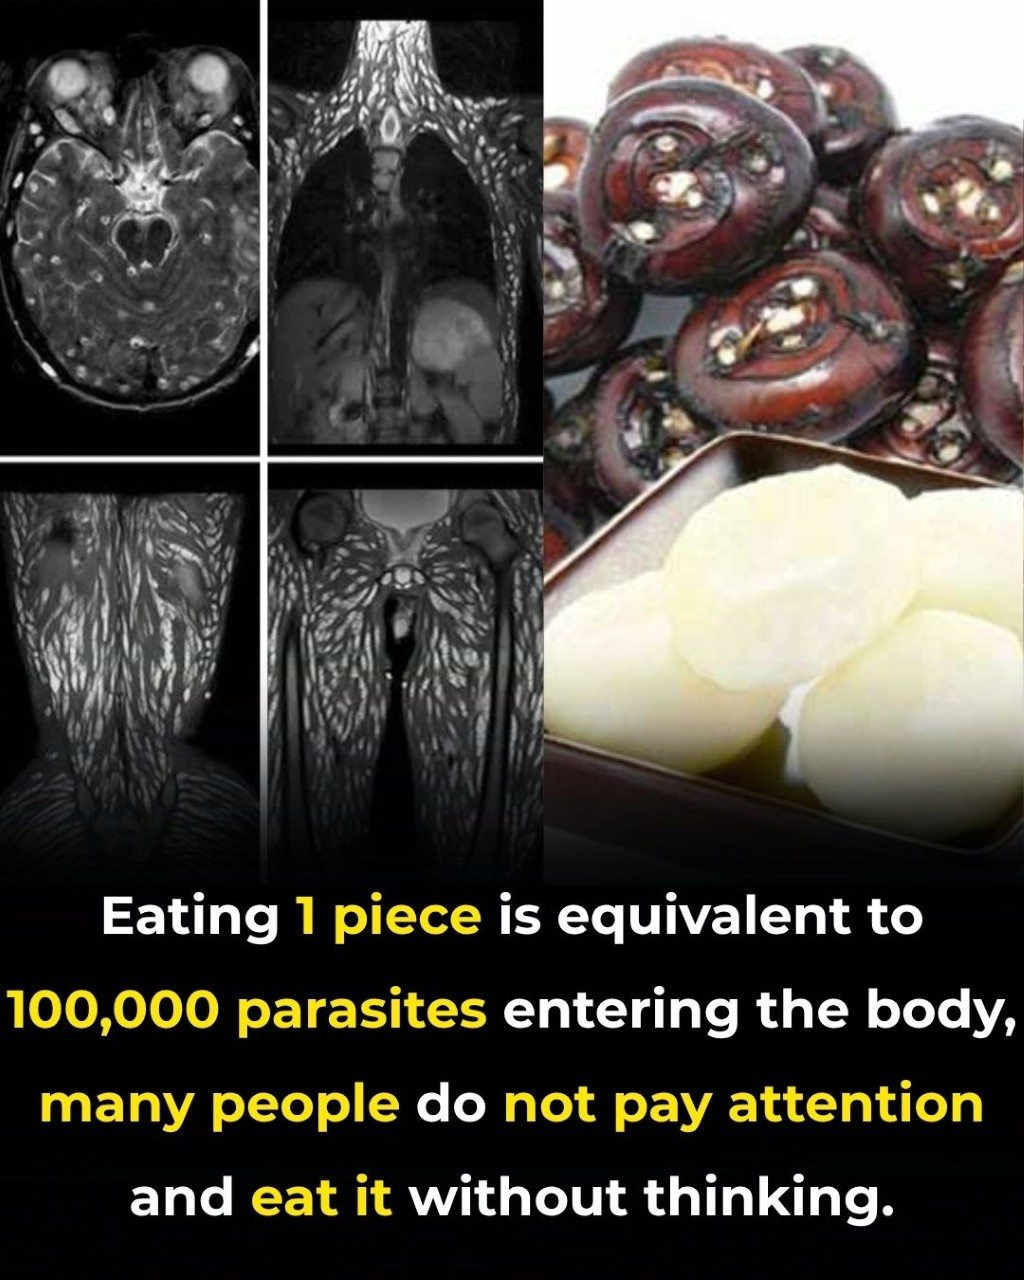
Some foods look harmless, taste familiar, and are even common in kitchens around the world. Yet few people realize that just one bite of certain foods—when prepared incorrectly—can already cause harm. One of the most overlooked examples is raw or undercooked kidney beans. They’re nutritious when cooked properly, but dangerous when they’re not—and millions of people have no idea.

This isn’t fearmongering. It’s science.


The Hidden Danger Inside Raw Kidney Beans

Kidney beans contain a naturally occurring toxin called phytohaemagglutinin, a type of lectin. Lectins are proteins found in many plants, but this particular one is especially potent.

Here’s the shocking part:

  • Eating as few as 4–5 raw or undercooked kidney beans can cause severe poisoning

  • Symptoms can begin within 1 to 3 hours

  • Even a small bite can trigger intense reactions in sensitive individuals

Despite this, kidney beans are widely used in salads, slow cookers, soups, and vegetarian dishes—sometimes without being cooked correctly.


What Happens When You Eat Them Raw?

When phytohaemagglutinin enters the body, it interferes with digestion and damages the lining of the gut. The result is sudden and dramatic.

Common symptoms include:

  • Severe nausea

  • Violent vomiting

  • Abdominal cramps

  • Diarrhea

  • Dehydration

  • Weakness and dizziness

In some cases, people require hospital treatment, especially children, older adults, or those with weaker immune systems.

The frightening thing? Many victims think they’ve caught a “stomach bug,” never realizing food poisoning was the real cause.


Why So Many People Still Eat Them

Despite the risks, raw or undercooked kidney bean poisoning continues to happen worldwide. Why?

1. Slow Cookers Give a False Sense of Safety

Slow cookers often don’t reach high enough temperatures to destroy the toxin. Cooking kidney beans at low heat for hours can actually increase toxicity instead of reducing it.

2. Raw Food Trends

Some health trends promote eating foods “as natural as possible.” While this may work for fruits and vegetables, raw legumes are a completely different story.

3. Lack of Public Awareness

Unlike poisonous mushrooms or spoiled meat, kidney beans don’t look dangerous. There’s no smell, no bitter taste, and no warning sign.

4. Canned Beans Confusion

Canned kidney beans are safe because they’re fully cooked during processing. But people often assume dried beans can be handled the same way—which is a dangerous mistake.


“But People Have Eaten Beans for Centuries…”

Yes—but proper cooking has always been essential.

Traditional methods involved soaking beans overnight and boiling them vigorously. Problems began when modern shortcuts—like slow cookers or partial cooking—became popular.

This isn’t about beans being “bad.” It’s about how they’re prepared.


The Right Way to Make Kidney Beans Safe

To completely destroy phytohaemagglutinin, kidney beans must be cooked correctly.

Safe preparation steps:

  1. Soak dried kidney beans in water for at least 5–8 hours

  2. Drain and rinse them thoroughly

  3. Boil vigorously for at least 10 minutes

  4. Only after boiling can they be simmered or added to recipes

⚠️ Never eat:

  • Raw kidney beans

  • Soaked but uncooked beans

  • Beans cooked only in a slow cooker without prior boiling


Who Is Most at Risk?

Some people are more vulnerable to even small amounts of the toxin:

  • Children

  • Elderly individuals

  • Pregnant women

  • People with digestive disorders

  • Those with weakened immune systems

For them, one bite really can be enough to cause serious distress.


Other Foods With “One-Bite” Risks

Kidney beans aren’t alone. Other foods that can be harmful if eaten raw or improperly prepared include:

  • Raw cassava (cyanide compounds)

  • Green potatoes (solanine)

  • Bitter apricot kernels (cyanide)

  • Raw elderberries

  • Undercooked chicken or eggs

These foods are safe only when handled correctly—yet many people still take them lightly.


The Takeaway

The most dangerous foods aren’t always exotic or rare. Sometimes, they’re sitting quietly in your pantry.

Raw or undercooked kidney beans prove a powerful lesson:
“Natural” does not always mean “safe.”
Familiar does not mean harmless.

Just one bite can be enough to make you violently ill—but with proper knowledge and preparation, the risk is completely avoidable.

Doctors reveal that avocado consumption causes

Avocados have earned a reputation as a “superfood,” but doctors and nutrition experts say their benefits go far beyond trendy toast toppings. Regular avocado consumption causes a series of positive changes throughout the body—from the heart and brain to the skin, digestion, and even weight management. Rich, creamy, and packed with nutrients, avocados are one of the few foods that truly deserve their healthy halo.

1. Improved Heart Health

Doctors consistently highlight avocados as a heart-friendly food. They are rich in monounsaturated fats, the same type of healthy fat found in olive oil. These fats help lower “bad” LDL cholesterol while supporting “good” HDL cholesterol. Studies have shown that people who eat avocados regularly tend to have better cholesterol profiles and a reduced risk of heart disease.

Avocados are also an excellent source of potassium—containing even more than bananas. Potassium helps regulate blood pressure by balancing sodium levels in the body, which reduces strain on blood vessels and the heart.

2. Better Brain Function and Mood

Avocado consumption causes noticeable benefits for brain health. The healthy fats in avocados support blood flow to the brain, improving concentration and mental clarity. Doctors explain that the brain is made largely of fat, so consuming quality fats is essential for memory, focus, and long-term cognitive health.

Avocados also contain folate and vitamin B6, nutrients linked to the production of neurotransmitters like serotonin and dopamine. These “feel-good” chemicals play a role in mood regulation, which may explain why diets rich in avocados are associated with lower rates of depression and anxiety.

3. Healthier Skin, Hair, and Nails

Dermatologists often recommend avocados for natural beauty from the inside out. Avocado consumption causes improvements in skin elasticity, hydration, and overall glow due to its high vitamin E and vitamin C content. Vitamin E protects skin cells from oxidative damage, while vitamin C supports collagen production.

The healthy fats in avocados also help keep hair shiny and strong and reduce brittle nails. That’s why avocado oil is commonly used in skincare and haircare products—but eating the fruit delivers those benefits internally.

4. Enhanced Digestion and Gut Health

Doctors reveal that avocados are surprisingly high in fiber, providing around 10 grams per fruit. Fiber supports healthy digestion, prevents constipation, and feeds beneficial gut bacteria. A healthy gut microbiome is linked to stronger immunity, improved mood, and better nutrient absorption.

Avocado consumption causes a gentler digestive process compared to many processed foods, making it suitable even for people with sensitive stomachs. The combination of soluble and insoluble fiber helps keep digestion smooth and regular.

5. Support for Weight Management

Despite being calorie-dense, avocados can actually support healthy weight control. Doctors explain that the fats and fiber in avocados increase satiety, helping you feel full longer and reducing the urge to snack between meals.

Research shows that people who include avocados in their meals tend to consume fewer calories overall during the day. Instead of causing weight gain, avocado consumption often leads to better portion control and more balanced eating habits.

6. Reduced Inflammation in the Body

Chronic inflammation is linked to many modern diseases, including arthritis, diabetes, and heart disease. Avocados contain powerful antioxidants such as lutein, zeaxanthin, and polyphenols that help reduce inflammation at the cellular level.

Doctors note that avocado consumption causes a calming effect on inflammatory pathways in the body, which may help ease joint stiffness, muscle soreness, and general aches—especially when combined with an overall healthy diet.

7. Better Blood Sugar Control

Unlike many fruits, avocados are very low in sugar. This makes them an excellent choice for people managing diabetes or insulin resistance. The healthy fats slow digestion and prevent rapid blood sugar spikes after meals.

Doctors often recommend pairing avocados with carbohydrates—such as rice, bread, or fruit—to reduce the glycemic impact of those foods and keep blood sugar levels stable.

8. Improved Nutrient Absorption

One lesser-known benefit doctors reveal is that avocado consumption causes better absorption of nutrients from other foods. Vitamins A, D, E, and K are fat-soluble, meaning they require fat to be properly absorbed.

Adding avocado to salads or vegetable-based meals significantly increases the body’s ability to absorb antioxidants and vitamins from those foods, maximizing their nutritional value.

The Bottom Line

Doctors agree that avocado consumption causes a wide range of health benefits when eaten in moderation. From protecting the heart and brain to improving digestion, skin, and weight control, avocados are one of nature’s most complete foods.

While no single food is a cure-all, adding avocados to a balanced diet can support long-term health in a delicious and satisfying way. Whether sliced, mashed, blended, or drizzled as oil, avocados prove that healthy eating doesn’t have to be boring—it can be creamy, nourishing, and deeply beneficial. 🥑

Don’t Throw Them Away Anymore: How to Use Eggshells for Your Health and Your Plants

Don’t Throw Them Away Anymore: How to Use Eggshells for Your Health and Your Plants

Eggs are a staple in kitchens worldwide, but how often do you stop to think about what happens to the eggshells? Most people discard them without a second thought, but eggshells are nutritional powerhouses and natural garden boosters. Before you toss them in the trash, read on to discover how you can use eggshells for your health and your plants.

Eggshells: A Nutritional Goldmine

Eggshells are made primarily of calcium carbonate, the same compound found in many over-the-counter calcium supplements. Calcium is essential for strong bones, teeth, and overall body health. A single eggshell can contain about 2 grams of calcium, which is nearly double the amount in a typical calcium tablet. Beyond calcium, eggshells contain small amounts of magnesium, phosphorus, and other trace minerals vital for your body.

How to Prepare Eggshells for Consumption

If you want to benefit from eggshells for your health, you need to prepare them properly to ensure safety and digestibility:

  1. Clean Thoroughly – After cracking an egg, rinse the shell to remove any residual egg white or yolk. Avoid using soap, as it may leave residues.

  2. Boil for Safety – Boil the cleaned shells in water for 5–10 minutes to kill any bacteria, such as Salmonella, which can sometimes be present on eggshells.

  3. Dry Completely – Let the shells air-dry or bake them at 200°F (90°C) for 10–15 minutes to ensure they are completely dry.

  4. Grind to Powder – Crush the shells into a fine powder using a coffee grinder, mortar and pestle, or food processor. The finer the powder, the easier it is to digest.

Once powdered, eggshells can be added to smoothies, soups, or yogurt. A teaspoon of eggshell powder provides a significant calcium boost. Some people even mix it with a little lemon juice to make a natural calcium supplement, as the citric acid can help increase calcium absorption.

Benefits of Eggshells for Your Health

  1. Bone Health – Regular intake of calcium from eggshells can help prevent osteoporosis and support overall bone density.

  2. Dental Health – Calcium is crucial for maintaining strong teeth. Eggshell powder can contribute to better dental health when used regularly.

  3. Joint Support – Eggshells contain collagen-rich membranes that surround the shell. These membranes have proteins and nutrients that may help improve joint health and reduce inflammation.

  4. Digestive Health – Some studies suggest that eggshell powder can act as a mild supplement for maintaining a healthy digestive tract by balancing minerals in the gut.

Eggshells as a Garden Miracle

Eggshells are not just for your body—they can transform your garden. Their natural composition makes them ideal for enriching soil and protecting plants.

  1. Soil Fertilizer – Crushed eggshells add calcium and trace minerals to your soil. Calcium is essential for plant cell structure and growth. Simply crush eggshells and sprinkle them around your plants or mix them into the soil. Tomatoes, peppers, and eggplants particularly benefit from extra calcium.

  2. Pest Deterrent – Crushed eggshells can act as a natural barrier against soft-bodied pests like slugs and snails. The sharp edges deter them from crawling over, protecting your precious seedlings.

  3. Seed Starters – Eggshell halves can be used as mini planters for seedlings. Fill them with soil, plant your seeds, and once the seedlings are ready, plant the entire eggshell in the ground. The shell will decompose and provide nutrients to the plant.

  4. Compost Booster – Eggshells are a great addition to compost piles. They add valuable minerals while balancing acidity, helping create nutrient-rich compost for your garden.

How to Use Eggshells Efficiently in Your Garden

  • Crushing Tip: For fertilizer, grind eggshells into small pieces or powder so they decompose faster in the soil.

  • Application: Sprinkle powdered eggshells around the base of plants or mix into the potting soil.

  • Protection: Scatter larger, crushed pieces around vulnerable plants to create a pest barrier.

  • Seedling Support: Use eggshell halves as biodegradable seedling pots.

Other Creative Uses for Eggshells

Beyond health and gardening, eggshells can serve other practical purposes:

  • Household Cleaning – Crushed eggshells can act as a gentle abrasive for scrubbing pots, pans, or sinks.

  • Natural Dye – Boiling eggshells with vegetable scraps or tea can create natural dyes for crafts or Easter eggs.

  • Bird Feed Supplement – Crushed eggshells can be added to bird feeders to provide wild birds with essential calcium.

Final Thoughts

Before you toss your eggshells in the trash, consider the multiple ways they can benefit both your health and your garden. From boosting calcium intake and supporting bones and joints to enriching soil, deterring pests, and even starting seedlings, eggshells are far more valuable than most people realize. With a little preparation, these humble kitchen scraps can become a powerhouse of nutrition and sustainability.

By incorporating eggshells into your daily routine and garden care, you not only reduce waste but also gain a natural, cost-effective source of nutrients for yourself and your plants. Start collecting your eggshells today and unlock their hidden potential—you’ll be amazed at the difference these simple scraps can make!

Stuffed Pepper Soup

When you think of comfort food, nothing quite beats the warm, hearty flavors of a home-cooked soup. Among the many soup varieties, Stuffed Pepper Soup stands out for its ability to capture all the delicious essence of a classic stuffed bell pepper in a lighter, spoonable form. This soup is rich, filling, and perfect for family dinners or cozy nights at home. Best of all, it’s a flexible recipe that allows you to adapt the ingredients based on what you have on hand.

Ingredients

To make a generous pot of stuffed pepper soup, you’ll need the following ingredients:

  • 1 pound ground beef (or ground turkey for a leaner option)

  • 1 tablespoon olive oil

  • 1 medium onion, diced

  • 3 cloves garlic, minced

  • 4 large bell peppers (preferably a mix of red, yellow, and green), diced

  • 2 medium carrots, diced

  • 2 celery stalks, diced

  • 1 (28-ounce) can diced tomatoes

  • 1 (15-ounce) can tomato sauce

  • 4 cups beef or chicken broth

  • 1 teaspoon dried oregano

  • 1 teaspoon dried basil

  • 1/2 teaspoon smoked paprika (optional, for depth of flavor)

  • Salt and pepper, to taste

  • 1 cup uncooked long-grain rice (or substitute with quinoa or cauliflower rice for low-carb)

  • Fresh parsley, chopped, for garnish

Step 1: Browning the Meat

Begin by heating the olive oil in a large pot or Dutch oven over medium heat. Add the ground beef and cook until browned, breaking it apart with a spoon as it cooks. Browning the meat first ensures rich flavor in your soup. Once the meat is cooked, transfer it to a plate and set it aside, leaving any remaining fat in the pot.

Step 2: Sautéing the Vegetables

In the same pot, add the diced onion, garlic, carrots, and celery. Sauté for about 5 minutes until the vegetables begin to soften and the onions turn translucent. Next, add the diced bell peppers. The bell peppers are the star of this soup, so letting them cook just until tender will help release their sweetness and aroma.

Step 3: Building the Soup Base

Return the cooked meat to the pot. Add the diced tomatoes, tomato sauce, and broth, stirring everything together. Sprinkle in the oregano, basil, smoked paprika, and season with salt and pepper. Stir well to combine, ensuring all the flavors start mingling beautifully.

Step 4: Cooking the Rice

Add the uncooked rice to the soup. Stir it in thoroughly, then bring the mixture to a gentle boil. Reduce the heat to low, cover the pot, and let the soup simmer for about 20–25 minutes, or until the rice is tender. The rice will absorb some of the flavorful broth, thickening the soup slightly and creating a comforting, stew-like texture.

Tip: Stir occasionally to prevent the rice from sticking to the bottom of the pot.

Step 5: Adjusting Flavors

Once the rice is cooked, taste the soup and adjust seasoning as needed. Some recipes benefit from a small pinch of sugar if your tomatoes are too acidic, or a dash of hot sauce for a subtle kick. The key to a perfect stuffed pepper soup is balancing the sweetness of the bell peppers with the savory notes of the meat and tomatoes.

Step 6: Serving and Garnishing

Ladle the hot soup into bowls and garnish with freshly chopped parsley for a burst of color and freshness. For extra indulgence, sprinkle a little shredded cheddar or Parmesan cheese on top. Serve with crusty bread, garlic toast, or even a side salad to complete the meal.

Variations and Tips

  1. Vegetarian Version: Swap the meat for hearty beans, such as kidney beans or black beans, and use vegetable broth instead of meat broth. Adding mushrooms can enhance the umami flavor.

  2. Low-Carb Option: Skip the rice and add chopped cauliflower for a lighter, low-carb soup.

  3. Spicy Twist: Add a diced jalapeño or a pinch of crushed red pepper flakes while sautéing the vegetables.

  4. Meal Prep Friendly: This soup stores beautifully in the fridge for up to 4 days and freezes well for up to 3 months. Make a big batch on the weekend and enjoy easy lunches or dinners during the week.

Why Stuffed Pepper Soup Is a Winner

Stuffed Pepper Soup is more than just a soup; it’s an experience. It combines the familiar comfort of stuffed peppers with the convenience and warmth of a hearty soup. The balance of tender vegetables, savory meat, and rich tomato broth creates a satisfying meal that warms the soul. Plus, it’s incredibly versatile and forgiving—perfect for beginner cooks or anyone looking to impress without stress.

Whether you’re enjoying it on a chilly evening, serving it at a family gathering, or making a large batch for meal prep, stuffed pepper soup never disappoints. Its rich flavors, vibrant colors, and heartwarming aroma will fill your kitchen and your belly with satisfaction.

So grab your favorite pot, dice those colorful peppers, and get ready to enjoy a soup that tastes just like a classic stuffed pepper—but in every comforting, slurpable spoonful.

Ooey Gooey Coconut Cake

If you’re a fan of rich, indulgent desserts, the Ooey Gooey Coconut Cake will quickly become your new favorite. With its moist, buttery layers, sweet coconut filling, and a luscious glaze, this cake is a perfect treat for any occasion—from birthdays and family gatherings to a simple weekend indulgence. Unlike dry, crumbly cakes, the ooey-gooey texture of this dessert makes every bite melt in your mouth, while the coconut adds a tropical twist that is both comforting and exotic.

The magic of this cake lies in its layers. A soft, tender cake base forms the perfect foundation for a rich coconut filling that oozes with sweetness. A light glaze or frosting ties everything together, ensuring each bite is decadently satisfying. What’s more, this recipe is surprisingly simple, using ingredients you likely already have in your pantry, and can be baked in under an hour, making it both convenient and irresistible.

Ingredients

For the Cake:

  • 1 cup (2 sticks) unsalted butter, softened

  • 1 ½ cups granulated sugar

  • 4 large eggs

  • 2 teaspoons vanilla extract

  • 2 cups all-purpose flour

  • 2 teaspoons baking powder

  • ½ teaspoon salt

  • ¾ cup whole milk

For the Coconut Filling:

  • 1 can (14 oz) sweetened condensed milk

  • 1 ½ cups sweetened shredded coconut

  • 2 large eggs

  • 1 teaspoon vanilla extract

For the Glaze (Optional but Recommended):

  • 1 cup powdered sugar

  • 2–3 tablespoons milk

  • ½ teaspoon vanilla extract

Step-by-Step Instructions

1. Preheat and Prepare
Begin by preheating your oven to 350°F (175°C). Grease a 9×13-inch baking pan with butter or non-stick spray, and lightly dust it with flour. This step ensures that the cake comes out cleanly and prevents sticking. For added flavor, you can line the pan with parchment paper.

2. Make the Cake Batter
In a large mixing bowl, cream together the softened butter and sugar until light and fluffy. This usually takes about 3–4 minutes using a hand mixer or stand mixer. Add the eggs one at a time, beating well after each addition, then stir in the vanilla extract.

In a separate bowl, whisk together the flour, baking powder, and salt. Gradually add the dry ingredients to the wet mixture, alternating with the milk. Start and end with the flour mixture, mixing just until combined. Overmixing can make the cake dense, so a gentle hand is key.

3. Prepare the Coconut Filling
In another bowl, combine the sweetened condensed milk, shredded coconut, eggs, and vanilla extract. Mix until smooth and creamy. This filling is what gives the cake its signature ooey-gooey texture.

4. Layer and Bake
Pour half of the cake batter into the prepared pan, spreading it evenly. Gently spoon the coconut filling over the batter, leaving a small border around the edges. Top with the remaining cake batter, using a spatula to smooth it out.

Bake in the preheated oven for 45–50 minutes, or until the top is golden brown and a toothpick inserted into the cake comes out mostly clean (the coconut layer may still leave a few sticky crumbs, which is perfect).

5. Make the Glaze
While the cake is baking, prepare the optional glaze by mixing powdered sugar, milk, and vanilla in a small bowl until smooth. Adjust the milk to achieve a pourable consistency. The glaze adds an extra layer of sweetness and a glossy finish to the cake.

6. Cool and Serve
Allow the cake to cool in the pan for about 15–20 minutes before drizzling the glaze over the top. This ensures the glaze sets slightly but still soaks into the cake for maximum flavor. Slice into generous squares and serve warm or at room temperature.

Tips for the Perfect Ooey Gooey Coconut Cake

  1. Use Fresh Coconut: If possible, use freshly shredded coconut instead of dried for a more vibrant flavor and texture.

  2. Room Temperature Ingredients: Ensure butter, eggs, and milk are at room temperature for a smoother batter and more even baking.

  3. Avoid Overbaking: The “gooey” part comes from a slightly underbaked center, so keep an eye on the cake during the last 10 minutes.

  4. Customize: Add chopped nuts, chocolate chips, or a hint of almond extract to make your cake uniquely yours.

  5. Storage: Store leftover cake in an airtight container in the refrigerator for up to 4 days. Reheat briefly for a fresh-out-of-the-oven taste.

Why This Cake Is Special

The combination of moist cake, rich coconut filling, and optional glaze makes this dessert unforgettable. Unlike traditional coconut cakes that can sometimes be dry or overly sweet, this version strikes the perfect balance of textures and flavors. It’s the kind of cake that invites second, even third helpings. The ooey-gooey texture ensures that every bite is a little indulgence, while the coconut brings a light, tropical note that makes it stand out.

Whether you’re baking for a special occasion or simply craving a comforting dessert, this Ooey Gooey Coconut Cake is sure to impress. Its simplicity, combined with its rich, indulgent flavors, makes it a crowd-pleaser for both kids and adults alike. The best part? The recipe is straightforward enough that even novice bakers can achieve bakery-quality results with a little care and patience.

So preheat your oven, gather your ingredients, and get ready to experience the bliss of an ooey-gooey slice of coconut heaven. One bite, and you’ll understand why this cake is destined to become a favorite in your dessert repertoire.

Zero-Carb Authentic Turkish Pide Bread Pide Recipe Soft Chewy & Topped with Sesame Seeds

Zero-Carb Authentic Turkish Pide Bread (Pide) Recipe: Soft, Chewy & Topped with Sesame Seeds

Turkish cuisine is celebrated for its rich breads, and pide—a soft, chewy, oval-shaped bread often topped with sesame seeds—is a staple on tables across Turkey. Traditional pide is made with wheat flour, which is high in carbs, but this zero-carb version allows anyone following a ketogenic or low-carb diet to enjoy this beloved bread without compromise. Using almond flour, psyllium husk, and eggs, this recipe replicates the soft interior, slightly crisp exterior, and nutty sesame topping of classic Turkish pide.

Ingredients

For the Bread:

  • 2 cups almond flour (finely ground)

  • 3 tablespoons psyllium husk powder

  • 1 teaspoon baking powder

  • 1/2 teaspoon salt

  • 2 teaspoons olive oil

  • 1 cup hot water

  • 2 large eggs (1 for the dough, 1 for brushing)

For Topping:

  • 1 tablespoon sesame seeds (white or black)

  • Optional: 1 teaspoon nigella seeds for extra flavor


Step-by-Step Instructions

1. Prepare the Dry Ingredients

In a large mixing bowl, combine almond flour, psyllium husk powder, baking powder, and salt. Psyllium husk is essential here—it absorbs moisture and gives the dough elasticity, which mimics the chewy texture of traditional wheat-based bread. Mix thoroughly to ensure even distribution of the baking powder and psyllium husk.

2. Add Wet Ingredients

Create a small well in the center of your dry mixture. Add 1 egg and 2 teaspoons of olive oil. Gradually pour in 1 cup of hot water while stirring continuously. The water should be warm but not boiling; this helps the psyllium husk activate and form a pliable, dough-like consistency.

Stir until the mixture forms a sticky dough. If the dough seems too dry, add a tablespoon of water at a time until it reaches a slightly sticky but manageable consistency.

3. Shape the Pide

Place the dough on a sheet of parchment paper. Using wet hands (to prevent sticking), form an oval shape, roughly 10 inches long and 5 inches wide, resembling traditional Turkish pide. You can gently press the center to create a shallow indentation, which will allow the topping to sit nicely.

4. Preheat Oven and Prepare Topping

Preheat your oven to 375°F (190°C).

Beat the second egg lightly and brush it over the top of the dough. Sprinkle sesame seeds evenly across the surface. For a more authentic Turkish flavor, consider adding a few nigella seeds as well.

5. Bake the Bread

Place the parchment paper with the shaped dough onto a baking tray. Bake in the preheated oven for 35–40 minutes. The bread should rise slightly, develop a golden-brown color, and feel firm to the touch.

For extra crispiness on the top, you can turn on the oven’s broiler for the last 2–3 minutes of baking, but watch carefully to prevent burning.

6. Cooling

Once baked, remove the pide from the oven and allow it to cool on a wire rack for at least 10 minutes. This resting period helps the interior set and maintains the chewy texture.


Tips for Perfect Zero-Carb Pide

  1. Psyllium Husk is Key: This ingredient replicates the elasticity and structure of gluten in wheat flour. Too little, and the bread will crumble; too much, and it may become dense. Stick to the recommended 3 tablespoons.

  2. Hot Water Activation: The warm water is crucial for activating the psyllium. Cold water will make it harder to form a pliable dough.

  3. Shaping Variations: Traditional pide can be oval or round. Feel free to make small individual pides instead of one large loaf. Adjust baking time accordingly (smaller pides bake in 20–25 minutes).

  4. Toppings: Sesame seeds add a nutty flavor, but you can experiment with poppy seeds, dried herbs, or even a sprinkle of cheese for a modern twist.

  5. Storage: Zero-carb bread can dry out faster than wheat bread. Store it in an airtight container at room temperature for 2–3 days, or freeze for up to a month. Reheat in a warm oven for a few minutes before serving to restore softness.


Serving Suggestions

  • Serve warm with kebabs, grilled meats, or stews.

  • Split open and fill with cheese, spinach, or eggs for a satisfying breakfast.

  • Use as a low-carb substitute for sandwiches or wraps.

The soft, chewy texture of this zero-carb pide is surprisingly close to the original, and the sesame-topped exterior adds a beautiful aroma and flavor. For anyone craving Turkish bread while maintaining a low-carb lifestyle, this recipe is a game-changer.


Why This Pide is Special

  • Authentic Texture: The combination of almond flour and psyllium husk gives a soft interior with a slight chewiness, closely mimicking wheat-based bread.

  • Zero Carbs: Perfect for keto, diabetic, or low-carb diets.

  • Versatile: Works for meals or snacks, and pairs beautifully with traditional Turkish dishes.

  • Simple Ingredients: No exotic flours or hard-to-find ingredients—just pantry staples.

In conclusion, this zero-carb Turkish pide recipe allows you to enjoy a soft, chewy, sesame-topped bread without compromising your diet. With just a few simple ingredients and easy steps, you can bring a taste of Turkey into your kitchen any day of the week. The key is patience with shaping, careful baking, and the magic of psyllium husk—once you get it right, you’ll have a loaf that rivals anything from a Turkish bakery, all while staying completely carb-free.

Doctors reveal that eating apples causes

Apples have long been associated with good health, but modern doctors and nutrition experts are now revealing just how powerful this simple fruit can be when eaten regularly. Often overlooked in favor of exotic “superfoods,” apples are affordable, widely available, and packed with nutrients that can quietly transform your body over time. From digestion and heart health to weight control and brain function, eating apples causes a chain reaction of positive effects that many people never realize.

1. Improved Digestive Health

Doctors frequently point out that one of the first noticeable changes from eating apples regularly happens in the digestive system. Apples are rich in dietary fiber, especially a soluble fiber called pectin. Pectin feeds beneficial gut bacteria, helping to balance the microbiome. When your gut bacteria are healthy, digestion becomes smoother, bloating is reduced, and bowel movements become more regular.

Apples can also help protect the stomach lining. Many doctors recommend apples as a gentle food for people who experience mild digestive discomfort, because the fiber helps regulate how quickly food moves through the intestines.

2. Lower Cholesterol Levels

One of the most well-documented effects doctors highlight is apples’ ability to help lower bad (LDL) cholesterol. The pectin in apples binds to cholesterol in the digestive tract and helps remove it from the body before it enters the bloodstream. Over time, this can reduce cholesterol buildup in the arteries, supporting better cardiovascular health.

Doctors often say that adding one apple a day to a balanced diet may support heart health in a simple, natural way—especially when combined with reduced intake of processed foods.

3. Better Blood Sugar Control

Despite their natural sweetness, apples have a low glycemic index, meaning they do not cause sharp spikes in blood sugar. Doctors explain that the fiber slows down sugar absorption, helping keep blood glucose levels more stable.

For people concerned about insulin resistance or type 2 diabetes, apples can be a smart fruit choice when eaten whole (not juiced). Many doctors emphasize that chewing the apple and keeping the skin on is key to getting this benefit.

4. Easier Weight Management

Doctors reveal that eating apples can support weight control in multiple ways. Apples are low in calories, high in water, and rich in fiber—all factors that increase feelings of fullness. Eating an apple before a meal may help reduce overall calorie intake by curbing overeating.

In addition, the natural sweetness of apples can help satisfy sugar cravings, making it easier to avoid processed snacks and desserts that contribute to weight gain.

5. Stronger Immune System

Apples contain vitamin C, antioxidants, and plant compounds called polyphenols. Doctors explain that these substances help protect cells from oxidative stress and support immune defenses. While apples are not a cure for illness, regularly eating them may help the body respond better to infections and inflammation.

Some doctors even recommend apples during seasonal changes, when immunity is often challenged by stress, poor sleep, or dietary changes.

6. Healthier Brain and Memory Support

Emerging research has caught doctors’ attention regarding apples and brain health. Apples contain antioxidants that may help protect brain cells from damage associated with aging. Certain compounds in apples are being studied for their potential role in supporting memory and reducing the risk of cognitive decline.

Doctors stress that while apples alone are not a magic solution, they can be part of a brain-supportive diet that includes fruits, vegetables, healthy fats, and adequate hydration.

7. Cleaner Teeth and Fresher Breath

Although apples should not replace brushing, dentists and doctors often refer to apples as a “natural toothbrush.” Chewing an apple stimulates saliva production, which helps wash away bacteria and food particles. The mild acidity may also help reduce odor-causing bacteria in the mouth.

That said, doctors still recommend rinsing your mouth with water after eating apples to protect tooth enamel.

8. Reduced Risk of Chronic Disease

Doctors increasingly emphasize that apples may help reduce the risk of chronic diseases such as heart disease and certain inflammatory conditions. The combination of fiber, antioxidants, and plant compounds works together to reduce inflammation in the body—a key factor in many long-term illnesses.

Eating apples regularly is often associated with overall healthier dietary patterns, which further amplifies these protective effects.

How to Get the Most Benefit

Doctors agree on a few important tips:

  • Eat apples whole, not juiced

  • Keep the skin on, where most nutrients are found

  • Wash thoroughly to remove residues

  • Pair apples with protein or healthy fats for balanced nutrition

Final Thoughts

Doctors reveal that eating apples causes more than just satisfaction from a crunchy snack—it sets off a series of beneficial changes throughout the body. From digestion and heart health to blood sugar balance and immune support, apples prove that simple foods can have powerful effects when consumed consistently.

While no single food guarantees perfect health, adding an apple a day to a balanced lifestyle may be one of the easiest and most affordable steps you can take toward better overall well-being. As many doctors like to remind us, sometimes the most powerful health solutions really are the simplest. 🍎

These Common Foods May Increase Dementia Risk According to Experts

Emerging research shows that what we eat can influence not only our physical health but also our brain health. Dementia — a general term for cognitive decline that affects memory, thinking, and daily functioning — has complex causes, including age, genetics, lifestyle, and importantly, diet. While no single food causes dementia, a growing body of scientific evidence suggests that certain everyday foods may increase the risk of developing the condition over time. Here’s what experts are warning about — and what to consider instead.

1. Ultra-Processed Foods

One of the most consistent findings from recent large studies is the link between ultra-processed foods and increased dementia risk.

Ultra-processed foods are products that have been industrially manufactured with many additives, preservatives, added sugars, and unhealthy fats. Examples include soft drinks, chips, packaged snacks, sugary breakfast cereals, flavored yogurts, ready meals, and processed sauces.

What the research says:
A major study published in Neurology found that for every 10 % increase in daily intake of ultra-processed foods, individuals had a 25 % higher risk of developing dementia — even after accounting for age, gender, family history, and heart health. On the flip side, replacing some ultra-processed foods with fresh, minimally processed foods like fruits, vegetables, legumes, milk, or lean meat was associated with a lower risk of dementia.

Why might this happen? Ultra-processed foods are typically high in added sugar, saturated fat, and salt, and low in beneficial nutrients such as fiber and antioxidants. These dietary patterns can contribute to chronic inflammation, obesity, insulin resistance, and vascular disease — all factors linked to cognitive decline.

2. Processed Red Meats

Processed red meats like bacon, sausages, hot dogs, and salami are not just a cardiovascular risk — they may also affect brain health.

A recent analysis of multiple long-term health studies found that people who regularly consumed higher amounts of processed red meat had a significantly increased risk of dementia. In one large cohort study, eating the most processed red meat was associated with about a 13 % higher risk of developing dementia compared to those who ate the least.

What’s driving the risk?
Processed meats are high in saturated fat, sodium, and preservatives like nitrates and nitrites — compounds that can promote inflammation and oxidative stress. They can also contribute to vascular damage, reducing blood flow to the brain over time.

Experts suggest that replacing even just one serving per day of processed red meat with fish, nuts, legumes, or other healthier proteins may lower dementia risk.

3. Sugary Beverages and Foods High in Added Sugars

High sugar consumption has long been linked to obesity and metabolic disorders — and recent research suggests it may also contribute to cognitive decline.

Sugary beverages — especially sodas and fruit drinks with added sugar — appear to be particularly harmful. One prospective study found that higher intake of free sugars from sugary drinks was associated with a greater risk of dementia later in life.

How sugar may affect the brain:

Inflammation and insulin resistance: Large swings in blood sugar can trigger chronic inflammation and insulin resistance, both of which are linked to cognitive impairment.

Vascular damage: High sugar levels may harm blood vessels, including those supplying the brain.

Oxidative stress: Excess sugar can increase oxidative damage to brain cells.

Reducing sugary drinks and replacing them with water, herbal teas, or beverages without added sugar can be a simple step toward better brain health.

4. Refined Carbohydrates and Highly Refined Grains

Refined carbohydrates — such as white bread, pastries, cakes, and many breakfast cereals — are quickly broken down into sugar in the body. Over time, this can contribute to the same metabolic issues associated with sugary foods.

These foods often lack fiber, vitamins, and minerals, making them “empty calories” that can worsen inflammation and insulin resistance — known contributors to cognitive decline.

Choosing whole grains like oats, brown rice, quinoa, and whole-grain breads over refined options can help stabilize blood sugar and support long-term brain and heart health.

5. Foods High in Saturated and Trans Fats

While the evidence is still evolving, many experts point to diets high in saturated fats (found in fatty cuts of meat, butter, and some baked goods) and industrial trans fats (often in fried and packaged foods) as factors that may worsen cognitive health over time.

These unhealthy fats are linked to elevated cholesterol and cardiovascular disease — and what’s bad for the heart is often bad for the brain. Reduced blood flow and plaque buildup in arteries can impair oxygen and nutrient delivery to brain cells, accelerating cognitive decline.

What This Means for You

Importantly, most of the evidence so far shows association, not direct cause and effect: foods don’t magically induce dementia overnight, but long-term dietary patterns can influence multiple risk factors for brain health.

Practical tips to support brain health include:

Limit ultra-processed foods: Choose fresh, whole foods whenever possible.

Cut back on processed meats: Replace with fish, beans, nuts, or lean poultry.

Reduce sugary drinks and snacks: Opt for water, unsweetened drinks, and whole fruits.

Choose whole grains over refined carbs: Whole grains offer fiber and nutrients that support brain and heart health.

Favor healthy fats: Foods rich in omega-3s (like oily fish, nuts, and seeds) may support cognition.

Diet is just one piece of the puzzle — physical activity, good sleep, social engagement, and managing cardiovascular risk also play crucial roles in protecting cognitive function.

Final Thought

Research continues to illuminate how everyday foods influence brain health over decades. While occasional indulgence won’t single-handedly cause dementia, habitual consumption of ultra-processed foods, high-sugar products, and processed meats may tilt the balance toward higher risk. Making informed food choices today could be one of the most powerful steps you take to preserve your brain health for the future.

Patty Melts with Secret Sauce

Few comfort foods strike the perfect balance between indulgent and nostalgic quite like a patty melt. Part burger, part grilled cheese, and entirely satisfying, this diner favorite has earned its place among the great American classics. What truly sets a memorable patty melt apart, though, is not just the juicy beef or the perfectly caramelized onions—it’s the sauce. That creamy, tangy “secret sauce” ties everything together and transforms a simple sandwich into something unforgettable.

This recipe walks you through crafting the ultimate patty melt at home, complete with deeply caramelized onions, buttery grilled bread, melty cheese, and a secret sauce that delivers bold flavor in every bite.

What Is a Patty Melt?

A patty melt is essentially a hybrid between a hamburger and a grilled cheese sandwich. Instead of a bun, it uses sliced bread—traditionally rye—grilled until golden and crisp. Inside, you’ll find a seasoned beef patty, melted cheese (often Swiss or American), and sweet caramelized onions. It’s rich, savory, and deeply comforting.

Unlike fast-food burgers, patty melts are meant to be slow-cooked and thoughtfully assembled, which is why they’re so beloved in diners.

Ingredients You’ll Need

For the Patty Melts

  • 1 pound ground beef (80/20 for best flavor)

  • Salt and freshly ground black pepper

  • 1 large onion, thinly sliced

  • 1 tablespoon oil or butter (for onions)

  • 8 slices rye bread (or sourdough if preferred)

  • 4 tablespoons butter, softened

  • 4 slices Swiss cheese

  • 4 slices American cheese

For the Secret Sauce

  • ½ cup mayonnaise

  • 2 tablespoons ketchup

  • 1 tablespoon yellow mustard

  • 1 tablespoon sweet pickle relish

  • ½ teaspoon garlic powder

  • ½ teaspoon onion powder

  • Optional: a dash of hot sauce or smoked paprika

Step 1: Caramelize the Onions

Great patty melts begin with patience. Heat oil or butter in a skillet over medium-low heat. Add the sliced onions and a pinch of salt. Cook slowly, stirring occasionally, for 25–30 minutes until the onions are soft, golden-brown, and sweet. Don’t rush this step—caramelized onions are essential to the flavor.

Once done, remove them from the pan and set aside.

Step 2: Make the Secret Sauce

In a small bowl, whisk together mayonnaise, ketchup, mustard, pickle relish, garlic powder, and onion powder. Taste and adjust as needed. This sauce should be creamy, tangy, slightly sweet, and deeply savory. Cover and refrigerate while you prepare the rest—it tastes even better once the flavors meld.

Step 3: Shape and Cook the Patties

Divide the ground beef into four equal portions and gently shape them into thin, oval patties roughly the size of your bread slices. Season both sides generously with salt and pepper.

Heat a skillet over medium-high heat and cook the patties for about 3–4 minutes per side, until browned and cooked through. Remove from the pan and set aside.

Step 4: Assemble the Patty Melts

Butter one side of each slice of bread. Place four slices butter-side down on a clean surface. Spread a generous layer of secret sauce on the unbuttered side of each slice.

Layer each sandwich as follows:

  • Swiss cheese

  • Beef patty

  • Caramelized onions

  • American cheese

  • Top with another slice of bread, butter-side up

Step 5: Grill to Golden Perfection

Heat a clean skillet or griddle over medium heat. Place the assembled sandwiches onto the skillet and cook slowly, pressing gently with a spatula. Grill for about 3–4 minutes per side, until the bread is deeply golden and the cheese is fully melted.

If the bread browns too quickly, lower the heat—slow cooking ensures everything warms evenly.

Serving Suggestions

Serve your patty melts hot, sliced diagonally for that classic diner look. They pair beautifully with crispy fries, onion rings, or a simple dill pickle on the side. For extra indulgence, offer a little extra secret sauce for dipping.

Tips for the Best Patty Melts

  • Bread matters: Rye is traditional, but sourdough or Texas toast also work well.

  • Don’t overwork the beef: Gentle handling keeps patties juicy.

  • Low and slow onions: This step cannot be rushed.

  • Cheese layering: Using two types of cheese adds depth and meltiness.

Final Thoughts

Patty melts with secret sauce are proof that simple ingredients, when treated with care, can deliver extraordinary results. This sandwich is rich, savory, and deeply satisfying—perfect for a weekend dinner, casual gathering, or anytime you’re craving classic comfort food.

Just half a cup in the morning and goodbye to bone pain, nerves, cartilage issues, depression, stress, insomnia

Just Half a Cup in the Morning — Say Goodbye to Bone Pain, Nerve Issues, Cartilage Problems, Depression, Stress, and Insomnia

What if one simple morning habit could help ease bone pain, calm your nerves, support cartilage health, lift your mood, reduce stress, and even improve your sleep? While no single drink is a magic cure, many people are discovering that starting the day with half a cup of a nutrient-rich, anti-inflammatory beverage can make a noticeable difference in how they feel—both physically and mentally.

The secret lies not in expensive supplements or harsh medications, but in natural ingredients that work with your body, not against it.

Let’s explore what this powerful morning drink is, why it works, and how it may support multiple aspects of your health.


The Morning Drink Your Body Craves

This simple blend is often made from warm milk or a plant-based alternative combined with turmeric, ginger, and a pinch of black pepper. Some people add cinnamon or honey for taste and additional benefits.

Just half a cup in the morning, taken consistently, may help your body reset after hours of rest and repair during sleep.

Why mornings? Because this is when your digestive system is ready to absorb nutrients most efficiently—and when inflammation levels are often at their highest.


How It Helps Relieve Bone Pain and Joint Discomfort

Bone pain and stiffness are often linked to chronic inflammation, mineral loss, and poor circulation.

  • Turmeric contains curcumin, a compound known for its powerful anti-inflammatory properties

  • Ginger improves circulation and reduces joint stiffness

  • Milk or fortified plant milk provides calcium, vitamin D, and magnesium—key nutrients for bone strength

Together, these ingredients may help reduce morning stiffness, support bone density, and ease everyday aches, especially when combined with gentle movement and a balanced diet.


Support for Nerves and Cartilage Health

Nerve discomfort and cartilage wear are common as we age or experience nutritional deficiencies.

This drink supports nerve health by:

  • Reducing oxidative stress

  • Supporting healthy blood flow

  • Providing essential minerals that nerves rely on to function properly

Cartilage, which cushions your joints, depends heavily on hydration and anti-inflammatory nutrients. Curcumin and ginger may help slow cartilage breakdown and support joint flexibility over time.


A Natural Boost for Mood and Mental Well-Being

Depression, stress, and low mood are often connected to inflammation, blood sugar imbalance, and poor sleep.

This morning drink may help by:

  • Supporting serotonin and dopamine activity

  • Stabilizing morning cortisol (the stress hormone)

  • Providing a calming ritual that signals safety and balance to the nervous system

Warm beverages in the morning also activate the parasympathetic nervous system, helping your body shift out of “fight or flight” mode.

Many people report feeling calmer, more focused, and emotionally steady after making this a daily habit.


Why It Helps Reduce Stress and Anxiety

Stress isn’t just mental—it’s deeply physical.

Turmeric and ginger both act as adaptogens, helping the body respond better to stress rather than overreacting to it. Warm milk contains tryptophan, an amino acid that supports relaxation and emotional balance.

Drinking this in the morning may help:

  • Lower tension throughout the day

  • Reduce nervous restlessness

  • Improve resilience to emotional stressors


Better Sleep Starts in the Morning

Insomnia often begins with poor daytime habits.

This drink supports sleep indirectly by:

  • Reducing inflammation that interferes with deep sleep

  • Supporting balanced blood sugar

  • Calming the nervous system early in the day

People who drink it consistently often notice fewer nighttime awakenings, deeper rest, and improved sleep quality within a few weeks.


How to Prepare It

Basic Recipe (½ cup):

  • ½ cup warm milk or plant-based milk

  • ¼ teaspoon turmeric powder

  • A pinch of black pepper (essential for absorption)

  • ¼ teaspoon grated ginger or ginger powder

  • Optional: cinnamon or raw honey

Warm gently—do not boil. Drink slowly in the morning, preferably on an empty stomach.


Important Reminder

This drink is not a replacement for medical treatment, but it can be a powerful addition to a healthy lifestyle. Consistency is key—benefits are usually noticed after 2–4 weeks of daily use.

If you have gallbladder issues, are pregnant, or take medications, consult a healthcare professional before adding turmeric regularly.


Final Thoughts

Sometimes, healing doesn’t begin with drastic changes—but with small, intentional habits. Just half a cup each morning may help your body feel stronger, calmer, and more balanced from the inside out.

Your bones, nerves, joints, mind, and sleep may all thank you.